6 • 8-Keyer Module Installation
signals to and from the module, as well as the other modules in the
same row.
7.
Remove the
Retaining Bolts
located at each corner of the Keyer
module and keep them in a safe place. A ¼ inch hex driver or wrench
is required.
8.
Remove the Keyer module plate from the control panel.
9.
Slide the 8-Keyer module into the module opening.
10.
Install the
Retaining Bolts
located at each corner of the module to a
maximum torque of
5 in-lbs
(
6 cm-kg
). A ¼ inch hex driver or
wrench is required.
11.
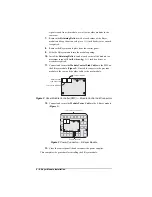
Connect and secure the
Module Control Link Cables
to the PMC on
). One cable connects to the previous
module in the row, and the other cable to the next module.
Figure 2 Panel Module Controller (PMC) — Module Control Link Connectors
12.
Connect and secure the
Module Power Cable
to the 8-Keyer module
Figure 3 Power Connector — 8-Keyer Module
13.
Close the control panel lid and reconnect the power supplies.
This completes the procedure for installing the 8-Keyer module.
To Next Module
Module Control
Link Connectors
To Previous Module
PMC Board
To Front of Control Panel
Power Connector


