background image

Page 2
Edition: September 01 2019

Effectivity: 125 MAX DD2 evo

NOTES

BRP-Rotax

Operators Manual

Summary of Contents for 125 MAX DD2 evo

Page 1: ...e 125 MAX DD2 evo Part no 297733 Edition 10 2019 BRP Rotax GmbH Co KG Rotaxstrasse 1 4623 Gunskirchen Austria T 43 7246 601 0 F 43 7246 6370 www rotax com www rotax kart com Installation instructions...

Page 2: ...General information BRP Rotax recommends products of the following companies...

Page 3: ...KG and based on the state of knowledge at the time of publication The manual has been drawn up to the best of our knowledge However we exclude any liability We reserve all rights including technical m...

Page 4: ...1 2019 Table of Content Chapter INTRO Chapter 1 Engine installation Chapter 2 Fuel system Chapter 3 Electric system Chapter 4 Cooling system Chapter 5 Exhaust system Chapter 6 Installation of the acce...

Page 5: ...Notes Page 2 Edition September 01 2019 Effectivity 125 MAX DD2 evo Edition Rev 0 NOTES BRP Rotax INSTALLATION MANUAL...

Page 6: ...slation or copies in whole or in part are authorized only after written permission by BRP Rotax GmbH Co KG BRP Rotax GmbH Co KG reserves the right at any time to discontinue or change specifications p...

Page 7: ...third party ATTENTION Identifies an instruction which if not followed may cause injury or endanger the life of the driver mechanic or third party ENVIRONMENTAL NOTE Environmental notes give you tips...

Page 8: ...f information from the respective chassis manufacturer Introduction Congratulations on choosing the ROTAX engine Type 125 MAX DD2 evo The ROTAX engine Type 125 MAX DD2 evo has been developed exclusive...

Page 9: ...box contains the pre assembled engine with the secure sticker which de scribes the run in procedure Take the engine out of the box Accessory box The accessory box contains all required parts for runn...

Page 10: ...BRP Rotax INSTALLATION MANUAL Effectivity 125 MAX DD2 evo INTRO Page 5 Edition September 01 2019...

Page 11: ...rk plug cap O 3 Battery box and wiring harness O 4 Battery charger O 5 Intake silencer O 6 Fuel pump with fuel hose O 7 Exhaust system O 8 Manuals and engine identity card O 9 Several small parts spar...

Page 12: ...UAL ENGINE INFORMATION Engine serial number The engine serial number is stamped on the clutch side housing half Figure 1 3 Serial number of the engine TYPICAL Effectivity 125 MAX DD2 evo INTRO Page 7...

Page 13: ...port it also provides you with information about the run in procedure and general tasks you must do at the initial run of the engine Figure 1 4 Information sticker Gear oil and fuel specifications See...

Page 14: ...INSTALLATION TOPICS IN THIS CHAPTER Installation of overload clutch and engine with rear axle 2 Engine installation with engine brackets 3 Direct attachment of the engine to chassis 5 Effectivity 125...

Page 15: ...igure 2 1 1 Overload clutch 2 Plain bearings Step Procedure 1 Slide the clamp ring pos 1 following figure the thrust washer pos 2 and the overload clutch 3 to the middle of the rear axle NOTE The rear...

Page 16: ...rear axle and the engine by measuring the distance between the front and the rear axle 2 After engine alignment tighten the 4 Allen screws M8 x 25 to fix the upper engine bracket to the engine with 28...

Page 17: ...BRP Rotax INSTALLATION MANUAL Figure 2 4 Tightening sequence 1 Allen screws 1 Page 4 Edition September 01 2019 Effectivity 125 MAX DD2 evo...

Page 18: ...crankcase is 16 mm to 20 mm 0 6 0 95 in NOTE Secure bolts with bolt adhesive e g LOCTITE 243 Step Procedure 1 Mount engine directly on the brackets NOTE Check for easy access to the pick up sensor pos...

Page 19: ...Notes Page 6 Edition September 01 2019 Effectivity 125 MAX DD2 evo Edition Rev 0 NOTES BRP Rotax INSTALLATION MANUAL...

Page 20: ...SYSTEM TOPICS IN THIS CHAPTER Installation and connection of the fuel pump 2 Installation of the Bowden cable for carburetor control 4 Installation and connection of the carburetor 6 Effectivity 125 M...

Page 21: ...Figure 3 1 Step Procedure 2 Install the retaining plate with fuel pump pos 1 on the gearbox cover by using 2 screws M6x30 pos 3 and washers pos 2 Figure 3 2 1 Fuel pump 2 Washer 3 Screws M6x30 Figure...

Page 22: ...Fuel filter ATTENTION Pay attention to the direction of the arrow on the fuel filter This must point towards the fuel pump ATTENTION Route the fuel line from the fuel tank to the fuel fil ter so that...

Page 23: ...recess of piston to wards intake silencer 6 Pass Bowden wire through compres sion spring pos 6 and through cover with rubber ring pos 7 8 of carburetor 7 Fit carb cover pos 7 on carburetor 8 Pass Bowd...

Page 24: ...the adjustment screw for Bowden cable on chassis so that the carburetor piston will remain in closed position when throttle pedal is not activated 12 Set and secure the stop screw for throttle pedal...

Page 25: ...lips screwdriver Step Procedure 1 Fit carburetor pos 1 into carburetor socket and secure with hose clamp pos 2 in vertical position 2 Connect the outlet hose of the fuel pump with fuel inlet pos 3 on...

Page 26: ...C SYSTEM TOPICS IN THIS CHAPTER Electric system overview 2 Installation ECU into the battery clamp assy 3 Installation of the battery clamp assy 5 Installation of the wiring harness 7 Effectivity 125...

Page 27: ...ctor pickup sensor 2 Connector starter 3 Connector battery 4 Connector RAVE only applicable 125 MAX evo 5 Connector ECU 6 Connector ignition coil 7 Connector shift contact 8 Tie wrap 250x4 8 9 Tie wra...

Page 28: ...It fits only in one position to the rubber pad Figure 4 3 1 Rubber pad Step Procedure 3 Insert the complete unit into the battery clamp assy NOTE If difficulties at insertion occur the inside of the...

Page 29: ...BRP Rotax INSTALLATION MANUAL Figure 4 4 1 Rubber pad 2 Connection cable 3 ECU connector 3 Page 4 Edition September 01 2019 Effectivity 125 MAX DD2 evo...

Page 30: ...ps pos 2 3 are designed for chassis tubes of 30 32 mm 1 18 1 26 in diameter ATTENTION Risk of clamp fracture Do not over tighten the screw of the pipe clamps Step Procedure 2 Install rubber pad pos 6...

Page 31: ...ttery 4 Connect the negative terminal black of the battery Figure 4 8 Step Procedure 5 Install the battery cover onto the bat tery holder NOTE Make sure that the two retaining lugs pos 1 are in the no...

Page 32: ...wiring harness ATTENTION Strain relief of the plug connections must be ensured NOTE Compensate excessive length of wiring harness by routing cables in loops m WARNING Non compliance can result in seri...

Page 33: ...pos 4 Pay attention to correct sequence of the components See following Figures For correct adjusting of the plastite screw find the according section inside the latest Operators Manual NOTE Fasten t...

Page 34: ...Direct attachment of the engine to chassis Figure 4 15 1 Pick up sensor NOTE If it s not possible to plug in the connector of the pick up sensor unscrew the pick up sensor and change the angle or dire...

Page 35: ...Notes Page 10 Edition September 01 2019 Effectivity 125 MAX DD2 evo Edition Rev 0 NOTES BRP Rotax INSTALLATION MANUAL...

Page 36: ...COOLING SYSTEM TOPICS IN THIS CHAPTER Cooling system overview 2 Installation of the radiator 3 Intake silencer 4 Installation of the intake silencer with integrated airfilter 5 Effectivity 125 MAX DD2...

Page 37: ...Figure 5 1 1 Radiator 2 Upper coolant water hose 3 Lower coolant water hose 4 Clamp 16 25 5 Rubber puffer 6 Rubber puffer 7 Washer 8 Lock nut 9 Allen screw rounded flange head 10 Hose clamps 4 Page 2...

Page 38: ...of the cylinder head cover 5 Push the lower coolant water hose pos 3 onto the lower socket of the radiator as well onto the water socket of the water pump housing Step Procedure 6 Secure the coolant...

Page 39: ...Intake silencer case 2 Intake silencer cover 3 Filter element 4 Holder for filter element 5 Intake silencer tube 6 O ring 7 Carburetor socket 8 Clamp 50 70 9 Lock nut M6 10 Allen screww rounded flange...

Page 40: ...points towards the carburetor 3 Install the filter element pos 3 with holder pos 4 4 Assemble filter box and filter insert as shown in the intake silencer overview figure Make sure that the locking i...

Page 41: ...Notes Page 6 Edition September 01 2019 Effectivity 125 MAX DD2 evo Edition Rev 0 NOTES BRP Rotax INSTALLATION MANUAL...

Page 42: ...P Rotax INSTALLATION MANUAL Chapter 5 EXHAUST SYSTEM TOPICS IN THIS CHAPTER Exhaust system overview 2 Installation of the exhaust system 3 Effectivity 125 MAX DD2 evo 5 Page 1 Edition September 01 201...

Page 43: ...lencer assy 3 Tension spring 4 Spring stainless 5 Exhaust gasket 6 Retaining plate 7 Rubber buffer 8 Spring stainless 9 Rubber buffer 10 Washer 8 4 11 Lock nut M8 12 Exhaust socket assy 13 Exhaust gas...

Page 44: ...support lug on the underside of the exhaust 2 Arrange the chassis specific supports so that the exhaust system follows the straightest possible course from the exhaust socket on the cylinder to the mu...

Page 45: ...Notes Page 4 Edition September 01 2019 Effectivity 125 MAX DD2 evo Edition Rev 0 NOTES BRP Rotax INSTALLATION MANUAL...

Page 46: ...F THE ACCESSORIES TOPICS IN THIS CHAPTER Installation of mounting plate 2 Fitting of the spark plug 3 Installation and connection of the RAVE control unit 4 Assembly of paddle shift system 7 Effectivi...

Page 47: ...Allen screw M8x50 pos 2 and distance sleeve 8 2 12 25 5 pos 3 onto the engine ATTENTION Slot of mounting plate has to be installed in the correct position Figure 7 1 1 Slot 2 Allen screw M8x50 3 Dist...

Page 48: ...ead 2 Check electrode gap of spark plug Ad just as required NOTE Check technical regulations to assure conform ity when setting the electrode gap Step Procedure 3 Fit supplied spark plug pos 1 and tig...

Page 49: ...ening of the exhaust valve NOTE In order to prevent the displacement of the im pulse nozzle pos 6 a small cable tie pos 8 should be attached directly afterwards to the pressure line Do not tie up the...

Page 50: ...roper operation Figure 7 6 1 Hose package Step Procedure 5 Attach cable tie with mount pos 1 to the housing Figure 7 7 1 Cable tie 2 Impulse nipple Step Procedure 6 Secure both lines with cable tie en...

Page 51: ...pressure line pos 1 to the magnetic valve pos 3 Se cure the pressure line on the magnetic valve with a tie wrap pos 4 Attach the other end of the pressure line to the exhaust valve pos 2 Figure 7 9 1...

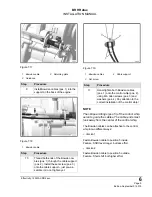
Page 52: ...ore Step Procedure 2 Install washer pos 1 on one of the two Bowden cables pos 2 Figure 7 11 1 Washer 2 Bowden cable Step Procedure 3 Mount Bowden cable pos 2 with washer pos 1 onto the shift contact g...

Page 53: ...Procedure 6 The alignment between point 1 and point 2 must be given Otherwise it can cause increased friction which has a negative impact on shifting behavior Figure 7 15 1 Point 1 2 Point 2 Step Pro...

Page 54: ...cedure 11 Hand tighten both Bowden cables pos 1 onto the control whip pos 2 using M6 Allen screws pos 3 and washers pos 4 Pay attention to the correct installation of the control whip NOTE The oblique...

Page 55: ...be attached on the back depending on how it is more ergonomic for the driver Step Procedure 13 Install spacer pos 1 with washer pos 2 onto the bottom side of the control whip 3 NOTE The bottom side is...

Page 56: ...60 Step Procedure 16 The setting of the shifting is carried out in neutral gear which means that the control whip must be in horizontal position 17 Tighten screw pos 2 of the cable abutment pos 1 and...

Page 57: ...BRP Rotax INSTALLATION MANUAL Figure 7 25 1 Cable abutment 2 Screw 3 Control whip 6 Page 12 Edition September 01 2019 Effectivity 125 MAX DD2 evo...

Page 58: ...possible transmission ratio the use of a rev counter is required for observation of the speed limits NOTE To warrant engine operation within temperature limits of the coolant a temperature sensor for...

Page 59: ...the bottom of the crankcase Step Procedure 2 The oil level can be checked on in spection glass pos 1 It should reach approximately to one third of the in spection glass see following figure If the oil...

Page 60: ...efore in stallation Always use a new sealing ring Figure 8 3 1 Magnetic oil drain plug 2 Sealing ring NOTE Tighten magnetic oil drain plug pos 1 to 20 Nm 177 lbf in m WARNING Non compliance can result...

Page 61: ...and a collecting reser voir using a piece of the supplied fuel hose of an appropriate length NOTE The venting hose must not reach all the way to the bottom of the collecting reservoir ATTENTION Do no...

Page 62: ...installation 3 Exhaust system 1 Exhaust system overview 2 Exhaust system installation 3 F Finishing work 1 Fuel pump connection 2 Fuel pump installation 2 Fuel system installation 1 I Intake silencer...

Page 63: ...Operator s Manual...

Page 64: ...ember 01 2019 Table of Content Chapter INTRO GENERAL INFORMATION Chapter 1 Technical Description Chapter 2 Operating fluids and battery Chapter 3 Engine calibration Chapter 4 Engine operation Chapter...

Page 65: ...Page 2 Edition September 01 2019 Effectivity 125 MAX DD2 evo NOTES BRP Rotax Operators Manual...

Page 66: ...ment without incurring obligation Engine performance may vary depending on among other things general conditions ambient temperature and altitude Contents This Operators Manual contains instructions a...

Page 67: ...Page 2 Edition September 01 2019 Effectivity 125 MAX DD2 evo NOTES BRP Rotax Operators Manual...

Page 68: ...eral 2 Cooling circuit 2 Balance gear 3 Ignition unit 3 Electric starter 3 Electro pneumatically exhaust timing control 3 Intake silencer 3 Exhaust system 4 Gearbox 4 Electronic Shifting Assistant ESA...

Page 69: ...__________________________________________________ COOLING CIRCUIT The coolant is pumped from the radiator to the water pump which is driven by the clutch shaft The water pump conveys the coolant thro...

Page 70: ...ch re set from START to ON is integrated ________________________________________________________________ ELECTRO PNEUMATICALLY EXHAUST TIMING CONTROL The engine type 125 MAX DD2 evo is equipped with...

Page 71: ...___________________________________________ ELECTRONIC SHIFTING ASSISTANT ESA To optimize the shifting from 1st to 2nd gear the ignition is interrupted for a short time This releases load from the gea...

Page 72: ...000 rpm the centrifugal clutch is completely engaged ________________________________________________________________ OVERLOAD CLUTCH The engine has a mechanical overload clutch which is installed on...

Page 73: ...Page 6 Edition September 01 2019 Effectivity 125 MAX DD2 evo NOTES BRP Rotax Operators Manual...

Page 74: ...pter 2 OPERATING FLUIDS AND BATTERY TOPICS IN THIS CHAPTER Coolant 2 Battery 3 Battery charging unit 4 Fuel 6 See also table important information summary in Chapter 5 Effectivity 125 MAX DD2 evo 2 Pa...

Page 75: ...al for the complete cooling system Big radiator approx 0 7 liter 0 185 gal for the complete cooling system 2 Close radiator cap ATTENTION Observe the storage conditions Storage below the freezing temp...

Page 76: ...owing with the spark plug removed it is easier for the electric starter to crank the engine which reduces current absorption of the electric starter result ing in battery voltage adequate to generate...

Page 77: ...green but the charging current will remain thus warranting a fully charged battery 4 The charging time amounts to approx 12 hours NOTE The battery charger may be connected to the battery for a longer...

Page 78: ...he battery charging unit manufacturer NOTE When the battery is charged while not mounted on the kart use the connector ca ble part no 266022 If needed contact your authorized distributor or one of the...

Page 79: ...n serious injuries or death Never perform mixing and fuelling in closed rooms handle fuel in well ventilated areas only m WARNING Non compliance can result in serious injuries or death Fuel the kart o...

Page 80: ...well to ensure adequate mixing of the gaso line with the oil ATTENTION Ensure that no contamination enters the fuel tank and the carburetor ATTENTION Unleaded fuel has a limited storage life Store onl...

Page 81: ...Page 8 Edition September 01 2019 Effectivity 125 MAX DD2 evo NOTES BRP Rotax Operators Manual...

Page 82: ...Performance graphs 2 Carburetor calibration 3 Automatic set up 4 Manual set up 7 Change of the carburetor main jet 11 Choose of gear ratio 14 Exchange of gear reduction ratio 16 Operation of the gear...

Page 83: ...rtical Y axis shows the power in kilowatts kW The horizontal X axis shows the ro tational speed in revolutions per minute rpm For more information please check the performance data sheets on www rotax...

Page 84: ...no longer apply if the carburetor calibration is carried out improperly and causes engine damage The following application for smartphones shows the individual setting of your ROTAX 125 Max DD2 evo en...

Page 85: ...necessary information regarding weather and geo graphical position Figure 3 2 Step Procedure 2 As a second step the engine type of the kart needs to be selected There fore the button underneath the we...

Page 86: ...tep Procedure 3 After all the necessary information has been provided and selected you on ly need to click the circular red button saying CALCULATE at the bottom of the screen Effectivity 125 MAX DD2...

Page 87: ...4 Now the recommended main jet value will be provided In case a second calculation needs to be made you can start over by simply pressing the button saying RESET next to the calculated value 3 Page 6...

Page 88: ...to be entered usually the barometer shows the actual level 2 As a second step the engine type of the kart needs to be selected There fore the button underneath the weather data needs to be clicked Th...

Page 89: ...alue for temperature The same works with feet and meter where you can just click on the small m or ft located next to the value for altitude in order to change between the systems Figure 3 6 In the to...

Page 90: ...can the following QR code for your mobile device Figure 3 9 QR code Android device Figure 3 10 QR code iOS device For better understanding and as help for carburetor adjustment the following figure de...

Page 91: ...BRP Rotax Operators Manual Figure 3 11 Various adjustments ______________________________________________________ 3 Page 10 Edition September 01 2019 Effectivity 125 MAX DD2 evo...

Page 92: ...ine va por are highly flammable and explosive under certain conditions m WARNING Risk of fire and explosion Make sure that fuel will not splash onto hot engine components or equipment ENVIRONMENTAL NO...

Page 93: ...and fit the corresponding main jet see ROTAX Max Jetting Guide 5 Fit and hand tighten the plug screw pos 27 and gasket ring pos 26 Needle position 1 2 3 4 5 K00403 9 8 10 11 7 5 4 3 6 2 1 12 13 14 15...

Page 94: ...et 8 Refit the fuel filter pos 32 the gasket ring pos 33 and hex screw pos 34 NOTE When trying to start the engine it will take a few seconds for the fuel pump to fill the float chamber and for the en...

Page 95: ...12 200 rpm is essentially higher than be tween 12 200 and 13 600 rpm Therefore it does not always make sense to use this rpm range high top speed on a straight and to not take advantage of the acceler...

Page 96: ...f primary drive gear Number of teeth of secondary drive gear Gear ratio Traditional gear ratio in sprocket size Theoretical max speed in km h mile h at 12 500 rpm and wheel diameter 870 mm 34 25 in 32...

Page 97: ...and secondary gears please note that the sum of the last digits of the teeth number must always be 7 or 17 35 62 EXCHANGE OF GEAR REDUCTION RATIO Tools required Torque wrench Allen key 5 mm Allen key...

Page 98: ...r pos 4 and secondary gear pos 5 and fit the gear pair of your choice NOTE At re assembly proceed in reverse sequence Tighten the screws to the following torque settings M6 10 Nm 88 lbf in M8 22 Nm 19...

Page 99: ...e gear shifting is very simple only some points have to be observed Engagement of the 1st gear ATTENTION It is prohibited to rev the engine up in idle mode in order to change engage the 1st gear This...

Page 100: ...justment of gear shifting please follow the instruction of the chassis manufacturer NOTE If the gearshift cables are excessively tensioned the gears are hard to shift 2 The distance between shift cont...

Page 101: ...BRP Rotax Operators Manual Figure 3 15 Adjusted 3 Page 20 Edition September 01 2019 Effectivity 125 MAX DD2 evo...

Page 102: ...CHAPTER ENGINE OPERATING 2 Engine start 2 Stopping the engine 4 Running in procedure for the engine 5 Setting of the exhaust valve timing 6 Maintenance schedule for engine components 9 Operating Limi...

Page 103: ...s it s recommended to put the shifting device in Neutral no gear engaged At engine start proceed as follows Step Procedure 1 On a cold engine pull the choke lever pos 1 into a vertical position Figure...

Page 104: ...em during and immediately after kart operation Risk of burning m WARNING Non compliance can result in serious injuries or death During kart operation beware of body or clothing contact with moving com...

Page 105: ...et in and out of the kart if engine is not running ______________________________________________________ STOPPING THE ENGINE See Fig Power button Step Procedure 1 Press the power button and the engin...

Page 106: ...use a mixing ratio of 1 33 3 or 0 3 liter oil per 10 liters fuel Make sure that the coolant temperature reaches 45 C 113 F before going full throttle Run the kart for 15 minutes at continuously chang...

Page 107: ...cted This is important for the general function of the engine Variant 1 Additional cable on battery ground A See Ground wire The additional cable is NOTattached to the ground wire The control of the e...

Page 108: ...e timing is activated at 9100 rpm NOTE Isolate the additional cable with an electrical insulating tape to the ground wire so that a possible contact with the engine ground does not affect the function...

Page 109: ...al Figure 4 5 Cable on starter relay NOTE Either variant 1 or variant 2 has been installed in your engine ______________________________________________________ 4 Page 8 Edition September 01 2019 Effe...

Page 110: ...alve and check if moving freely X Check overflow bottle empty if needed X Tear down inspection of engine must be con ducted by an authorized ROTAX Service Center X Inspect following com ponents and re...

Page 111: ...system X Check fit and tightness of exhaust X Inspect for oil or water on the leakage bore at the crankcase X right after every collision Verify a tight fit and non leakage of radiator hoses and clam...

Page 112: ...fied operating temperature due to the low ambient temperature then the cooling efficiency of the radiator must be reduced by partially covering the radiator with adhesive tape m WARNING Non compliance...

Page 113: ...Page 12 Edition September 01 2019 Effectivity 125 MAX DD2 evo NOTES BRP Rotax Operators Manual...

Page 114: ...ERVATION AND TRANSPORT TOPICS IN THIS CHAPTER Preservation and transport 2 Preservation of engine and equipment 2 Transport of the kart 2 IMPORTANT INFORMATION SUMMARY 3 Notes 4 Effectivity 125 MAX DD...

Page 115: ...m to prevent corrosion 5 Remove battery from the fixture and charge periodically with the specified battery charger ______________________________________________________ TRANSPORT OF THE KART If the...

Page 116: ...91 MOZ 2 STROKE OIL Fully synthetic XPS Kart Tec OIL IN FUEL MIX ING RATIO During break in 1 33 3 oil During normal use 1 50 2 oil COOLING SYSTEM 0 90 0 237 Pure water resp antifreeze if kart is stor...

Page 117: ...___ ________________________________________________________________________________ ________________________________________________________________________________ __________________________________...

Page 118: ...ing Assistant ESA 4 Engine calibration 2 Engine operating 2 Engine operation 1 Engine start 2 Exchange of gear reduction ratio 16 Exhaust system 4 F Fuel 6 Fuel pump 4 G Gearbox 4 General 2 I Ignition...

Page 119: ......

Page 120: ...GmbH Co KG Rotaxstra e 1 4623 Gunskirchen Austria T 43 7246 601 0 F 43 7246 6370 www rotax com www rotax kart com R and TM are trademarks of BRP Rotax GmbH Co KG 2019 BRP Rotax GmbH Co KG All rights...

Reviews: