background image

10


2


u


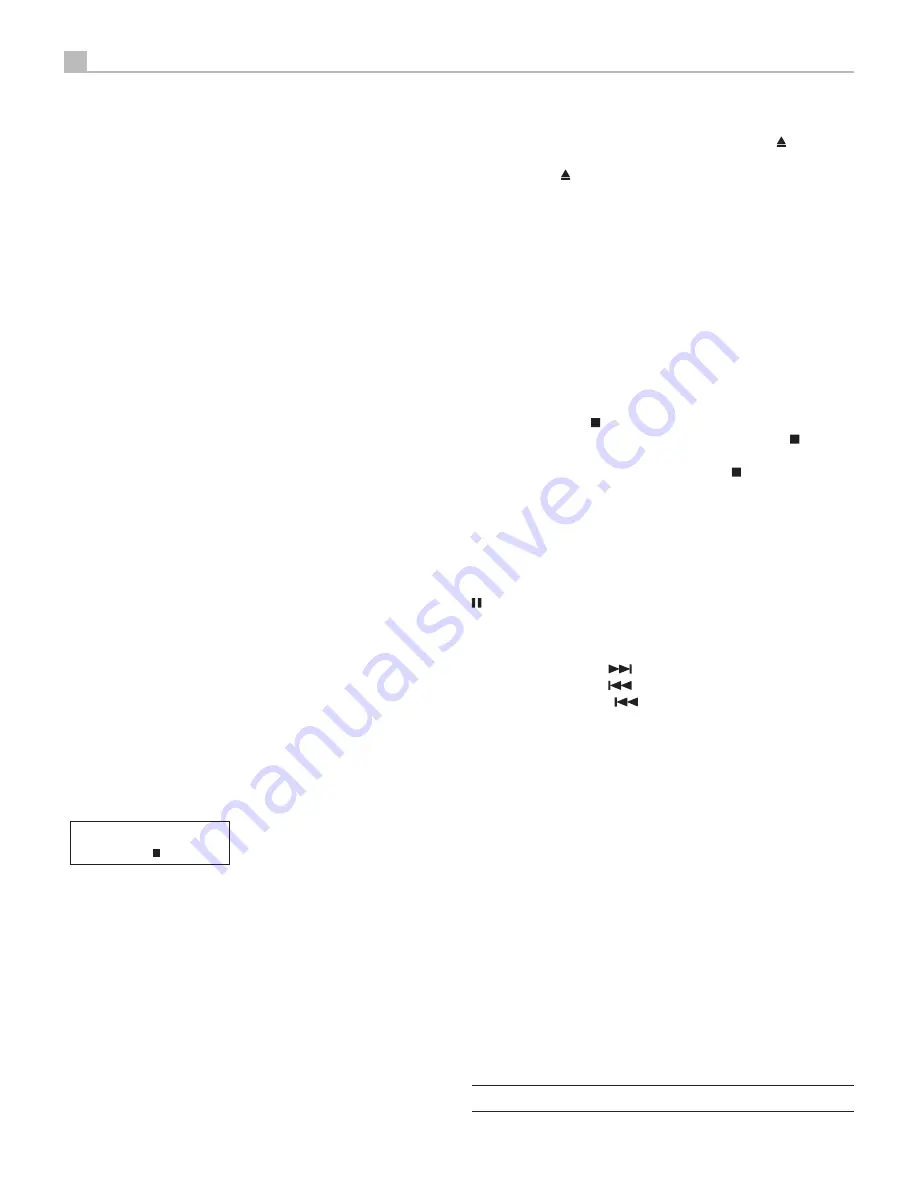
0:00:06

Tracks: 12   

T

 0:44:34

CD11 Stereo Compact Disc Player  

Analog Outputs 

0


See Figure 3 

A pair of standard RCA jacks supplies an analog output signal from the 
CD11 unit to the source inputs of an audio preamplifier, integrated amplifier, 
or receiver. 

Select high quality audio interconnect cables. Connect the left and right 
channel outputs of the unit to the corresponding inputs on the preamplifier 
or other component.

Digital Output 

-


See Figure 3

If you are using an outboard D/A converter or other digital processor, 
you will need an unprocessed digital data stream from the CD11. Using a 
standard 75 ohm coax digital cable, connect the CD11’s coax digital output 
to the digital input connector on the outboard D/A converter.

Operation 

The unit can be operated using its front panel buttons or from corresponding 
buttons on the supplied infrared remote control. Specific instructions for each 
of these controls are detailed below. Most of the buttons are duplicated 
on the front panel and on the IR remote control. However, there are a few 
exceptions where the buttons are only available on one or the other. These 
exceptions are noted in the instructions.

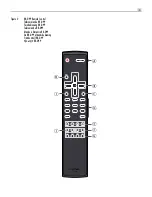
Infrared Remote Control  

Before using the IR remote control, it is necessary to install two “UM-4/
AAA” batteries (supplied). Remove the plastic cover on the back of the IR  
remote, install the batteries (observing the + and – polarity indications), 
and reinstall the cover.

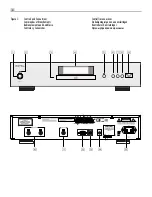
Display 

4


A back-lit display on the front panel of the unit provides useful information 
about the status of the unit, activation of special features, and track/time 
information for the disc being played. Each of these indicators is described 
in the detailed operating instructions that follow.

Disc Tray 

3


A motor-driven disc loading tray located in the center of the unit, accepts a 
compact disc. Press the eject button then place the disc into the tray, label-
side up. Make sure the disc is properly centered before loading. The disc 
can be ejected by pressing the eject button again.

Transport Control Buttons 

These buttons provide basic control functions for the disc transport mechanism. 
Except where noted, all functions are available on the unit front panel and 
the IR remote control.

EJECT Button 

5

E


To open the tray loading mechanism press the EJECT button  . The tray will 
open allowing the CD to be loaded label side up.  To close the tray press 
the EJECT button   again.

If no disc is loaded when the tray is closed the display will read "No Disc". 
When a disc is loaded, the display will indicate the number of tracks on the 
disc and the total time of the disc in hours, minutes and seconds.

PLAY Button 

6

E


After the disc is loaded, press the PLAY button 

u

 to start playing the disc. 

The number of the track being played and the elapsed time will be shown 
in the display, along with the PLAY indicator. Normally, the disc will start 
playing with the first track. However, you can select a different track using the 
TRACK buttons or the DIRECT ACCESS buttons (see below) before pressing 
the PLAY button 

u

 to start playing a different selection.

STOP Button 

7

E


Press the STOP button   once to stop disc play. Press the PLAY button 

u


to resume disc play where it was stopped. If the STOP button   is pressed 
twice, disc play stops, the display shows STOP indicator. When the PLAY 
button 

u

 is pressed after pressing the STOP button   twice, the disc begins 

playing from the first track or the first programmed track in PROGRAM 
mode (see below).

PAUSE Button 

8

E


This button is used to temporarily suspend play. The disc continues to spin 
and play will be resumed from the current position. The PAUSE indicator 
will light in the display. To resume playing the disc, press the PAUSE button 

 again or press the PLAY button 

u

.

TRACK Buttons 

9

J


These buttons are used to select tracks on the disc. When a disc is playing, 
pressing the TRACK button 

 advances to the beginning of the next track. 

Pressing the TRACK button 

 returns to the beginning of the current track. 

Pressing the TRACK button 

 twice quickly in succession returns to the 

beginning of the previous track. The new track number appears in the display. 

These buttons are also used to select a track before pressing the PLAY button 

u

 or when memorizing tracks for the PROGRAM play mode (see below). 

These selections are made by continuously pressing the TRACK buttons until 
the desired track is reached. 

In PROGRAM mode, the TRACK buttons advance or reverse to the next  
track in the memorized selection list. 

DIRECT ACCESS Buttons 

D


Remote Only

These ten numeric buttons (labelled 0 through 9) are used to directly access 
a track from the IR remote control instead of stepping through the tracks 
using the TRACK buttons. 

The first nine tracks on a disc can be selected by pressing the corresponding 
button. For example, to play the third track, press the 3 button on the 
remote control.

When accessing track numbers greater than 9, enter the 2 digit track number 
on the remote control.

Note:

 The >10 button is not used for this model.

Summary of Contents for CD11

Page 1: ...tung Manual de Instrucciones Manuale di istruzioni Gebruiksaanwijzing Instruktionsbok Инструкция пользователя CD11 Stereo Compact Disc Player Lecteur de disque compac Stereo CD Player Lettore CD Reproductor de Discos Compactos CD Speler CD spelare СD проигрыватель ...

Page 2: ...t 2 Do not expose the unit to rain or moisture 3 Do not touch the power cord or plug with wet hands Rotel products are designed to comply with international directives on the Restriction of Hazardous Substances RoHS in electrical and electronic equipment and the disposal of Waste Electrical and Electronic Equipment WEEE The crossed wheelie bin symbol indicates compliance and that the products must...

Page 3: ...ivalent Do not modify the supplied cable Do not use extension cords The mains plug is the disconnect of the unit In order to completely disconnect the unit from the supply mains remove the main plug from the unit and the AC power outlet This is the only way to completely remove mains power from the unit The batteries in the remote control should not be exposed to excessive temperature such as suns...

Page 4: ...ns Commandes et branchements Bedienelemente und Anschlüsse Controles y Conexiones Controlli e connessioni De bedieningsorganen en aansluitingen Kontroller och anslutningar Органы управления и разъемы POWER CD11 2 4 5 6 78 9 0 q w e 1 3 ...

Page 5: ... Remote Control Télécommande RR D99 Fernbedienung RR D99 Telecomando RR D99 Mando a Distancia RR D99 De RR D99 afstandsbediening Fjärrkontroll RR D99 Пульт ДУ RR D99 ENT RR D99 PROG RND RPT TIME MENU A H B D F I C E G J ...

Page 6: ...6 CD11 Stereo Compact Disc Player Figure 3 Connections Connexions Anschlussdiagramm Conexiones Collegamenti De verbindingen Anslutningar Подсоединения CD Player CD11 Amplifier A11 ...

Page 7: ...va todos los componentes del equipo cajas acústicas incluidas antes de conectar cualquier nuevo componente en el mismo 4 Desactiva todos los componentes del equipo antes de cambiar cualquier conexión del mismo Héél belangrijk Bij het maken van de verbindingen 4 Zorg dat niet alleen de CD11 maar de gehele installatie uitstaat als nog niet alle verbindingen gemaakt zijn 4 Zorg dat niet alleen de CD1...

Page 8: ...oduct We are sure it will bring you many years of enjoyment About the CD11 Simply stated the unit is designed to do one thing deliver the most detailed nuanced sound from every disc The unit will faithfully reproduce all that is recorded on the disc While the unit was under development the design team went far beyond the usual measurable technical performance characteristics Listening panels spent...

Page 9: ...otel factory service department for information NOTE Some products are intended for sale in more than one country and as such are supplied with more than one AC cord Please use only the cord appropriate for your country region CD11 should be plugged directly into a polarized wall outlet using the supplied cable or other high current compatible cable as recommended by your authorized Rotel dealer D...

Page 10: ...tton again If no disc is loaded when the tray is closed the display will read No Disc When a disc is loaded the display will indicate the number of tracks on the disc and the total time of the disc in hours minutes and seconds PLAY Button 6E After the disc is loaded press the PLAY button u to start playing the disc The number of the track being played and the elapsed time will be shown in the disp...

Page 11: ...selected track will appear in the main numeric area at the center of the display SEARCH Button F Remote Only These fast forward and fast reverse buttons allow fast searching through the currently playing disc One press of these buttons will fast forward or fast reverse at 2X normal speed Pressing these buttons repeatedly will fast forward or fast reverse at 4X and 8X normal speed Pressing the PLAY...

Page 12: ...s made using the C button are temporary only and not saved after powering off the CD11 Troubleshooting Most difficulties in audio systems are the result of incorrect connections or improper control settings If you encounter problems isolate the area of the difficulty check the control settings determine the cause of the fault and make the necessary changes If you are unable to get sound from the u...

Page 13: ... Analog Output impedance 470 Ohms Digital Output 0 5 Volt Peak to Peak Load Impedance 75 Ohms Power Requirements AC USA 120V 60 Hz EC 230V 50 Hz Power Consumption 15 Watts Standby Power Consumption 0 5 Watts BTU 40 BTU h Dimensions W H D 430 x 98 x 314 mm 17 x 3 7 8 x 12 3 8 Front Panel Height 80 mm 3 1 8 Weight net 5 8 kgs 12 7 lbs All specifications are accurate at the time of printing Rotel res...

Page 14: ...treet North Reading MA 01864 2699 USA Phone 1 978 664 3820 Fax 1 978 664 4109 Rotel Europe Dale Road Worthing West Sussex BN11 2BH England Phone 44 0 1903 221 763 Fax 44 0 1903 221 525 Rotel Deutschland Vertrieb B W Group Germany GmbH Kleine Heide 12 D 33790 Halle Westf Deutschland Tel 05201 87170 Fax 05201 73370 E Mail info bwgroup de www rotel com ...

Reviews: