35
English
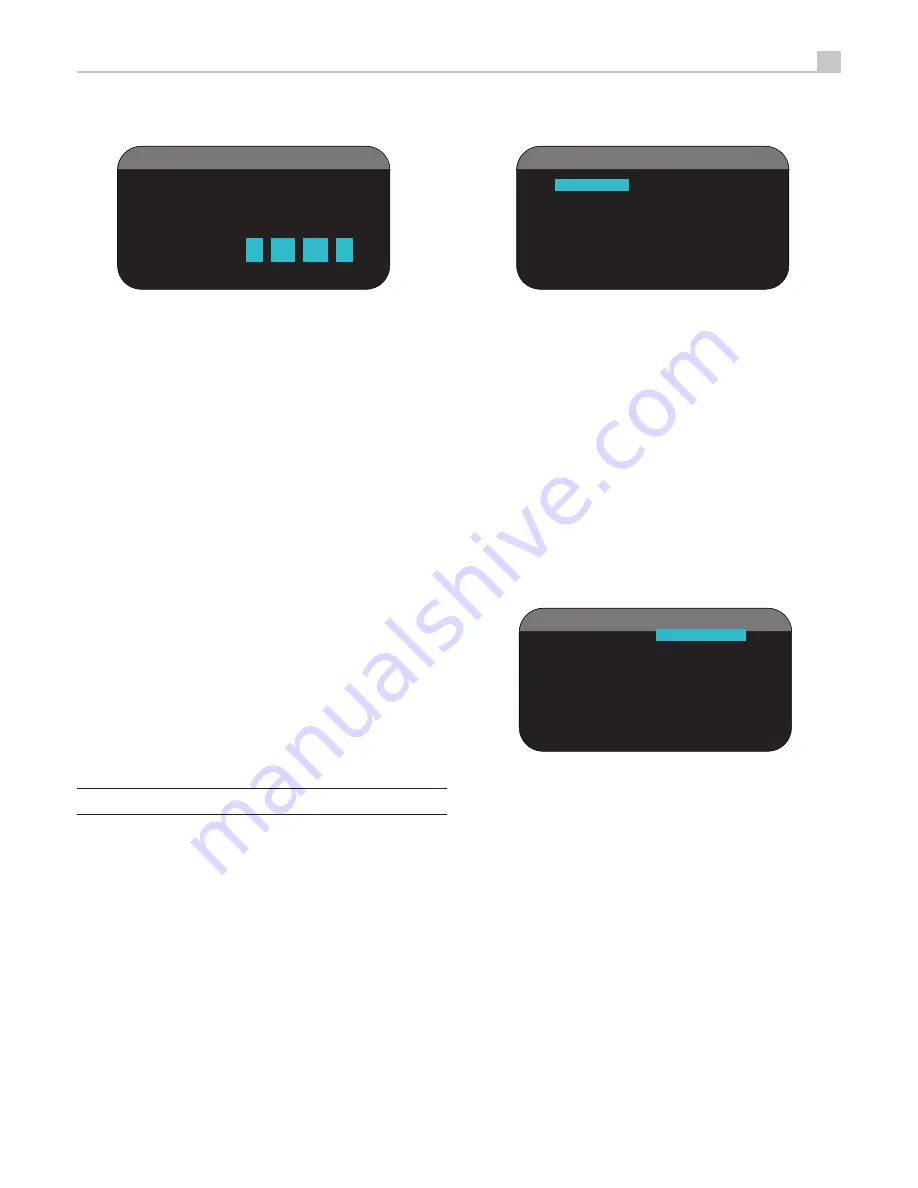
System Status
S Y S T E M
S T A T U S
L I S T E N : T u n e r
V I D E O
I N P U T : O f f
R E C O R D : S o u r c e
M O D E : D o l b y
P L I I x M u s i c
A U D I O
I N P U T : A n a l o g
V O L U M E : 4 5
S P E A K E R S : F L
C N T
S U B
F R
S L
C B 1
C B 2
S R
V i d e o 1 O f f V i d e o 5
Z O N E 2 : Z O N E 3 :
Z O N E 4 :
The SYSTEM STATUS menu provides a snapshot of the current system
settings. This screen appears when you press enter the STATUS Menu.
LISTEN:
the input source selected for listening.
VIDEO INPUT:
the video source selected for viewing. It is necessary to
assign a video input, by selecting from Composite 1–2, Component 1–2,
HDMI 1–6 or OFF (no video) in the INPUT SETUP menu.
RECORD:
the source selected for recording from the VIDEO and AUDIO
outputs.
MODE:
the current surround sound mode.
AUDIO INPUT:
the input selected for the current source: Optical Digital,
Coaxial Digital, HDMI Audio, Analog, etc.
VOLUME:
the current volume setting.
SPEAKERS:
highlights the speakers that are currently configured for the
system (front right, center, subwoofer, front left, surround left, center back
1, center back 2, and surround right).
ZONE:
shows the current status of ZONE 2, 3 & 4 (Z2, Z3 & Z4). In
the example, the ZONE 2 source is Video 1, ZONE 3 is OFF, and the
ZONE 4 source is Video 5.
No changes can be made using this screen; it only provides information.
To go to the rest of the menus.
Note:
While in STATUS menu, press ENT to return to MAIN Menu.
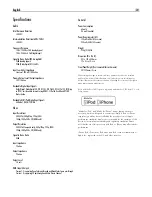
Main Menu
M A I N
M E N U
I N P U T
S P E A K E R
D E L A Y
T E S T
T O N E
S U B
S E T U P
Z O N
O T H E R
V I D E O / H D M I
S T A T U S
E Q
D E F A U L T
E X I T
E
The MAIN MENU provides access to OSD screens for various configuration
options. MAIN MENU is reached by pressing the RCVR/SETUP button on
the remote. To go to the desired menu, move the highlight using the Up/
Down and Left/Right buttons on the remote and press the ENT button.
Press the RCVR/SETUP button again to cancel the display and return to
normal operation.
Configuring Inputs
A key step in setting up the unit is to configure each source input using
the INPUT SETUP screens. Configuring the inputs allows you to set
defaults for a number of settings including the type of input connector,
the desired surround mode, custom labels that appear in the displays
when a source is selected, and many more. The following OSD menus
are used to configure the inputs.
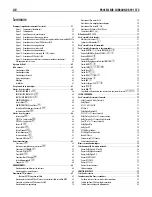
Input Setup
I N P U T
S E T U P
L I S T E N : C D
V I D E O
I N P U T : O f f
I N P U T
L A B E L : _ _ _ _ _ _ _ _
A U D I O
I N P U T : C o a x i a l
2
I N P U T
A T T . :
0 d B
C I N E M A
E Q : O f f
1 2 V
T R I G G E R :
1
_
_
_
_
6
D E F A U L T
M O D E : D o l b y
P L I I x
M u s
G R O U P D E L A Y :
2 0 0 m S
M A I N
M E N U
The INPUT SETUP menu configures the source inputs and is reached from
the MAIN menu. The screen provides the following options, selected by
placing the highlight on the desired line using the Up/Down buttons:
LISTEN:
changes the current listening input source (CD, TUNER, VIDEO
1–6, iPod/USB, & MULTI INPUT). Changing this input also allows you
to select a specific input for configuring.
VIDEO INPUT:
selects the video source to be displayed on the TV
monitor. Assign the input to a source component you have connected
by selecting from Composite 1–2, Component 1–2 and HDMI 1–6. For
audio only sources (such as a CD player), you would typically specify
OFF so that no video is displayed.
INPUT LABEL:
The eight character labels for all inputs can be customized.
Place the highlight on this line to begin labelling. The first character in
the label will be flashing.
Press the Left/Right buttons to change the first letter, scrolling through
1.
the list of available characters.


