4
x
Installation
FA ROTEX Solaris DrainBack - 09/2016
21
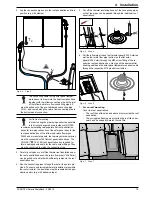
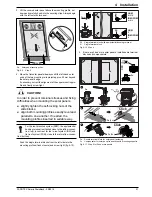
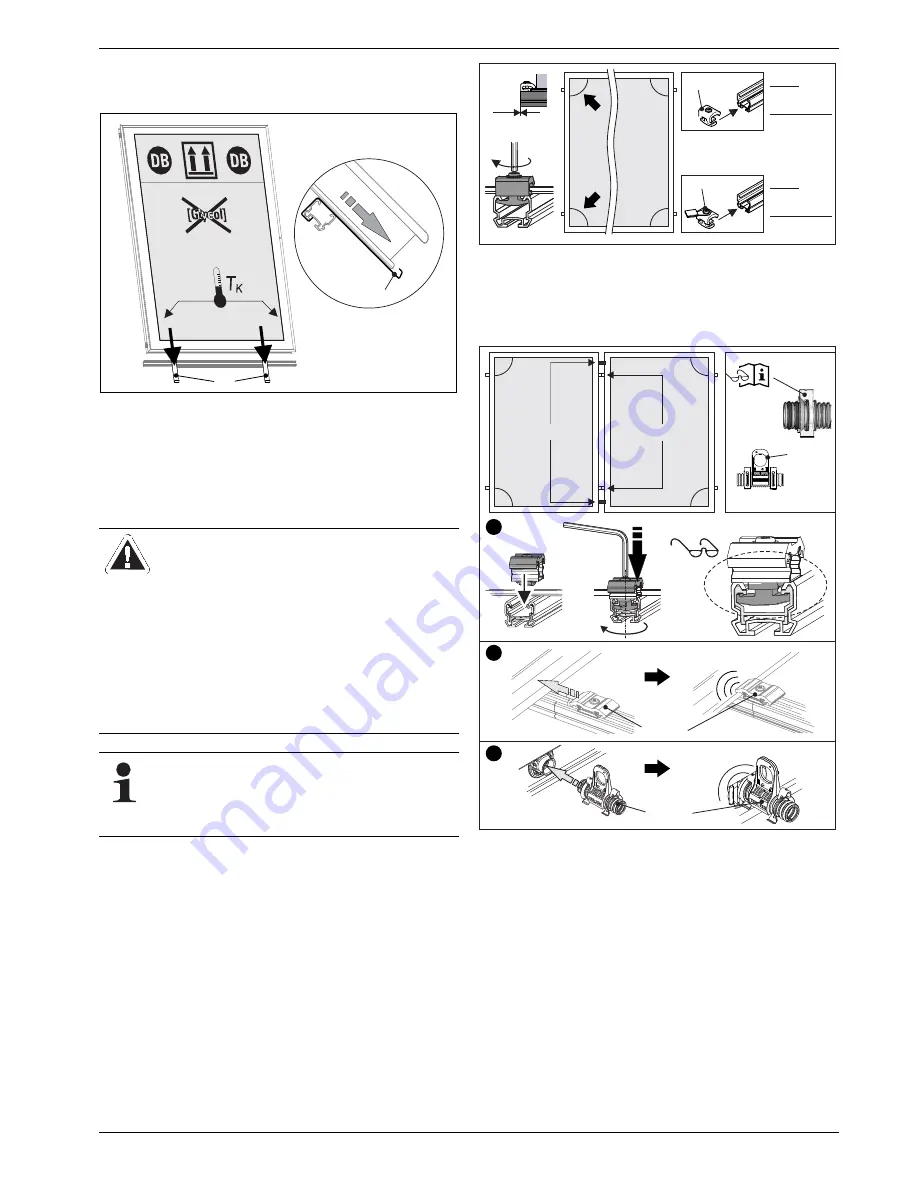
3. Lift the covered solar panel above the mounting profile, set
down and carefully hook into the securing clips. Always begin
with the left outer solar panel.
4. Move the flat solar panel sideways until the left-hand outer
ends of the two mounting rails project approx. 25 mm beyond
the solar panel's edge.
If necessary, correct the alignment of the upper mounting pro-
file and finally screw tight.
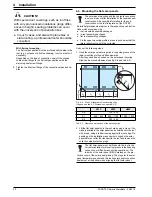
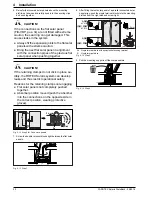
Push the single terminal blocks from the left side into the
mounting profiles (flush closure) and screw tight (fig. 4-10).
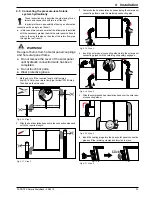
5. If there are 2 and more solar panels, install double terminal
blocks and compensators.
2b
Solar panel securing clips
Fig. 4-9
Step 3
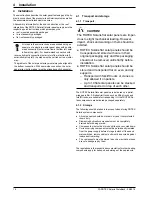
CAUTION!
In order to prevent torsional stresses and fixing
difficulties when mounting the solar panels,
●
slightly tighten the self-locking nuts of the
slide blocks,
●
align both mounting profiles exactly level and
parallel to one another. If needed, the
mounting profiles inserted in suitable way.
For the roof-mounted system (ADM), the equipotential
bonding terminal is attached close to the inflow connec-
tion (top); in contrast, for the in-roof system (IDM) and
flat roof system (FDM), close to the return flow connec-
tion (bottom).
2b
2b
5h
Single terminal block with equipotential bonding terminal
5i
Single terminal block
Fig. 4-10 Step 4
3a
Double terminal block for solar panel fastening
3c
Compensator for solar panel connection with mounting supports
Fig. 4-11 Step 5 for 2 and more panels
0 mm
ADM
a+c+d
IDM / FDM
a+b+c
ADM
b
IDM / FDM
d
a
b
c
d
5h
5i
1.
2.
Click
3.
Click
3a
!
3c
3a
a
b
c
d
3c
3c
(2x)
3a
(2x)

