4
x
Installation
FA ROTEX Solaris DrainBack - 09/2016
23
4.5
Connecting the pressure-less Solaris
system hydraulically
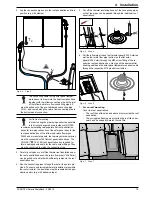
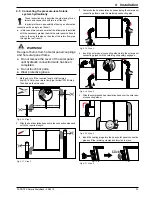
1. Mark and cut off the required length of inflow pipe
(top/VA15 Solar) and return flow pipe (bottom/VA18 Solar).
Then deburr the pipe ends.
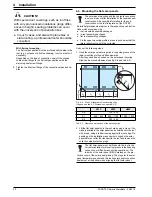
2. Slide the heat insulation hoses onto the connection pipes and
cut to the required length.
3. Compress the heat insulation hoses and plug the solar panel
connecting elbows onto the matching connecting pipe.
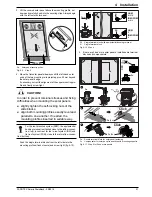
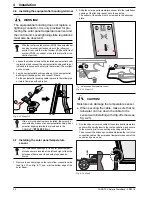
4. Insert the solar panel connecting elbows into the solar panel
connecting pipes until the retaining clip audibly engages.
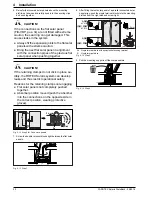
5. Slide the compressed heat insulation hose over the solar pan-
el connecting elbow.
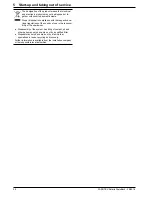
6. Insert the sealing plugs into the open solar panel connection
pipes until the retaining clamps audibly click in place.
These instructions only describe the pipe laying for al-
ternate end connection with two roof transits.
In principle there is a possibility of having an alternative
connection with a single roof transit.
●
In this case, always make sure that the inflow pipe is installed
with the necessary gradient behind the solar panel surface in
order to then lay this also on the side of the return flow pipe
through the roof transit.
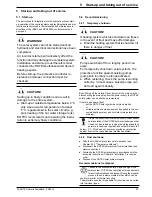
WARNING!
Danger of burns from hot solar panel couplings
and hot solar panel frame.
●
Do not remove the cover of the solar panel
until hydraulic connection work has been
completed.
●
Do not touch hot parts.
●
Wear protective gloves.
Fig. 4-16 Step 1
Fig. 4-17 Step 2
Fig. 4-18 Step 3
Fig. 4-19 Step 4
Fig. 4-20 Step 5
Fig. 4-21 Step 6
Click
Click

