RTX-IOM-PRODUCT-YY
Page
25
of
131
www.rotexautomation.com
•
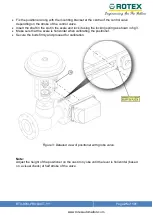
Fix the positioner along with the mounting bracket at the centre of the control valve
depending on the stroke of the control valve.
•
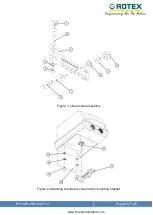
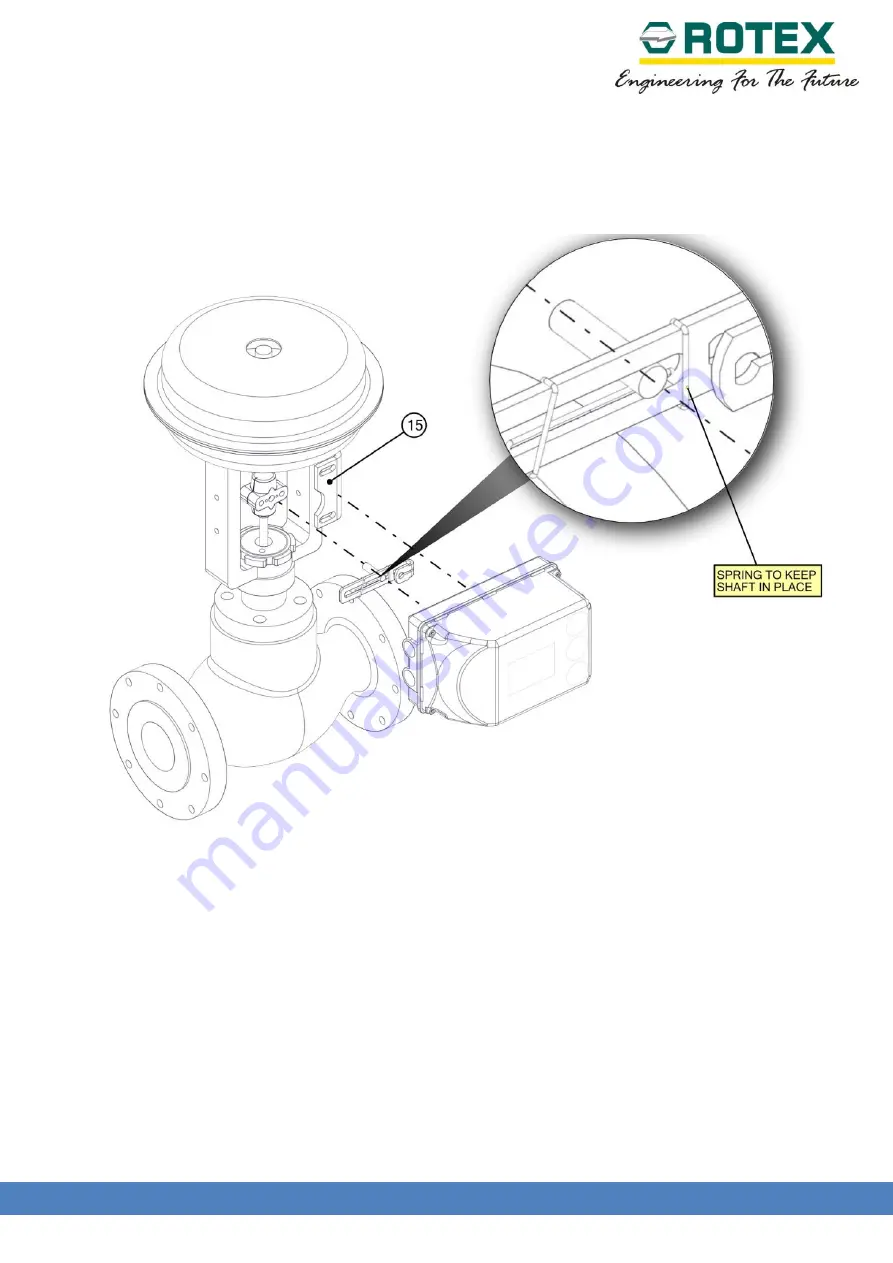
Insert the shaft in the slot in the scale and lock it using the locking spring as shown in fig 3.
•
Make sure that the scale is horizontal when calibrating the positioner.
•
Secure the bolts firmly and proceed for calibration.
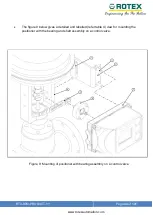
Figure 3: Detailed view of positioner with globe valve.
Note:
Adjust the height of the positioner on the cast iron yoke until the lever is horizontal (based
on a visual check) at half stroke of the valve.
Summary of Contents for Posidapt Expert
Page 7: ...RTX IOM PRODUCT YY Page 7 of 131 www rotexautomation com 1 2 Posidapt Series...
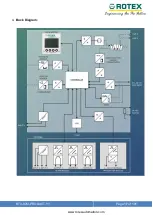
Page 17: ...RTX IOM PRODUCT YY Page 17 of 131 www rotexautomation com 4 Bock Diagram...
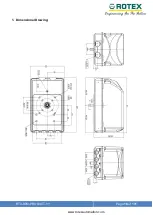
Page 18: ...RTX IOM PRODUCT YY Page 18 of 131 www rotexautomation com 5 Dimensional Drawing...
Page 44: ...RTX IOM PRODUCT YY Page 44 of 131 www rotexautomation com 7 Electrical Connection...
Page 46: ...RTX IOM PRODUCT YY Page 46 of 131 www rotexautomation com...
Page 79: ...RTX IOM PRODUCT YY Page 79 of 131 www rotexautomation com...
Page 122: ...RTX IOM PRODUCT YY Page 122 of 131 www rotexautomation com...

