7
OPERATION
1. Place the power supply on a sturdy and level surface in a safe, dry place, away from laboratory
traffic.
2. Ensure that the AC power switch is OFF, and then plug the three-pronged power cord into a
grounded three-prong AC outlet of the appropriate voltage (100 V to 240 V as indicated on the
rating sticker near the AC cord on the back of the unit).
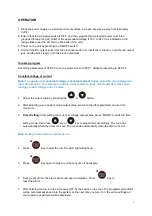
3. Power on the unit by pressing the ON/OFF switch.
4. Connect the DC output jacks from the electrophoresis unit; insert the red lead (+) into the red output
jack, and the black lead (-) into the black output jack.
One-step-program
Set all the parameters of STEP 2 to zero, system will run STEP 1 without proceeding to STEP 2.
Constant voltage or current
Note:
To operate under
constant voltage
or
constant current
modes, adjust the other parameter to
the maximum value. For example, to operate under constant voltage, adjust
current
to max before
running constant voltage, and vice versa.
1.
Adjust the output value by pressing the
or
button.
2.
After adjusting your constant mode output value, switch to the other parameter and set it to
maximum.
3.
Timer Setting:
After setting the current or voltage output value, press “MODE” to switch to time
setting mode, then press
key or
key to adjust timer accordingly. The run ends
automatically when the timer runs out.
The run ends automatically when the timer runs out.
Note:
Setting 0 will result in a continuous run.
4.
Press
Key to start the run. The LED light will light up.
5.
Press
Key again to stop the unit at any time if necessary.
6.
During a timed run, the alarm will sound upon completion. Press
Key to
reset the alarm.
7.
After finishing the run turn the AC power OFF by the switch on the rear. The programmed settings
will be automatically saved into the system so the next time you turn it on, the same settings as
your previous experiment will be displayed.


