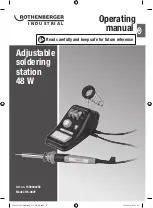
background image

Safety

21

GB

Safety

Intended Use

This soldering station is exclusively designed for private use and for hobby 

and DIY projects for the following purposes:

 - for fine soldering work on, for example, wires and PCBs

The soldering station should only be used in accordance with the 

instructions and safety information given in this operating manual. It should 

not be used for any other purpose. Neither the manufacturer nor the 

dealer accepts responsibility for any damage, loss or injury resulting from 

improper use of the soldering station. Examples of improper use include the 

following, in particular: 

 - Any use beyond the specified intended use.
 - Failure to follow the safety, assembly, operating, cleaning and 

maintenance instructions given in this operating manual.

 - Failure to comply with applicable health, safety and accident prevention 

regulations regarding the use of this soldering station.

 - Using accessories and spare parts which are not suitable for this 

soldering station.

 - Changes made to the soldering station or to the accessories.
 - Excessive use.

Anyone using or maintaining this soldering station has to be familiar with 

these instructions and be aware of potential hazards. This soldering station 

should only be used by a skilled person - if in doubt ask an expert for 

advice.

Non-observance of the safety, assembly and operating instructions while 

operating the appliance counts as misuse. All the applicable health and 

safety regulations have to be followed. All other applicable local and 

national laws have to be complied with. The soldering station should not 

be modified. Any unauthorised modification increases the risk of injury or 

damage to property.

1500003258_Anleitung_DE_GB_FR.indb   21

1500003258_Anleitung_DE_GB_FR.indb   21

29.11.2019   08:31:14

29.11.2019   08:31:14

Summary of Contents for 1500003258

Page 1: ...áljaamellékeltCD ROMlemezenPDFformátumban IS ÞiðfinniðleiðbeiningaráíslenskuíPDF skjaliámeðfylgjandigeisladiski IT PotetetrovareilmanualeinItaliano informatoPDFsulCD ROMallegato LT LietošanasinstrukcijuValodasnosaukumsvaratatrastpievienotajāCD ROMPDF formātā LV InstrukcijąlietuviųkalbarasitepridėtameCD ROMPDFformatu NL UvindtdehandleidinginhetNederlandsopdebijgevoegdeCD ROMinPDF formaat NO Dufinne...

Page 2: ...tze montieren wechseln 8 Reinigungsschwamm auflegen 9 Netzanschluss herstellen 9 Verwendung 10 Ein und Ausschalten 10 Arbeitstemperatur 11 Löten 11 Entlöten 12 Wartung Reinigung Lagerung und Transport 12 Wartung 13 Reinigung 13 Lagerung 13 Transport 13 Fehlerbehebung 14 Technische Daten 14 Entsorgung 15 Altgerät entsorgen 15 Verpackung entsorgen 15 Inhaltsverzeichnis 1500003258_Anleitung_DE_GB_FR ...

Page 3: ...Lötständer 4 Lötkolben 5 Lot 1x Ø 1 mm 6 Lot 1x Ø 1 5 mm 7 Flache Lötspitze 8 Reinigungsschwamm 9 Schwammauflage 10 Spitze Lötspitze vormontiert 11 Ablage für Reinigungsschwamm 12 Temperaturregler 13 Ein Ausschalter 14 Haltefeder 1 2 5 6 7 8 11 12 13 14 3 9 1500003258_Anleitung_DE_GB_FR indb 3 1500003258_Anleitung_DE_GB_FR indb 3 29 11 2019 08 31 01 29 11 2019 08 31 01 ...

Page 4: ...auf Wenn Sie die Lötstation an Dritte weitergeben geben Sie unbedingt diese Bedienungsanleitung mit Die folgenden Symbole und Signalworte werden in dieser Bedienungsanleitung auf der Lötstation oder auf der Verpackung verwendet Bezeichnet eine gefährliche Situation die wenn sie nicht vermieden wird den Tod oder schwere Verletzungen zur Folge haben kann Bezeichnet eine Gefährdung die wenn sie nicht...

Page 5: ...Sicherheits und Unfallverhütungsvorschriften welche die Verwendung dieser Lötstation betreffen Die Verwendung von Zubehör oder Ersatzteilen welche nicht für diese Lötstation geeignet sind Veränderungen an der Lötstation oder am Zubehör Die übermäßige Verwendung Wer diese Lötstation verwendet oder wartet muss mit diesen Anweisungen vertraut und sich über mögliche Gefahren bewusst sein Diese Lötstat...

Page 6: ...renden Gefahren verstehen Kinder dürfen nicht mit dem Gerät spielen Reinigung und Benutzerwartung dürfen nicht von Kindern ohne Beaufsichtigung durchgeführt werden b Wenn die Netzanschlussleitung dieses Gerätes beschädigt wird muss sie durch den Hersteller oder seinen Kundendienst oder eine ähnlich qualifizierte Person ersetzt werden um Gefährdungen zu vermeiden c Lagern Sie die Lötstation nach Ge...

Page 7: ... Nähe des heißen Lötkolbens m Vermeiden Sie Kontakt zwischen den heißen Teilen des Lötkolbens und den Kunststoffteilen des Lötständers n Lassen Sie den Lötkolben nicht unbeaufsichtigt solange er in Betrieb ist o Führen Sie keine Lötarbeiten an unter Spannung stehenden Teilen durch p Sorgen Sie für eine gute Belüftung Beim Löten können reizende Dämpfe entstehen die zu Schleimhautschäden bis chronis...

Page 8: ...ene Serviceadresse an den Hersteller Vor Verwendung Haltefeder montieren Lötspitze montieren wechseln Drücken Sie die Haltefeder 14 fest in die dafür vorgesehene Öffnung der Steuerungseinheit und Lötständers 3 und fixieren Sie diese so VORSICHT Lassen Sie die Lötstation vollständig abkühlen bevor Sie eine Lötspitze auswechseln Einige Lötspitzen sind sehr scharf Tragen Sie stets Schutzhandschuhe un...

Page 9: ...r um die Lötspitze auszuwechseln Legen Sie die Schwammauflage 9 in die Ablage für Reinigungsschwamm 11 Legen Sie den Reinigungsschwamm 8 in die Ablage Befeuchten Sie den Reinigungsschwamm Schließen Sie die Lötstation nur über eine Steckdose mit ordnungsgemäß installierter Erdung an Die Lötstation ist für den Betrieb mit Einphasen Wechselstrom 230 240 V 50 Hz gebaut Reinigungsschwamm auflegen Netza...

Page 10: ... die Spitze eine Temperatur von ca 500 C Wählen Sie durch Drehen des Temperaturreglers 12 die für Ihre Anwendung geeignete Temperaturstufe siehe Kapitel Arbeitstemperatur Schalten Sie den Ein Ausschalter in die Position O Geben Sie den Lötkolben 4 in den Haltefeder 14 um ihn vollständig auskühlen zu lassen 13 12 1500003258_Anleitung_DE_GB_FR indb 10 1500003258_Anleitung_DE_GB_FR indb 10 29 11 2019...

Page 11: ...Arbeitstemperatur Löten HINWEIS Bei längeren Pausen Arbeitsunterbrechungen ziehen Sie den Netzstecker aus der Steckdose Beginnen Sie beim Löten mit einer niedrigen Arbeitstemperatur Stufe 1 2 und erhöhen Sie die Temperatur falls nötig Die geeignete Arbeitstemperatur ist üblicherweise erreicht wenn der Schmelzvorgang des Lötmittels bei Kontakt mit der Lötspitze ohne Verzögerung beginnt Zum Entlöten...

Page 12: ...ernende Lot mit der Lötspitze Sobald das Lot schmilzt aktivieren Sie die Entlötpumpe Durch die Saugkraft wird das Lot entfernt Entlöten Reinigen Sie vor dem Löten die zu verbindenden Teile Führen Sie den mit einem geeigneten Flussmittel gefüllten Lötdraht an das äußerste Ende der Lötspitze heran und schmelzen den Lötdraht ab Dabei wird die Lötstelle durch das austretende Flussmittel benetzt dadurc...

Page 13: ...it ab und müssen ggf ausgewechselt werden Wartung Reinigung Lagerung Transport VORSICHT Achten Sie darauf dass keine Flüssigkeiten in das Innere der Lötstation gelangt Reinigen Sie die Lötstation mit einem weichen leicht angefeuchteten Tuch Verwenden Sie keine aggressiven Scheuermittel und keine Lösungsmittel oder Benzin Lassen Sie die Lötstation vor der Lagerung vollständig abkühlen Reinigen Sie ...

Page 14: ...vom Hersteller oder seinem Vertreter ersetzten Das Lot auf der Lötspitze verläuft nicht richtig Die Arbeitstemperatur ist zu niedrig Wählen Sie eine höhere Arbeitstemperatur Lötspitze ist locker Schalten Sie die Lötstation aus lassen Sie sie vollständig auskühlen und ziehen Sie die Lötspitze an Technische Daten Modell HS 060Y Netzspannung 230 240 V 50 Hz Nennleistung 48 W Schutzklasse I 1500003258...

Page 15: ...n Elektro und Elektronik Altgeräten enthalten sind negative Auswirkungen auf die Umwelt und die menschliche Gesundheit haben Durch die sachgemäße Entsorgung dieser Lötstation tragen Sie außerdem zu einer effektiven Nutzung natürlicher Ressourcen bei Informationen zu Sammelstellen für Altgeräte erhalten Sie bei Ihrer Stadtverwaltung dem öffentlich rechtlichen Entsorgungsträger einer autorisierten S...

Page 16: ...16 1500003258_Anleitung_DE_GB_FR indb 16 1500003258_Anleitung_DE_GB_FR indb 16 29 11 2019 08 31 07 29 11 2019 08 31 07 ...

Page 17: ...003258 Model HS 060Y Operating manual Read carefully and keep safe for future reference I N D U S T R I A L I N D U S T R I A L GB 1500003258_Anleitung_DE_GB_FR indb 17 1500003258_Anleitung_DE_GB_FR indb 17 29 11 2019 08 31 09 29 11 2019 08 31 09 ...

Page 18: ...24 Mounting replacing the soldering tip 24 Placing the cleaning sponge 25 Connecting the power supply 25 Usage 26 Switching on and off 26 Working temperature 27 Soldering 27 De soldering 28 Maintenance cleaning storage and transport 28 Maintenance 29 Cleaning 29 Storage 29 Transport 29 Troubleshooting 30 Technical data 30 Disposal 31 Disposing of the used device 31 Disposal of packaging 31 Table o...

Page 19: ...ng stand 4 Solder iron 5 Solder 1x Ø1 mm 6 Solder 1x Ø1 5 mm 7 Flat soldering tip 8 Cleaning sponge 9 Sponge pad 10 Soldering tip pre assembled 11 Pad for cleaning sponge 12 Temperature controller 13 On Off switch 14 Retaining spring 1 2 5 6 7 8 11 12 13 14 3 9 1500003258_Anleitung_DE_GB_FR indb 19 1500003258_Anleitung_DE_GB_FR indb 19 29 11 2019 08 31 10 29 11 2019 08 31 10 ...

Page 20: ...cerning the use of this product Keep this manual in a safe place for future reference Always include the manual when you give the soldering station to others The following symbols and key words will be used in this manual on the soldering station or the packaging Indicates a hazardous situation that if not avoided could result in death or serious injury Signals a hazard that can cause injuries whe...

Page 21: ...icable health safety and accident prevention regulations regarding the use of this soldering station Using accessories and spare parts which are not suitable for this soldering station Changes made to the soldering station or to the accessories Excessive use Anyone using or maintaining this soldering station has to be familiar with these instructions and be aware of potential hazards This solderin...

Page 22: ...supervision b To prevent the risk of injury damaged mains cables may only be replaced by the manufacturer by customer service or by a similarly qualified person c Allow the soldering station to cool down completely in air after use before you put it away WARNING The soldering iron must be stored in the soldering stand when not in use d Do not use the soldering station if the handle the mains cable...

Page 23: ...d n Do not leave the soldering iron unattended while it is switched on o Do not carry out any soldering work on live parts p Always use in a well ventilated space Toxic fumes can be produced when soldering which can lead to damage to the mucous membranes and or chronic respiratory illness q Wear eye protection r The supplied solder wire contains resin May give rise to allergic reactions s Solder c...

Page 24: ...dicated on the warranty card Before Use Mounting the retaining spring Mounting replacing the soldering tip Press the retaining spring 14 firmly into the opening provided in the control unit and soldering stand 3 and fix it like this CAUTION Allow the soldering station to cool down completely before you change the soldering tip Some soldering tips are very sharp Always wear protective gloves and or...

Page 25: ...ows to change the soldering tip Place the sponge pad 9 in the space provided for the cleaning sponge 11 Place the cleaning sponge 8 in the provided space Wet the cleaning sponge Connect the soldering station only to a socket that is properly earthed The soldering station is designed for use with single phase alternating current 230 240 V AC 50 Hz Placing the cleaning sponge Connecting the power su...

Page 26: ...he tip reaches a temperature of about 500 C Select the temperature setting suitable for your application by turning the regulator 12 see chapter Working temperature Move the On Off switch to the O position Place the soldering iron 4 in the holder 14 to allow it to cool down completely 13 12 1500003258_Anleitung_DE_GB_FR indb 26 1500003258_Anleitung_DE_GB_FR indb 26 29 11 2019 08 31 16 29 11 2019 0...

Page 27: ...ng temperature Soldering NOTE For long breaks work interruptions disconnect the mains plug from the socket When soldering start with a low working temperature setting 1 2 and increase the temperature if necessary The appropriate working temperature is reached when the solder begins to melt as soon as it comes into contact with the soldering tip Use a higher temperature setting 3 4 for desoldering ...

Page 28: ...with the soldering tip Once the solder melts activate the de soldering pump The suction force removes the solder De soldering Clean the parts to be joined before soldering Touch the edge of the appropriate flux cored solder wire to the end of the soldering tip to melt the solder wire The workpiece is coated with the flux which flows out of the solder wire allowing the solder to join the metal If t...

Page 29: ...r out after some time and need be replaced from time to time Maintenance Cleaning Storage Transport CAUTION Make sure that liquids do not get into the soldering station Clean the soldering station with a slightly dampened cloth Do not use aggressive cleaning agents solvents or petroleum spirit Allow the soldering station to cool down completely before storage Clean the soldering station before sto...

Page 30: ...cturer or the manufacturer s representative The solder does not run smoothly on the soldering iron The working temperature is too low Select a higher working temperature Soldering tip is loose Turn the soldering station off allow it to cool down completely and tighten the soldering tip Technical data Model HS 060Y Mains Voltage 230 240 V 50 Hz Rated power 48 W Protection class I 1500003258_Anleitu...

Page 31: ...ic equipment incorrect handling of waste equipment may have a negative impact on the environment and on the health of human beings By disposing of this soldering station correctly you are also contributing towards an efficient use of natural resources Information on collecting points for waste equipment can be obtained from your local authority the public waste disposal authority an authorised ins...

Page 32: ...32 1500003258_Anleitung_DE_GB_FR indb 32 1500003258_Anleitung_DE_GB_FR indb 32 29 11 2019 08 31 16 29 11 2019 08 31 16 ...

Page 33: ...W Réf 1500003258 Modèle HS 060Y Notice d utilisation À lire et à conserver I N D U S T R I A L I N D U S T R I A L FR 1500003258_Anleitung_DE_GB_FR indb 33 1500003258_Anleitung_DE_GB_FR indb 33 29 11 2019 08 31 18 29 11 2019 08 31 18 ...

Page 34: ...t remplacement des pannes de soudage 40 Poser l éponge de nettoyage 41 Créer une connexion au secteur 41 Utilisation 42 Marche et arrêt 42 Température de travail 43 Souder 43 Dessoudage 44 Maintenance nettoyage stockage et transport 44 Entretien 45 Nettoyage 45 Stockage 45 Transport 45 Dépannage 46 Caractéristiques techniques 46 Élimination 47 Élimination des vieux appareils 47 Élimination de l em...

Page 35: ...t support socle du fer à souder 4 Fer à souder 5 Fil de soudure 1x Ø 1 mm 6 Fil de soudure 1x Ø 1 5 mm 7 Panne à souder plate 8 Éponge de nettoyage 9 Support éponge 10 Panne à souder pointue prémontée 11 Dépôt pour l éponge de nettoyage 12 Régulateur de température 13 Marche Arrêt 14 Ressort de maintien 1500003258_Anleitung_DE_GB_FR indb 35 1500003258_Anleitung_DE_GB_FR indb 35 29 11 2019 08 31 20...

Page 36: ...ion ultérieure dans un lieu sûr Si vous donnez la station de soudage à un tiers donnez lui impérativement cette notice Les symboles et les termes d avertissement suivants sont utilisés dans cette notice sur la station de soudage ou sur l emballage Indique une situation dangereuse qui si on ne l évite pas peut provoquer la mort ou des blessures graves Indique une situation dangereuse qui si on ne l...

Page 37: ...ons de santé de sécurité et de prévention des accidents concernant l utilisation de la station de soudage L utilisation d accessoires et pièces de rechange non prévus pour cette station de soudage Des modifications sur la station de soudage ou aux accessoires Une utilisation trop importante La personne utilisant ou entretenant la station de soudage doit être familiarisée avec ces instructions et e...

Page 38: ... enfants ne doivent pas procéder au nettoyage ni à la maintenance s ils ne sont pas surveillés b En cas d endommagement du cordon d alimentation de l appareil celui ci doit être remplacé par le fabricant par le service après vente ou par toute autre personne qualifiée afin d éviter tout danger c Après l utilisation stocker la station de soudage à l air libre jusqu à ce qu elle ait complètement ref...

Page 39: ...entre les pièces brûlantes du fer à souder et les pièces en plastique du maintien n Ne pas laisser la station à souder sans surveillance lorsqu il est branché o Ne pas souder des pièces sous tension p Assurer une bonne ventilation Pendant le brasage des vapeurs peuvent se dégager irriter les muqueuses et aboutir même à des maladies pulmonaires chroniques q Portez des lunettes de protection r Le fi...

Page 40: ...e service indiqué sur la carte de garantie Avant l utilisation Montage du ressort de maintien Montage et remplacement des pannes de soudage Pressez le ressort de maintien 14 dans la fente de l unité de commande du support 3 et fixez le ainsi ATTENTION Laissez le fer à souder refroidir complètement avant de remplacer la panne Quelques pannes à souder sont très pointues Utilisez toujours des gants d...

Page 41: ...procédez comme suit Placez le support éponge 9 dans le support pour éponge de nettoyage 11 Placez l éponge de nettoyage 8 dans le support Humidifiez l éponge de nettoyage Ne raccordez la station à souder qu à une prise de courant avec mise à terre conforme La station de soudage est conçue pour un fonctionnement avec courant alternatif monophasé de 230 240 V 50 Hz Poser l éponge de nettoyage Créer ...

Page 42: ...nne a une température d env 500 C Tournez le régulateur de température 12 pour régler la température appropriée voir le chapitre Température de travail Positionnez l interrupteur marche arrêt en position O Placez le fer à souder 4 dans le ressort de retenue 14 pour qu il refroidisse complètement 13 12 1500003258_Anleitung_DE_GB_FR indb 42 1500003258_Anleitung_DE_GB_FR indb 42 29 11 2019 08 31 25 2...

Page 43: ...rature de travail Souder REMARQUE En cas de pauses interruptions de travail prolongées débranchez la fiche secteur de la prise de courant Commencez par une température de travail plutôt basse niveau 1 2 et augmentez la température si nécessaire La température adaptée est normalement atteinte lorsque l étain de soudure de brasage commence à fondre immédiatement lorsque il est en contact avec la poi...

Page 44: ...retirer avec la panne à souder Activez la pompe dès que l étain de soudage commence à fondre L étain de soudage est enlevé par la puissance de l aspiration Dessoudage Nettoyez les pièces à souder avant le brasage Positionnez le fil de brasage fourré avec le fondant approprié à l extrémité de la panne et faites fondre le fil de soudage Pendant cette opération la zone de soudage est mouillée par le ...

Page 45: ...de sécurité Les pannes 7 10 s usent au bout d un certain temps et doivent être remplacées Entretien Nettoyage Stockage Transport ATTENTION Veillez à ce que des liquides ne s infiltrent pas dans la station de soudage Nettoyez la station à souder à l aide d un chiffon doux et légèrement humide N utilisez ni produit abrasif agressif ni solvant ou essence Laissez refroidir la station de soudage avant ...

Page 46: ...bricant ou un représentant Le métal d apport de brasage ne fond pas correctement sur la panne La température de travail est trop basse Choisissez une température plus élevée La panne est desserrée Débranchez la station à souder laissez la refroidir resserrez la panne à souder Caractéristiques techniques Modèle HS 060Y Tension du secteur 230 240 V 50 Hz Puissance nominale 48 W Classe de protection ...

Page 47: ...nipulation non conforme d appareils usés peut avoir des répercussions négatives aussi bien sur l environnement que sur la santé de personnes En éliminant cette station de soudage de façon conforme vous contribuez également à une exploitation effective des ressources naturelles Les informations relatives aux centres de récupération d appareils usagés vous seront fournies par l autorité municipale c...

Page 48: ...79 Kelkheim Fischbach Tel 49 0 6195 9981 0 Email info diy rothenberger com www rothenbergerindustrial com Copyright Rothenberger Industrial GmbH 2015 2020 All rights reserved 1500003258_Anleitung_DE_GB_FR indb 48 1500003258_Anleitung_DE_GB_FR indb 48 29 11 2019 08 31 26 29 11 2019 08 31 26 ...

Reviews: