25
24
5.3 | Inserting the battery
Open the battery compartment and connect a 9 V alkaline battery with the correct
polarity. Stow the battery in the battery compartment and close the compartment
properly.
5.4 | Switching on the device
Press the trigger (1) to switch on the device and display the temperature value. In
the meantime SCAN appears.
5.5 | Temperature measurement
Press and hold the trigger (1) - SCAN appears on the display. Release the trigger
and the device switches to HOLD mode in order to save the measurement
automatically. The device switches off automatically after approximately
60 seconds if it is not operated again.
Whilst pressing the trigger (1), the laser beam ON/OFF button (2) can be used to
switch the laser on or off, as required. appears on the display.
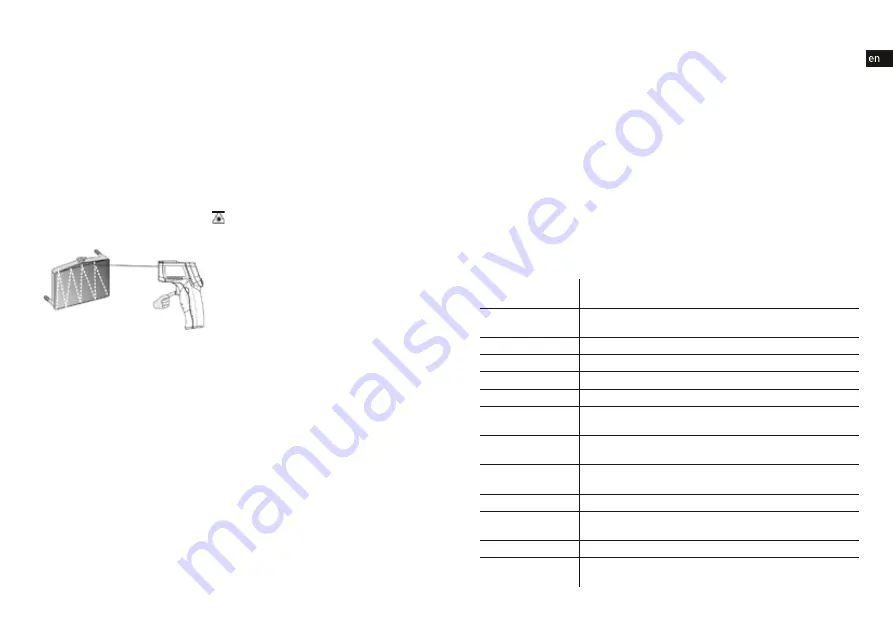
To find cold or hot areas on an object, proceed as follows.
6 | Settings
6.1 | Changing the temperature unit
Switch on the device with the trigger (1). Press button (2) to switch the
temperature unit between degrees Celsius and degrees Fahrenheit. The
respective symbol appears on the display. The temperature unit can only be
changed in MAX, MIN, AVG and DIF modes.
6.2 | Backlight
Switch on the device with the trigger (1). To switch the backlight for the display
on or off, press button (4) whilst holding the trigger (1). The symbol appears on
the display.
6.3 | Calling up values
Press the SET button (5) repeatedly to call up the values MAX-AVG-MIN-DIF-
LAL-HAL-OFFSET-E on the display one by one for the respective measurement.
This device has a memory function – the measured values are displayed again
the next time you switch on.
MAX: Maximum temperature of the preceding measurement
MIN: Minimum temperature of the preceding measurement
DIF: Difference between the MAX and MIN of the preceding measurement
AVG: Average temperature of the preceding measurement
HAL: High temperature alarm - If HAL is selected, buttons 4 and 2 can be used
to set the value at which an alarm is triggered. To save the setting, press the SET
button (5). If the measured value exceeds the set value, the HI symbol appears on
the display and a beep sounds.
LAL: Low temperature alarm - If LAL is selected, buttons 4 and 2 can be used to
set the value at which an alarm is triggered. To save the setting, press the SET
button (5). If the measured value drops below the set value, the LOW symbol
appears on the display and a beep sounds.
OFFSET: Zero offset setting
6.4 | Setting the emission level
Switch on the device with the trigger (1). Press the EMS button (6) to change
the preconfi gured emission value (0.95). You can use buttons 4 and 2 to set the
value. You then confi rm it with the EMS button (6).
7 | Specifi cations
Temperature
measuring range
-50°C to +550°C (-58°F to +1022°F)
Measuring
accuracy
0°C to 550°C (32°F to 1022°F): ± 1.5°C (± 2.7°F) or ± 1.5%
-50°C to 0°C (-58°F to 32°F): ± 3°C (± 5°F)
Resolution
0.1°C (°F)
Reaction time
500 milliseconds
Emission level
0.1 to 1.00 (0.95 preconfi gured)
Spot size
12:1
Operating
temperature
0°C to 40°C (32°F to 104°F)
Humidity in
operation
10% to 95% non-condensing at 30°C
Storage
temperature
-20°C to +60°C (-4°F to +104°F)
Operating voltage
9 V alkaline battery
Battery life
(alkaline)
Approx. 12/22 hours with/without laser
Laser class
2
Laser output
power
< 1 mW


