background image

Subject to change.  

Roto Safe C | C600 | C600 – Tandeo | H600 

IMO_457_DE_v0 

 July 2017 


57

Maintenance

Roto Safe H performance test – Lever handle-operated multi-point locking systems

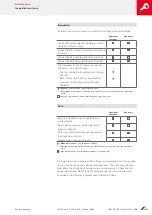
When the door is closed

REQUIREMENT

The door and door frame must be vertical for the performance test.

Check the locking process.

Close the door.
>  The latch must run into the frame component and keep the door closed.

Check opening by lever handle.

With the door closed, push the lever handle all the way down.
> The latch must retract fully so that the door can be opened.

Check locking by lever handle.

Push the lever handle all the way up.
> The latch and all deadbolts must run smoothly and extend fully.
> All additional locks must be in the locking position.

Check for blocking.

Turn the key in the profile cylinder by one rotation in the locking direction. 

> Key must be very easy to turn (max. 1 Nm).

> Lever handle blocks when moved down. (Lever handle can still be moved up.) 
> It must be possible to remove the key.

Check unlocking.

Turn the key in the profile cylinder by one rotation in the unlocking direction. 
> The latch and the deadbolt must retract fully.
> All additional locks must be in the open position.

Have malfunctions remedied by a specialist company.

Summary of Contents for C600

Page 1: ...Roto Safe C C600 C600 Tandeo H600 Multi point locking systems for doors Installation maintenance and operating instructions for aluminium timber and PVC profiles Window and Door Technology ...

Page 2: ...rint Copyright July 2017 Roto Frank AG Window and Door Technology Wilhelm Frank Platz 1 70771 Leinfelden Echterdingen Germany Phone 49 711 7598 0 Fax 49 711 7598 253 info roto frank com www roto frank com ...

Page 3: ...CBZS CHZS CZS 28 C600 H600 with 6 additional locks 4C2QB Quadbolt 29 H542 with 2 additional locks C 30 H542 with 2 twist bolts T 31 C600 Tandeo with 2 automatic bolts A 32 C600 Tandeo with 2 automatic bolts and additional locking device AZS 33 Drilling and routing dimensions on the frame 34 C500 C600 H600 with 4 additional locks E V 34 C500 C600 H600 with 2 4 additional locks CB CH C 35 C500 C600 ...

Page 4: ... 48 Cam adjustment 49 Roto Safe C performance test Cylinder operated multi point locking systems 54 When the door is open 54 When the door is closed 55 Roto Safe H performance test Handle operated multi point locking systems 56 When the door is open 56 When the door is closed 57 Maintenance Maintenance 58 Inspection and care 59 Preservation of the surface finish 60 Transport Transport packaging st...

Page 5: ...ware These instructions should be stored where they can be accessed quickly when required Further markings The following markings are used in these instructions to emphasise instructions results lists references and other elements Marking Explanation Sash Frame Drillings 1 Hardware components 1 Steps First level list List without defined order second level P 12 Cross reference in tables See page 1...

Page 6: ...y Door secured The term door secured means that the door is secured using the latch in the main lock but is not locked Actuating the lever handle on the door causes the latch to retract allowing the door to be opened Door locked The term door locked means that the door is secured by an unsprung rigid deadbolt that has been pushed out of the main lock and or addition ally by other additional locks ...

Page 7: ...ng element dealers installation companies The building element dealers target group includes all companies indi viduals that purchase doors from door manufacturers for resale and instal lation in a construction project without modifying the doors The installation companies target group includes all companies individu als that purchase doors from door manufacturers or from building element dealers ...

Page 8: ...s Responsibility of door manufacturer The door manufacturer must pass the following documents on to building element dealers or the bulider even if a subcontractor installation com pany is involved Installation maintenance and operating instructions They must ensure that the end users are provided with the documents and information intended for them in printed format Responsibility of building ele...

Page 9: ...Insufficient invitation to tender non compliance with installation regulations and non compliance with the application diagrams Increased contamination Claims made by third parties against the hardware manufacturer on account of damage resulting from misuse or failure to comply with the obli gation to give instructions on the part of hardware dealers door manufac turers building element dealers or...

Page 10: ...an immi nently hazardous situation which may lead to death or serious injuries if not avoided WARNING This combination of symbol and signal word indicates a potentially hazardous situation which may lead to death or serious injuries if not avoided CAUTION This combination of symbol and signal word indicates a potentially hazardous situation which may lead to minor or light injuries if not avoided ...

Page 11: ...n be found in the technical documentation for the locking system The locking systems are not suitable for adapting to shape changes and changes to the seal as a result of temperature differences or changes to the building The hardware in its entirety locking system must only be composed of origi nal Roto parts and in the combination specified by Roto for the profile series and its frame sash combi...

Page 12: ...lt or the locking elements are used contrary to their stipulated use to keep the door open The locking elements have been installed or after treated e g painted over in such a way that they no longer work properly Loads which are not suitable for the product and exceed normal manual force are exerted on the lever handle connection Loads which are not suitable for the product and exceed normal manu...

Page 13: ... the risks away from the hazardous area WARNING Placing additional loads on the sash may pose a risk of injury and cause property damage Refrain from placing additional loads on the sash CAUTION Wind poses a risk of injury Avoid exposing the open sash to wind Lock doors in windy and draughty conditions CAUTION Introducing obstacles into the opening between sash and frame may pose a risk of injury ...

Page 14: ...c functions to a 17 point lock Further options such as additional locking device or ID latch are additional possibilities for individual requirements Roto Sil Nano standard surface Roto Sil Nano coating technology offers the highest available level of sur face protection Systematic quality checks with the most stringent testing requirements ensure that each individual component in Roto Safe multi ...

Page 15: ...ntamination in the upper area of the door leaf e g plas ter residues must not be wiped towards the lock faceplate contamina tion can enter behind the lock faceplate of the lock and then block the lock Lubricate locking points latch deadbolt additional lock at least once per year CAUTION Using incorrect lubricants may cause property damage Substandard lubricants can prevent the hardware from workin...

Page 16: ...sing suitable supports run up blocks wedges etc Do not remove the cylinder fixing which is a transport safety mechanism until you are about to install the cylinder The lock area of the door leaf must not be drilled through when the lock is installed e g for protective hardware Install the cylinder without subjecting it to stress and align it 90 to the door leaf Fit long plates and rosettes without...

Page 17: ...stainless steel screws on the Roto Sil Nano surface Use stainless steel screws on stainless steel components Manufacture door constructions with the specified axis dimensions so that it is always possible to ensure that the locks operate properly The door or door leaf must not be carried by the lever handle When an original cylinder is not installed only lock and unlock the door using the Roto uni...

Page 18: ... entitled Security stipulated use Insufficient invitation to tender Failure to comply with installation regulations Increased contamination Claims made by third parties against the hardware manufacturer on account of damage resulting from misuse or failure to comply with the obli gation to give instructions on the part of hardware dealers door manufac turers building element dealers or the builder...

Page 19: ...rgy efficiency Powerful espagnolette for closing the door tightly Automatic clearance adjustment with the V cam bolt power wedge combination lock and Quadbolt Large gasket compression adjustment range for permanently tight shutting doors Quality Certified continuous operation characteristics for more than 200 000 actua tions ensure permanent functional reliability Corrosion resistant surfaces for ...

Page 20: ...ergy efficiency Powerful automatic closing mechanism for closing the door tightly Automatic clearance adjustment for secure locking even on doors which are slightly warped Large gasket compression adjustment range for permanently tight shutting doors Quality Certified continuous operation characteristics for more than 200 000 actua tions ensure permanent functional reliability Corrosion resistant ...

Page 21: ...bination lock offer maximum protection against burglary Energy efficiency Powerful espagnolette for closing the door tightly Automatic clearance adjustment with the V cam bolt power wedge and combination lock Large gasket compression adjustment range for permanently tight shutting doors Quality Certified continuous operation characteristics for more than 200 000 actuations ensure permanent functio...

Page 22: ...atible E cam 5 point lock V cam 5 point lock RC 1 compatible Quad bolt 17 point lock RC 4 compatible Possible additional locks for Roto Safe C600 Tandeo Automatic bolt 3 point lock RC 2 compatible Possible additional locks for Roto Safe H600 Bolt 3 point 5 point lock RC 2 compatible Power wedge 3 point 5 point lock RC 4 compatible Bolt power wedge combination 3 point 5 point lock RC 4 compatible E...

Page 23: ... length of the fixing screws must be selected according to the profiles used The manufacturer must ensure that the hardware components are adequately secured and if necessary contact the screw manufacturer Do not use any acid cross linked sealing compounds that could lead to corrosion of the hardware components Screw connections for PVC WARNING Incorrect screw connections may lead to serious injur...

Page 24: ...s for aluminium WARNING Incorrect screw connections may lead to serious injuries The hardware components can be pulled out of the sash if they are not screwed through a profile wall that is at least 6 mm thick in total or screwed down using rivet nuts f fSelect the length of the screws so that they will hold in the aluminium profile Alternatively insert addi tional aluminium profiles If rivet nuts...

Page 25: ...tional locks E V Drilling and routing dimensions on the sash C500 C600 H600 with 4 additional locks E V Pattern A B C F H X G K L M N O 1825 2165 300 998 2225 2200 300 998 2227 2500 300 998 C 36 11 5 4 Travel 20 Centre of E V cam Open position Centre of E V cam Locked position H F B Handle height at various distances G 1020 1018 1016 1013 1000 E 92 94 90 88 85 72 MN 22 20 18 15 2 ...

Page 26: ...82 400 260 998 1380 0207 2400 738 982 200 260 998 1980 0275 1900 738 550 200 260 998 1548 0293 2700 738 1282 300 260 998 2280 0605 1700 438 382 300 560 998 1380 0615 1900 438 482 400 560 998 1480 0813 2500 738 982 368 482 400 260 630 998 1480 1980 0817 2200 738 752 368 382 300 260 630 998 1380 1750 5253 2200 368 382 300 630 998 1380 5400 2400 1310 652 600 260 918 1570 16 241 16 16 16 16 176 176 17...

Page 27: ...817 2200 738 752 368 382 300 260 630 998 1380 1750 0819 2500 738 982 368 382 300 260 630 998 1380 1980 Installation Drilling and routing dimensions on the sash wood PVC aluminium C500 C600 H600 with 2 4 additional locks and ID latch CBTF CHTF CTF D D 20 45 16 16 176 12 6 3 Stulpbreite B C F H A G 17 E 20 RZ 25 117 124 Ø 20 D D 20 40 45 176 16 241 16 156 MN 70 N O M 16 176 L K Faceplate marking Fac...

Page 28: ... and additional locking device CBZS CHZS CZS Pattern A B C F H X G K L M N O 0217 2200 738 752 382 300 260 998 1380 1750 0219 2400 738 982 382 200 260 998 1380 1980 0817 2200 738 752 368 382 300 260 630 998 1380 1750 0819 2500 738 982 368 382 300 260 630 998 1380 1980 176 X 156 C H A F B 176 K L M G N O E MN 17 241 176 17 70 124 117 16 45 D 20 D 20 D 20 Faceplate marking D 20 RZ 25 45 16 16 16 16 ...

Page 29: ...on the sash C600 H600 with 6 additional locks 4C2QB Quadbolt Pattern A B C F H I J X K L LL M N O OO 6291 2200 782 782 516 516 250 250 300 216 482 748 998 1248 1514 1780 45 16 16 176 176 16 C X 176 16 241 MN 20 RZ 25 17 D D 20 16 16 176 117 124 E G 70 Ø 20 16 A H B F I LL M N O OO 45 176 J 176 K L 12 6 3 Faceplate width Faceplate marking Handle height at various distances G 1020 1018 1016 1013 100...

Page 30: ...od PVC aluminium H542 with 2 additional locks C Drilling and routing dimensions on the sash H542 with 2 twist bolts T Pattern A B C K L M N O 0203 1783 738 752 146 5 884 5 1636 5 0207 2013 738 982 146 5 884 5 1866 5 176 16 16 22 20 D 20 45 30 20 22 O C 279 113 166 D 20 E92 E92 A 16 45 20 B 176 K M 12 6 3 Faceplate width Faceplate marking ...

Page 31: ...od PVC aluminium H542 with 2 twist bolts T 16 22 20 D 20 16 75 75 20 30 20 22 152 O C 92 B 152 K 92 279 113 166 D 20 E92 E92 M A 16 12 6 3 Faceplate width Faceplate marking Drilling and routing dimensions on the sash H542 with 2 twist bolts T Pattern A B C K L M N O 1443 1914 698 948 143 5 841 5 1789 5 1647 1744 771 705 143 5 914 5 1619 5 ...

Page 32: ...h C600 Tandeo with 2 automatic bolts A Pattern A B C F H X G K L M N O 0201 2200 738 632 400 260 998 1630 0203 2200 738 752 300 260 998 1750 0205 1900 738 382 400 260 998 1380 0207 2400 738 982 200 260 998 1980 0293 2700 738 1282 300 260 998 2280 A 20 RZ 25 Ø 20 D D 20 Faceplate marking 16 241 16 16 O 156 156 53 53 K B C M MN G E 17 124 117 70 12 6 3 Faceplate width Handle height at various distan...

Page 33: ... device AZS Drilling and routing dimensions on the sash C600 Tandeo with 2 automatic bolts and additional locking device AZS Pattern A B C F H X G K L M N O 0217 2200 738 752 382 300 260 998 1380 1750 A 20 RZ 25 Ø 20 D D 20 D 20 D 20 Faceplate marking 16 241 16 16 O 156 156 16 156 53 53 K B N C H M MN G E 17 17 124 117 70 12 6 3 Faceplate width Handle height at various distances G 1020 1013 E 92 9...

Page 34: ... profile no routing required No routing is required for aluminium strikers for 4 V lock Request the routing drawing for wood strikers Installation Drilling and routing dimensions on the frame C500 C600 H600 with 4 additional locks E V C 36 11 5 4 Travel 20 Centre of E V cam Open position Centre of E V cam Locked position H F B ...

Page 35: ...stallation Drilling and routing dimensions on the frame C500 C600 H600 with 2 4 additional locks CB CH C Carry out routing in accordance with the adjacent drawing NOTE The routing refers to PVC and aluminium strikers Request the routing drawing for wood strikers NOTE The routing depth depends on the leg height on the striker Example Combination striker Striker height 24 5mm Leg height 7mm Min rout...

Page 36: ...rs Request the routing drawing for wood strikers NOTE The routing depth depends on the leg height on the striker Example Combination striker Striker height 24 5mm Leg height 7mm Min routing depth 17 5mm NOTE The routing axis depends on the profile 20 25 24 48 44 15 8 19 19 20 7 Faceplate marking 19 135 135 B F C 82 75 135 R 5 Drilling and routing dimensions on the frame C500 C600 H600 with 2 4 add...

Page 37: ...rs Request the routing drawing for wood strikers NOTE The routing depth depends on the leg height on the striker Example Combination striker Striker height 24 5mm Leg height 7mm Min routing depth 17 5mm NOTE The routing axis depends on the profile 20 25 24 48 44 15 20 8 19 19 7 Faceplate marking 19 135 135 B F C 82 75 135 R 5 Drilling and routing dimensions on the frame C500 C600 H600 with 2 4 add...

Page 38: ...outing drawing for wood strikers NOTE The routing depth depends on the leg height on the striker Example Combination striker Striker height 24 5mm Leg height 7mm Min routing depth 17 5mm NOTE The routing axis depends on the profile R5 R5 R5 R5 R5 R5 19 19 19 9 5 14 5 25 20 15 20 19 19 19 15 135 135 82 75 135 44 48 B F H J I C 135 135 135 Routing axis Faceplate marking Drilling and routing dimensio...

Page 39: ...C F H 1443 738 632 1647 738 752 Carry out routing in accordance with the adjacent drawing NOTE The routing refers to PVC and aluminium strikers Request the routing drawing for wood strikers NOTE The routing depth depends on the leg height on the striker Example Combination striker Striker height 24 5mm Leg height 7mm Min routing depth 17 5mm NOTE The routing axis depends on the profile Routing axi...

Page 40: ... Roto Safe C C600 C600 Tandeo H600 Subject to change Installation Drilling and routing dimensions on the frame H542 with 2 twist bolts T NOTE Strikers for H542 with 2 twist bolts are special strikers request the routing drawing ...

Page 41: ...cordance with the adjacent drawing NOTE The routing refers to PVC and aluminium strikers Request the routing drawing for wood strikers NOTE The routing depth depends on the leg height on the striker Example Combination striker Striker height 24 5mm Leg height 7mm Min routing depth 17 5mm NOTE The routing axis depends on the profile Drilling and routing dimensions on the frame C600 Tandeo with 2 au...

Page 42: ...d aluminium strikers Request the routing drawing for wood strikers NOTE The routing depth depends on the leg height on the striker Example Combination striker Striker height 24 5mm Leg height 7mm Min routing depth 17 5mm NOTE The routing axis depends on the profile Routing axis 11 15 95 48 44 95 C 82 75 B 19 5 14 5 9 5 25 15 15 8 7 11 19 5 Faceplate marking Drilling and routing dimensions on the f...

Page 43: ...ion advice Lever operated espagnolette Cut the lever operated espagnolette to the required length Position the lever operated espagnolette and screw down with 8 or 9 screws depending on the version minimum screw length 40mm Move cover plate 1 in the longitudinal direction and screw down at point 2 1 2 ...

Page 44: ... Remove the cover cap Installation 1 Unlock the lock 2 Push the handle down until the hole position for installing the changeover switch is free 3 Keep the handle pushed down Clip in the change over switch rotated approx 25 to the left 4 Turn the changeover switch so that it is vertical NOTE Ensure that the changeover switch is in night position rib vertical 5 Release the handle ...

Page 45: ...n the frame The additional locks remain retracted The door can now be pushed without using the handle and opened without using a key This requires the electrical opener in the frame component to be set to day function see detail NOTE The VDS certificate is no longer valid with the day function activated Deactivating the day function 1 Push the handle all the way down 2 Keep the handle pushed down ...

Page 46: ...46 July 2017 IMO_457_DE_v0 Roto Safe C C600 C600 Tandeo H600 Subject to change ...

Page 47: ...sh pin Ø max 3mm into the inspection opening Caution The latch reversal may only carried out when the lock is in a vertical position and unlocked Do not activate the spindle hole while doing so 2 Push the pin down slightly 3 Latch comes loose and can be removed 4 5 4 Turn the latch 5 Insert the latch straight into the shaft and push it in Ø max 3mm ...

Page 48: ...e latch 180 A Move the slider upwards B 1 Push the assembly tool in as far as it will go 2 Remove the latch C Turn the latch 180 Note do not lubricate automatic bolts D 1 Insert the spring element into the opening in the faceplate 2 Push latch over deadbolt E 1 Keep the trigger mechanism pushed down 2 Push the latch in fully F 1 Push the latch in fully 2 Push the deadbolt in after Adjustment Latch...

Page 49: ...adjustment inmm 0 8 Basic setting E cam E cam adjustment instructions Can be adjusted using hex key 4mm Adjustment range in Gasket com pression adjustment inmm 0 8 Basic setting 1 6mm automatic height adjustment V cam adjustment instructions Can be adjusted using hex key 2 5mm E cam strikers V cam strikers 5 3 Lower edge of E cam Run in edge of frame component Lower edge of V cam Run in edge of fr...

Page 50: ...e C C600 C600 Tandeo H600 Subject to change Adjustment Adjustment instructions Latch deadbolt striker Horizontal stop adjustment 1 Adjustment range via eccentric screws Tool hex key size 3 1 5 mm 2 Adjust the stop adjustment range 1 5 mm ...

Page 51: ...tment instructions Latch deadbolt striker with replaceable part Horizontal stop adjustment 1 Loosen hexalobular socket screws by half a turn 180 but do not unscrew fully Tool hexalobular key T20 2 Adjust the stop adjustment range 2mm 3 Retighten hexalobular socket screws Tool hexalobular key T20 ...

Page 52: ...0 C600 Tandeo H600 Subject to change Adjustment Adjustment instructions PVC combination lock Adjusting the additional locking striker 1 Loosen screws but do not unscrew them fully Tool hex key size 3 2 Adjust the striker adjustment range 1 5mm ...

Page 53: ...7 53 Adjustment Adjustment instructions Wood combination lock Horizontal stop adjustment 1 Loosen screw if in place 180 but do not unscrew it fully Tool hexalobular key T20 2 Adjust the stop adjustment range 1 5mm Tool hex key size 3 3 Retighten screw Tool hexalobular key T20 ...

Page 54: ...e initial position Check that the latch is working properly Push the lever handle all the way down The latch must retract When pushed down the latch may protrude over the lock faceplate of the lock by a maximum of 2 mm Release the lever handle The latch must extend fully Turn the key in the profile cylinder in the unlocking direction The latch must retract fully Check that the deadbolt is working ...

Page 55: ...eely move into the frame components Check opening by lever handle With the door closed push the lever handle all the way down The latch must retract fully so that the door can be opened Tandeo the latch and all deadbolts must retract so that the door can be opened Check locking by key With the door closed turn the key in the locking direction The key must be easy to turn The latch and all deadbolt...

Page 56: ...ushed down the latch may protrude over the lock faceplate of the lock by a maximum of 2 mm Release the lever handle The latch must extend fully Turn the key in the profile cylinder in the unlocking direction The latch must retract fully Check locking by lever handle Push the lever handle all the way up The latch and all deadbolts must be extended fully 20 and 11 mm All additional locks must be in ...

Page 57: ... so that the door can be opened Check locking by lever handle Push the lever handle all the way up The latch and all deadbolts must run smoothly and extend fully All additional locks must be in the locking position Check for blocking Turn the key in the profile cylinder by one rotation in the locking direction Key must be very easy to turn max 1 Nm Lever handle blocks when moved down Lever handle ...

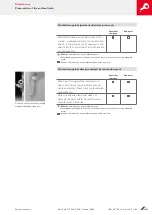
Page 58: ...ews Replace components if required Lubricate all movable parts with acid free and resin free oil from a specialist retailer Lubricate steel strikers with acid free and resin free grease from a specialist retailer Must be carried out by a specialist company Must not be carried out by the end user the end user must not perform any assembly work May be carried out by a specialist company or the end u...

Page 59: ...must not perform any assembly work May be carried out by a specialist company or the end user Care Specialist company End users Keep the hardware free of deposits and contaminants Never use aggressive acidic cleaners or abrasive cleaners Only use mild pH neutral cleaning agents that have been diluted Always clean using a soft cloth Must be carried out by a specialist company Must not be carried ou...

Page 60: ...r the end user Protection against contamination Specialist company End users Remove deposits and contaminants caused by construction materials construction dust plaster stucco mortar cement etc or the like before they bond with water Keep the hardware free of deposits and contaminants Never use aggressive acidic cleaners or abrasive cleaners Only use mild pH neutral cleaning agents that have been ...

Page 61: ... May be carried out by a specialist company or the end user Protection against damage caused by renovation work Specialist company End users When performing surface treatment on doors do not treat any hardware compo nents and protect them from contamination caused by this Only use adhesive tape that does not damage the paint coats Consult the door manufacturer if in doubt Must be carried out by a ...

Page 62: ...ective devices Only use transport safety devices that have been adapted to the specific clearance During transport and handling the door leaf must be secured against the frame using suitable supports run up blocks wedges etc Do not remove the cylinder fixing transport safety mechanism until you are about to install the cylinder NOTE During transport and loading and unloading processes especially w...

Page 63: ...al Immediately check the delivery for completeness and transport damage on receipt NOTE Submit a complaint about any defects as soon as they are identi fied Claims for damages may only be made within the applicable reclamation period Separate hardware components from the door and dispose of together with metal scrap ...

Page 64: ...g Beschlagsysteme für große Schiebefenster und türen Roto Door Aufeinander abgestimmte Beschlagtechnologie rund um die Tür Roto Equipment Ergänzende Technik für Fenster und Türen The Tilt Turn hardware system for windows and balcony doors Hardware systems for large sliding windows and doors Compatible hardware technology for all things doors Additional technology for windows and doors From a singl...

Reviews: