background image

8

Actuator Setting Tool Pro v1.1

7.  Bluetooth Device Search Mode

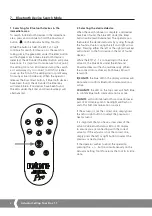
1  Searching for Bluetooth devices in the  
immediate area

To search for Bluetooth devices in the immediate 
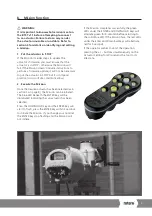
area, press and continue to hold the Download 
button ( 


) on the Actuator Setting Tool 

Pro

While the button is held, the BTST v1.1 will 
continue for search for devices. As the search is 
taking place, the green LED under the Enter button 
will flash green. Each time a Bluetooth device is 
detected, the LED under the Enter button will pulse 
blue once. It is important to make sure to not point 
the setting tool at an IrDA device during the search 
as it will always try to connect to IrDA first (either 
cover up the front of the setting tool or point away 
from any active IrDA device). When the operator 
releases the Download button, if Bluetooth devices 
have been found, the LED under the Enter key 
will remain blue. If no devices have been found, 
the LEDs under the Enter and Download keys will 
alternate red.

2  Selecting the desired device

When the search (above) is complete, and devices 
have been found, the blue LED under the Enter 
button will remain illuminated. The operator can 
then select the desired actuator by cycling through 
the found actuators using the left and right arrow 
keys. Pressing either the left or the right arrow keys 
will connect to the first device in the list of found 
devices.

While the BTST v1.1 is connecting to the next 
actuator, the blue LEDs under the Enter and 
Download keys will flash simultaneously. When 
the connection is achieved, both blue LEDs will 
remain lit.

IQ3 UNITS 

the blue LED in the display window will 

illuminate to confirm Bluetooth communication is 
active.

CVA UNITS 

the LED on the top cover will flash Blue 

to confirm Bluetooth communication is active.

SI UNITS

 will confirm Bluetooth is active on lower 

part of LCD display and its backlight will flash on 
and off whilst communication is active.

If the actuator is not the correct one, simply press 
the left or right button to select the previous or 
next actuator.

It is important that you have a clear view of the 
actuator's Bluetooth status LED or LCD display 
to ensure you are connecting with the correct 
actuator. If the actuator is not the correct one, 
simply press the left or right button to select the 
previous or next actuator.

If the operator wishes to abort the operation, 
pressing the  + / -  buttons simultaneously on the 
Actuator Setting Tool 

Pro

 returns the tool to its idle 

state.

Summary of Contents for BTST v1.1

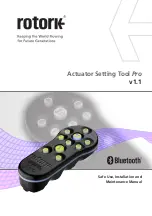
Page 1: ...Actuator Setting Tool Pro v1 1 Safe Use Installation and Maintenance Manual...

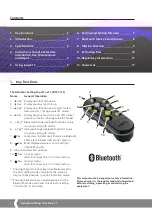
Page 2: ...ption setting initiate BT search 9 Infra red transmitter window 10 Key Close actuator Non functional on SI or CVA actuators 11 Key Open actuator Non functional on SI or CVA actuators Pressing these tw...

Page 3: ...in the instructions section below Utilisez uniquement les types de piles approuv s d taill s dans la section instructions ci dessous WARNING Substitution of components may impair intrinsic safety La s...

Page 4: ...ents that degrade polymeric materials Regular inspections must be performed to confirm enclosure damage is not apparent Do not use the equipment if damage is present 3 The BTST v1 1 is not intended to...

Page 5: ...e missions have been cleared BTST v1 1 Slave Mode Place the setting tool into its Slave mode so that it can be found by the Insight 2 software Press and hold the Enter and Download buttons simultaneou...

Page 6: ...is normal behaviour 2 Once the search is complete any discovered devices will be listed in the left hand mode panel 3 Right click the Bluetooth Setting Tool entry and click connect 4 The blue LED und...

Page 7: ...s serial number If you want to collect files from more than one actuator click the send to all checkbox 6 Finally enter the relevant password for the actuator For configuration and datalogger refer t...

Page 8: ...d The operator can then select the desired actuator by cycling through the found actuators using the left and right arrow keys Pressing either the left or the right arrow keys will connect to the firs...

Page 9: ...2 Execute the Mission Once the desired actuator has been selected as in section 2 on page 8 the Mission can be initiated The blue LED beneath the ENTER key will be illuminated indicating that an actu...

Page 10: ...me the tree will indicate the presence of one or more files and these files will be located by actuator type Clicking on a file will automatically extract and display the file Once the file has been e...

Page 11: ...he user s authority to operate the equipment CAUTION EXPOSURE TO RADIO FREQUENCY RADIATION This device must not be co located or operating in conjunction with any other antenna or transmitter Canada I...

Page 12: ...d and change specifications without prior notice Published data may be subject to change For the very latest version release visit our website at www rotork com The name Rotork is a registered tradema...

Reviews: