


Installation and Connection
27 of 132
Publication S177E V2.0 Issue 03/05
7
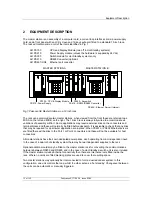
INSTALLATION AND CONNECTION
The master station is now ready for installation and connecting to the loop.
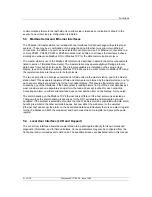
7.1 Mounting
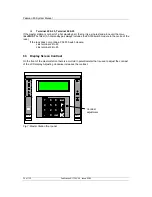
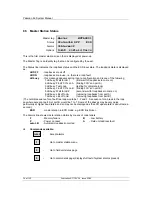
The master station rack should be mounted
horizontally in a suitable frame or cabinet. The
height of the front should be between 1.0 m
and 1.7 m above the floor so that the screen
may be viewed and the keys accessed. There
should be no equipment in front of the master
station. At the rear ensure sufficient space is
provided to access the terminals and
connectors.
Ideally both front and rear access to the unit
should be provided. However if rear access is
not possible, ensure sufficient cable length is
allowed for the rack to be withdrawn and
placed safely when checks to the connections
are required.
All connections are to the rear of the rack.
7.2 Mains
Power
The individual master stations in the rack each
require their own power feed. When ac power
is used this is connected by an IEC connector.
The unit will operate on an ac supply between
90 and 264 volts, 43 to 440 Hz, single phase.
[For dc systems a suitable dc supply must be
arranged (24 V dc nominal, range 21-30 V dc),
this is connected to the screw terminals on the
rear of the unit, and each master station still
requires its own supply feed.]
It is essential that an Earth connection is made
to the master station via the IEC connector,
and/or the safety earth stud.
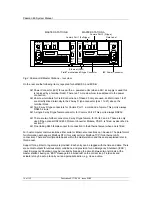
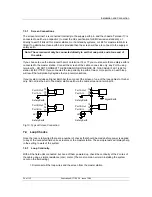
System Terminals
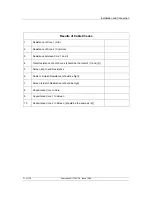
SWITCH
1
2
3
4
5
6
7
LAMP
SWITCH
1
2
3
4
5
6
7
Masterstations A
Masterstations B
Safety Earth
Signal Earth
1.0 m
1.7 m
Comms Ports
Fig 8: Typical system cabinet


