4
cm
30 28
26 24
22 20
18 16
14 12
10
Z
I
P
y
B
O
S
C
H
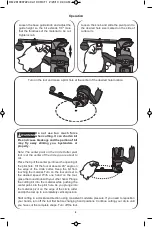
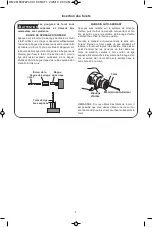
Operation
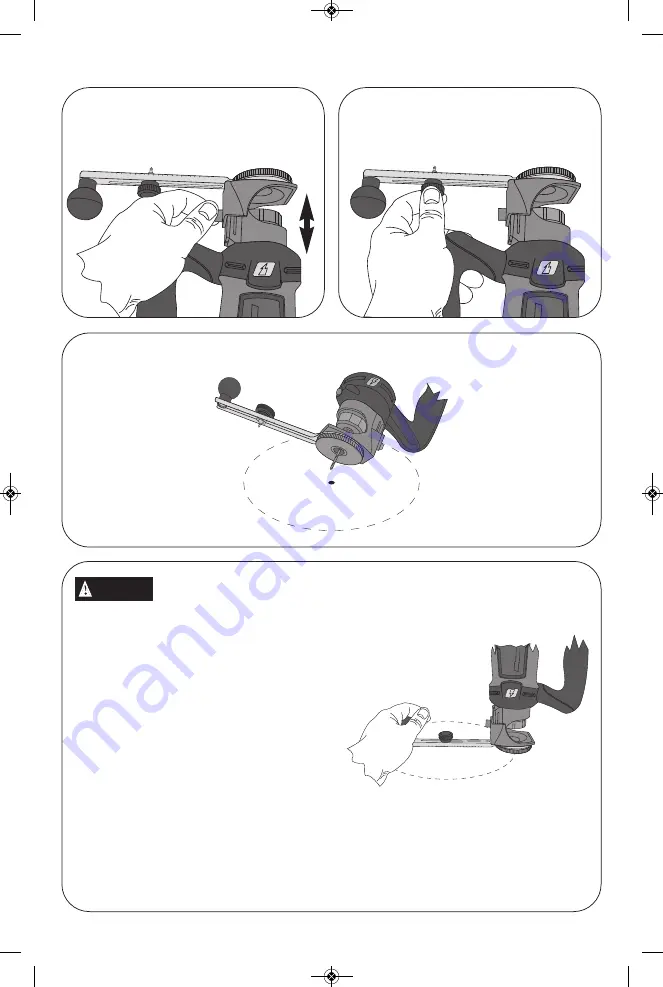
Loosen the base guide knob and adjust the
guide height so the bit extends 1/8" more
that the thickness of the material to be cut.
Tighten knob.
4
5
6
7
8
9
1
1
1
2
cm
30 28
26 24
22 20
18 16
14 12
10
Z
I
P
b
y
B
O
S
C
H
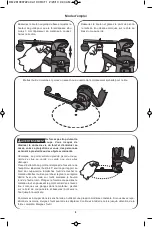
Loosen the knob and slide the pivot point to
the desired hole size marked on the side of
cutter arm.
Turn on the tool and make a pilot hole at the center of the desired hole location.
R
O
T
O
Z
I
P
R
Z
5
b
y
B
O
S
C
H
4
5
6
7
8
9
1
0
11
12
I
NC
H
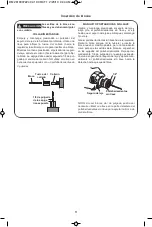
Note: The center point on the Circle Cutter pivot
foot is at the center of the circle you are about to
cut.
Place the tip of the center point near the opening of
the pilot hole. Tilt the tool at about a 45° angle on
the edge of the circle cutter. Keep the bit from
touching the material. Turn on the tool and set to
the desired speed. With one hand on the tool,
grasp the round knob with your other hand. Plunge
the cutting bit into the material while pushing the
center point into the pilot hole. As you plunge into
the material, pivot on the edge of the circle cutter
and tip the tool up to a completely vertical position.
Start cutting in a clockwise direction using consistent moderate pressure. If you need to reposition
your hands, turn off the tool first before changing hand positions. Continue cutting your circle until
you have cut the complete shape. Turn off the tool.
Do not use too much force
when cutting. It can shorten bit
life and cause breakage and the portion of bit
may fly away striking you, bystanders or
property.
WARNING
DM 2610007224 02-10:CRCT 1 2/23/10 9:43 AM Page 4

