-15-
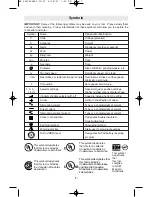
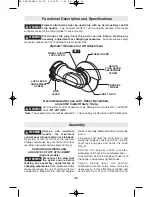
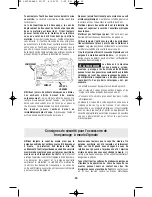
locks to engage square end of drive bit into
attachment.
5. Position attachment as shown and lock the
lock lever.
Use the allen wrench to adjust the lock lever
adjustment screw.
Overtightening the lock lever
adjustment screw
can
permanently damage the locking mechanism.
Test the tightness of the lever after each full
turn of the adjustment screw.
!
CAUTION
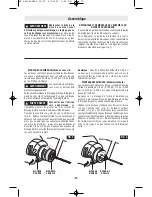
LOCK LEVER
COLLAR
DRIVE BIT
KEYLESS CHUCK
WHEEL GUARD
LOCK LEVER
GUARD
LOCK LEVER
ADJUSTMENT
SCREW
SHAFT LOCK
LOCK LEVER
ADJUSTMENT SCREW
FIG. 2
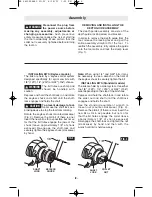
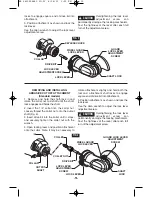
LOCK LEVER
COLLAR
DRIVE BIT
COLLET NUT
COLLET
OUTPUT
SHAFT
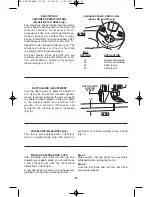
REMOVING AND INSTALLING
ABRASIVE CUT OFF ATTACHMENT
(Standard models)
1. Depress and hold the shaft-lock in and
rotate the collet nut and shaft until the shaft-
lock engages and holds the shaft.
2. Insert the 1/4” collet into the collet nut.
Loosely thread the collet nut onto the output
shaft (Fig. 3).
3. Insert drive bit into the collet until it stops,
and securely tighten the collet nut with the
wrench.
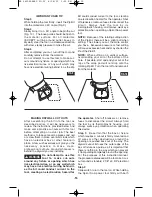
4. Open locking lever and position attachment
onto the collar. Note: It may be necessary to
rotate attachment slightly and hold both the
tool and attachment shaft locks to engage
square end of drive bit into attachment.
5. Position attachment as shown and lock the
lock lever.
Use the allen wrench to adjust the lock lever
adjustment screw.
Overtightening the lock lever
adjustment screw can
permanently damage the locking mechanism.
Test the tightness of the lever after each full
turn of the adjustment screw.
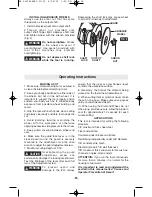
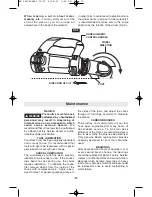
WHEEL GUARD
LOCK LEVER
GUARD LOCK LEVER
ADJUSTMENT
SCREW
SHAFT
LOCK
LOCK LEVER
ADJUSTMENT
SCREW
FIG. 3
!
CAUTION
RZ 2610954840 07-07 8/16/07 3:55 PM Page 15

