2015-2017 5.0L Mustang Phase 1/2 RHD ROUSHcharger Kit
SECTION A – DISASSEMBLY
1316-RHD-AA 12152016
10
800.59.ROUSH
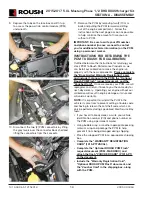
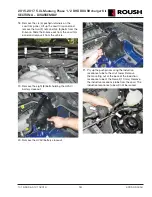
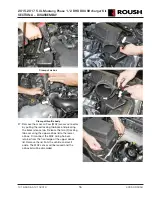
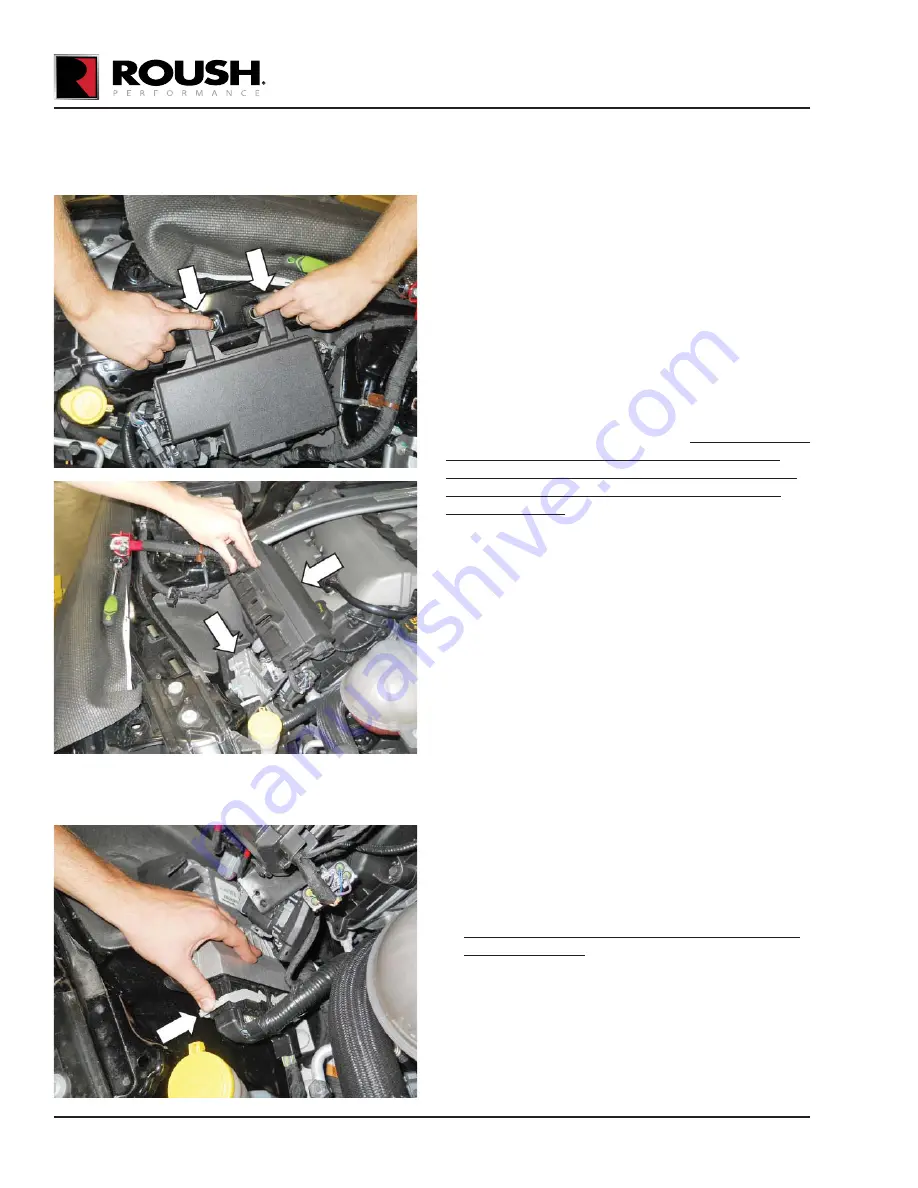
11. Remove the PCM by removing two (2) 10 mm
bolts and pulling the PCM forward and lifting
out of the engine compartment. Follow the
instructions on the next page as soon as possible
to help minimize the amount of time you are
without a PCM.
IMPORTANT: Be sure to write your VIN number
and phone number (in case we need to contact
you for additional vehicle information) on the PCM
using a permanent marker.
INSTRUCTIONS FOR RETURNING THE
PCM TO ROUSH FOR CALIBRATION
Outlined below are the instructions for returning your
stock PCM to Roush Performance Products so we
can install our calibration to make the engine run
properly with the new components.
Please complete
the “Base Limited Warranty Registration” card
and include it, along with the PCM, the “Optional
Roush PCM Flash” request document, and the
“Voucher Card”.
Once we receive your PCM, we will
reprogram and return it back to you the same day for
next-day delivery. Operating your engine without our
calibration will result in engine damage or failure and
will void all warranty.
NOTE:
It is important to reinstall the PCM in the
vehicle it came from to prevent setting a trouble code
and having to relearn the anti-theft code which can
only be performed using specialized Ford Service Bay
tools.
• If you haven’t already done so, write your vehicle
identifi cation number (VIN) and phone number on
the PCM using a permanent marker.
• Using bubble wrap, or another appropriate packing
material, wrap and package the PCM to help
prevent it from being damaged during shipping.
• Place the wrapped PCM in an appropriate shipping
box.
•
Complete the “WARRANTY REGISTRATION
CARD” (1315-P1TVSCAL).
•
Complete the “Optional ROUSH PCM Flash”
request document (PCM-FLASHDOC) and
attach the fl ash "VOUCHER CARD" (P1315-P1)
to the document.
•
Include the "Warranty Registration Card",
“Optional ROUSH PCM Flash” document, and
the “Voucher Card” in the shipping box, along
with the PCM.
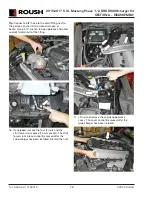
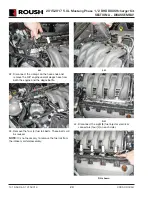
9. Depress the tabs on the fuse box and lift it up
to access the powertrain control module (PCM)
underneath.
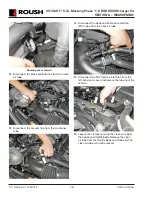
10. Disconnect the two (2) PCM connectors by lifting
the grey levers over the connector back shell and
lifting the connectors from their sockets.


