65/74
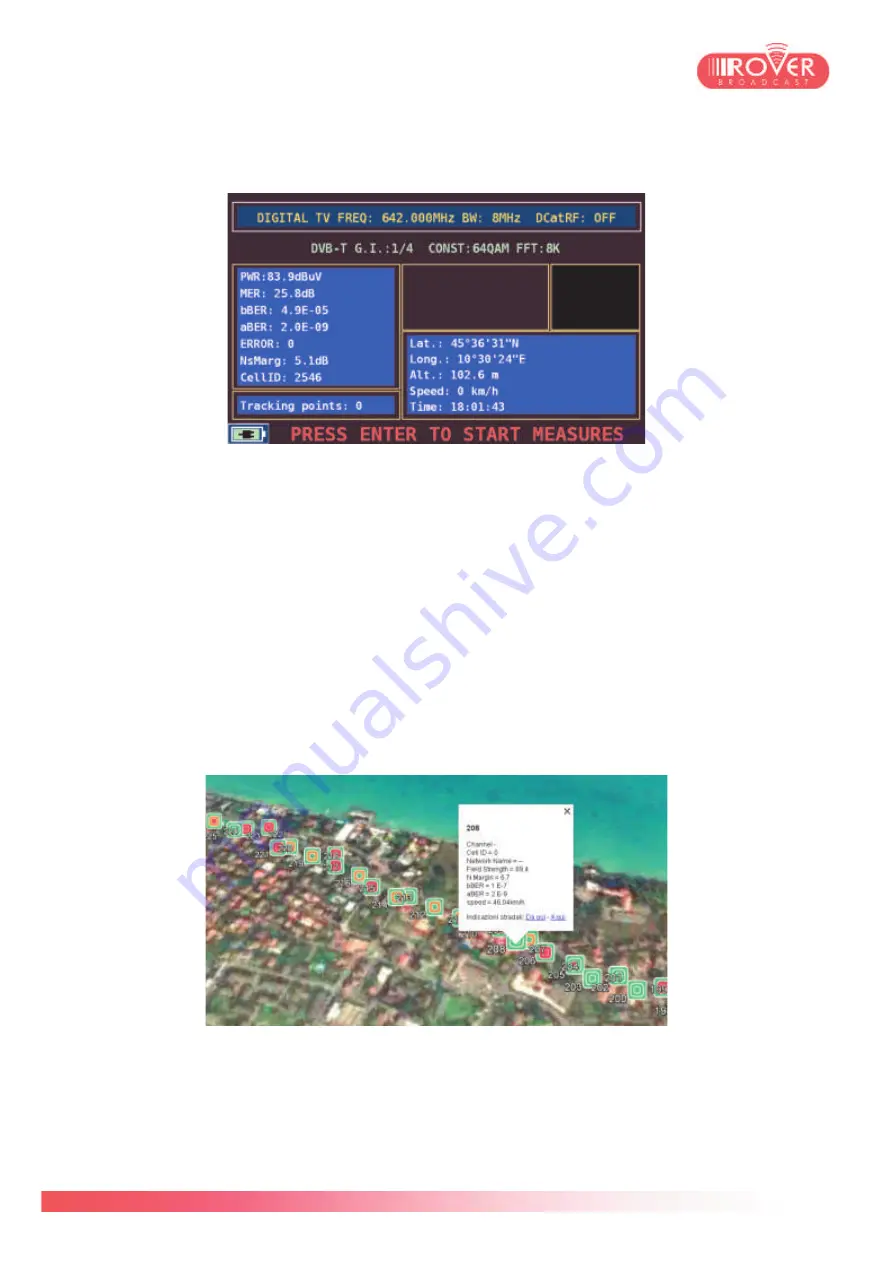
Once finished to set the desired parameters, pressing
START MEASURE
will toggle the meter into
the Test Drive mode:
Before actually starting to collect measurements, it is necessary to wait that the meter has
correctly locked and demodulated the configured signal (up to 10 seconds) and the GPS provide
valid data (LAT, LOT, ALT, SPEED and UTC time will be displayed on screen).
Pressing ENTER will start the measurements: it is possible to see the progress of the campaign
looking at the number of samplings done and indicated by
Tracking points
.
Pressing again ENTER will stop the measurements and automatically toggle the meter to the
HOME screen. Now the file containing the tracked points has been saved on the USB dongle.
Unplug it from the meter and plug into your PC to retrieve the file and browse the recordings.
Using the ROVER Test Drive application it will be then possible to convert the recordings to a kml
file and import it into Google Earth to see the geo-referenced measurements on the map*.
(*Test Drive software is provided in bundle with the Test Drive APP for the meter. Contact us for
upgrade information and upgrade support).
Summary of Contents for HD PRO TAB
Page 1: ...HD PRO TAB User Guide Version 2 4 Released March 2014 ...
Page 2: ...2 74 Blank page ...
Page 6: ...6 74 Blank page ...
Page 18: ...18 74 ...
Page 38: ...38 74 BlankPage ...
Page 43: ...43 74 as shown in the following picture ...
Page 54: ...54 74 ...
Page 67: ...67 74 available files those files normally include firmware upgrade and or channel plans ...
Page 71: ...71 74 Blank Page ...
Page 74: ...74 74 ...


