Economy Knee Scooter
Set Up Instructions:
Please follow the step by step instructions on the following pages to
properly assemble your KneeRover
®
scooter. The diagram below
identifies the key components of the scooter to aid with assembly.
Visit kneerover.com for assembly videos.
Setup Instructions:
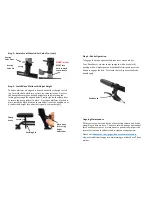
Step 1: Install Handlebars & Steering Column
Please
carefully complete all steps
before operating your new KneeRover
scooter. The steering column and handlebars will be separate and in a
folded position when unpacking. Insert the handlebars into the steering
column, making sure not to twist the brake cables. Next, raise the steering
column and push the clamp lever to the left to allow security pin to lock into
place (as shown below). Raise the clamp lever upward and tighten by
turning it clockwise. Finally, push clamp lever down firmly to secure the
steering column (as shown below). Reverse these steps when needing to
lower steering column for transport.
Step 2: Rotate Front Wheels & Set Guide Pin
Pull down the guide pin ring as shown below, and turn the handlebars so
that the front wheels and brake handles are facing forward.
The
BACK
sticker
MUST be facing back toward the rear wheels with the guide
pin between the guide stops.
(see photos on top of next page). Be sure
that the brake cables are not twisted. The front of the scooter should look
similar to the picture on the previous page.
Hand Brake Levers
Handlebar Height
Adjustment Knob
Quick Release
Clamp
Steering Column
Brake Cable
Weight Capacity = 300 pounds
Steering Column
Guide Pin
Non-Marking
7.5” Wheels
Adjustable
Knee Platform
Rear Brake
Mechanism
Push Clamp Lever to Left
Clamp Lever
Guide Pin Ring
Pull Ring Down


