background image

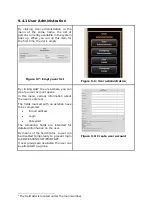
If not all fields are completed, this fact is 
shown by a corresponding note. 

Please  complete  all  fields  so  that  the 
system  can  affect  the  authentication 
correctly. 


Figure 9.37: Missing login / password 

After successful login, the button 

LOGOUT

 is displayed next to the 

STOP

 button in ROWE 

SCAN/COPY/PRINT APP. By means of this function, you can change the user. 

9.7.1.2 Editing Range 

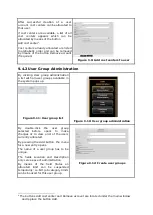
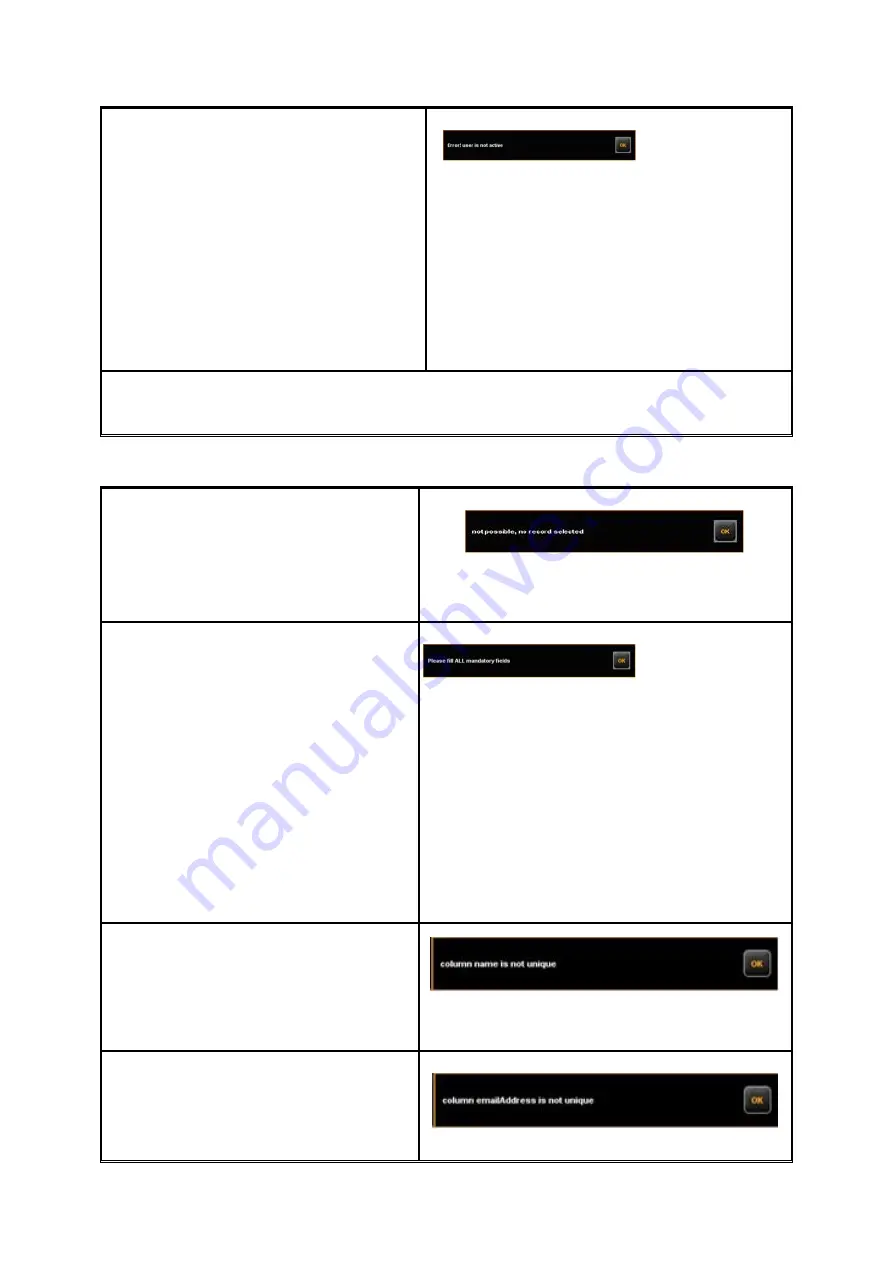
For being able to change a data record, 
you  have  to  highlight  a  line  in  the 
corresponding  list  first.  This  warning 
may  appear  if  you  try  to  delete  or 
change  an  entry  without  having 
highlighted it before. 


Figure 9.38: Error message - No selection 

made 

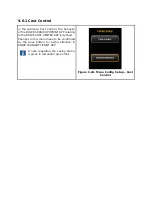
The  fields  in  the  administration  menus 
marked  with  an  asterisk  have  to  be 
completed.  

If  all  highlighted  fields  are  completed, 
click 

Save

 again. 


Figure 9.39: Please fill ALL mandatory 

fields 

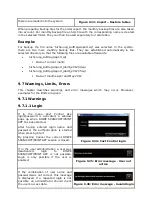
If the login name is already used in the 
system, you have to change this entry. 


Figure 9.40: Field: User login is not 

unique 

If  the  e-mail  address  is  already  used  in 
the  system,  you  have  to  change  this 
entry. 


Figure 9.41: Field: E-mail address is not 

Summary of Contents for Scan 850i

Page 1: ...R O T H W E B E R G m b H APP CENTER ecoPrint Scan 850i O PE RAT ING MA NUAL R EV I SI O N 1 1 ...

Page 2: ...se of non observance ROTH WEBER cannot accept any liability Other product and company names mentioned herein may be trademarks or trade names of the respective owner Copyright ROTH WEBER GmbH referred to hereinafter as ROWE Niederdreisbach Germany 2017 All rights reserved Without the written consent of ROWE reprint copying editing or reproduction and publishing also in excerpts are not permitted R...

Page 3: ...anner Comments In the present manual the following types of comments are given Document History No Date Description 1 0 01 30 2017 Creation of the Instruction manual 1 1 07 17 2017 Addition to the Instruction manual Note You obtain information and useful tips which are helpful for smooth operation of the devices Attention These notes intend to prevent damage to or failure of the device Caution Pos...

Page 4: ...i Series 8 3 1 Basic Models of ROWE Scan 850i Series 9 3 2 Scanner Upgrades 9 3 3 System Overview 13 3 4 Unpacking of Device 16 3 5 PC Requirements 17 3 6 Connection of ROWE Scan 850i to Power Supply 18 4 Installation 19 4 1 Erecting Scanner 20 4 2 Starting Software Installation 20 4 3 Selecting Folder 21 4 4 Installation Process 22 4 5 Installation of Device Drivers 22 4 6 Installation of Additio...

Page 5: ...ings for Inkjet Printer 51 7 10 2 4 Set Function 52 7 10 3 Settings Independent of Function 52 7 10 3 1 Color Mode 52 7 10 3 2 Quality 53 7 10 3 3 Scan Format 57 7 10 3 4 Scaling Margins 58 7 10 3 5 Info 59 7 11 Favorites 59 7 11 1 Multiprint Favorites 60 7 12 Job List 63 7 13 ROWE PRINT APP 64 7 13 1 Layout of ROWE PRINT APP 65 7 13 2 File List 65 7 13 3 File Settings 67 7 13 4 Job Settings 69 7 ...

Page 6: ...ost Center Administration 105 9 5 2 Cost Center Group Administration 106 9 5 3 Cost Center Limits 106 9 5 4 Cost Center Group Limits 106 9 6 Menu Config Setup 107 9 6 1 Cost Control 108 9 6 2 Job Category Administration 110 9 6 3 Order Report Administration 112 9 6 3 1 Backup Settings 112 9 6 3 2 Deleting Order Report 113 9 6 4 Export Import 113 9 7 Warnings Limits Errors 114 9 7 1 Warnings 114 9 ...

Page 7: ...blems with Automatic Width Detection 125 11 5 Scan Quality 125 A Technical Requirements 127 A 1 Java Runtime Environment 127 B Service and Contact 128 C About this System 129 C 1 Rating plate identification 130 ...

Page 8: ...1 Introduction This chapter contains important information regarding the safe use of the ROWE Scan 850i ...

Page 9: ...n from a few chapters This Instruction manual references other documents Follow the content in these documents Some of the illustrations in this Instruction manual are for the purpose of technical clarification The colors displayed may differ from the original colors Keep this Instruction manual with the Folding system so that it is always accessible If the Instruction manual was provided in digit...

Page 10: ...nstruction manual will enable you to benefit from the full range of features provided by this Scanner and avoid unnecessary problems A thorough understanding of the safety information and regulations is the basic prerequisite for safe and problem free operation of the Scanner Therefore read this section carefully before beginning any work with the Scanner In addition follow all safety information ...

Page 11: ...y The ROWE systems of the Scan 850i series shall exclusively be used as described in this Operating Manual Another use or use exceeding the above shall not be deemed intended use The manufacturer is not liable for damages resulting therefrom Solely the user bears the risk for the above All persons dealing with erection commissioning operation and maintenance of the device shall be appropriately sk...

Page 12: ...ive or bear hazards otherwise Only authorized skilled service staff shall be charged with maintenance in these areas of the scanner The housing is fitted with louvers at the bottom ensuring reliable operation Do not cover or close these louvers nor place any objects in front of them In order to prevent the above the product must not be operated on soft furniture such as beds carpets or other soft ...

Page 13: ...ce at the end of life for proper disposal and recycling 1 The device shall not be disposed of in unsorted industrial waste 1 In terms of WEEE the device is a device for mere commercial use and must not be given to municipal waste collection like consumer devices e g washing machines video recorders or standard computers 2 For disposal please contact the Roth Weber GmbH Company www rowe de or your ...

Page 14: ...iver Connect the equipment into an outlet on a circuit different from that to which the receiver is connected Consult the dealer or an experienced radio TV technician for help 2 5 Instruction and training Instruct your staff carefully Inform your staff about laws and accident prevention regulations and on the content of the Instruction manual Make sure your staff understand and follow this informa...

Page 15: ...ons for operating the Scanner Safety guards on the Scanner Emergency measures Operating the Scanner New Folding system operator experiences since the last round of instruction New experiences with regard to input materials and aids since the last round of instruction Experiences with the Scanner Training confirmation No Last name First name Signature 1 2 3 4 5 6 Date Training director Signature of...

Page 16: ...ope of supply and the options of the ROWE Scan 850i series of the software applications of the ROWE Scan 850i series This chapter shall provide a first overview You find detailed information in the corresponding chapters which are also included in this Operating Manual Before using the device please read the Fehler Verweisquelle konnte nicht gefunden werden in Annex Fehler Verweisquelle konnte nic...

Page 17: ... Adjutancy In order to scan originals with a larger thickness than 1 5mm the ROWE Scan 850i is also available with height adjutancy The maximum original thickness is 30mm Scan width up to 60 In order to scan originals with larger widths than 44 the ROWE Scan 850i is also available in a wider version The standard scan width is 55 and can be upgraded to 60 The maximum document width is 63 and the ma...

Page 18: ...ption ROWE TWAIN APP TWAIN EDIT Direct scanning in all applications by support of TWAIN basic kit image editing 2 viewers General Viewer and Main Viewer ICC color management etc ROWE SCAN APP TWAIN EDIT SCAN Includes ROWE ScanManager TWAIN plus Scan to Net Scan to USB Scan to Email etc ROWE COPY APP TWAIN EDIT SCAN COPY Includes ROWE ScanManager TWAIN LT plus Scan to Copy Multiprint Multitasking R...

Page 19: ... APP Direct printing of PostScript level 2 and 3 PDF PDF A Multipage PDF PDF A files on a ROWE ecoPrint and or Inkjet Table 3 2 ROWE APP CENTER By default the ROWE Scan 850i is delivered including ROWE TWAIN APP as well as a 30 day trial version of ROWE SCAN COPY APP Optionally models with extended features can be activated on the spot by means of a software upgrade An overview of the available AP...

Page 20: ... printers on request Height of feed table for originals 1 145 mm to 1 265 mm Including bracket for flat screen 17 to 23 with VESA MISD75 100 holder and a maximum weight not exceeding 10 kg The flat screen is not included in the scope of supply ROWE Scan Series PC holder for MFP stand 44 PC holder for MFP stand 44 intended to accommodate a conventional PC housing ROWE Scan Series touch screen 17 to...

Page 21: ...e screws at the bottom before putting the scanner on the MFP Stand Remove the four sheets Use the screwdriver provided with the MFP Stand Secure the scanner against tilting or falling down in order to avoid damages and injuries Remove before putting the scanner on the MFP Stand ...

Page 22: ...ng slot for document feed 7 Zero point 8 Locking scanner top on both sides Figure 3 1 ROWE Scan 850i Fehler Verweisquelle konnte nicht gefunden werden shows the ROWE Scan 850i control panel It includes the following components 1 Start key 2 Stop key 3 Forward motion key 4 Backward motion key 5 Favorite keys individual allocation of scan settings via ROWE SCAN COPY PRINT APP 6 Operating LED 7 Malfu...

Page 23: ...ehold cleaning agents to remove or clean it Fehler Verweisquelle konnte nicht gefunden werden shows the back of the ROWE Scan 850i with the left side box There you see the following connections 1 Connection for 24 V power unit 2 USB A slot USB 3 0 to connect side box USB slot to PC 3 USB B slot USB 3 0 for ROWE Scan 850i to connect the scanner to PC ...

Page 24: ...nner a space of at least 2 5 m x 2 0 m is required which meets with the ambient conditions described in Annex B 3 1 Page 130 When unpacking the scanner do not lift it by grabbing the side boxes see Fehler Verweisquelle konnte nicht gefunden werden Figure 3 4 Unpacking of ROWE Scan 850i ...

Page 25: ...mum requirements ROWE Scan 850i Optimum requirements ROWE Scan 850i CPU 3 0 GHz Dual Core 3 0 GHz Quad Core Memory 4 0 GB 8 0 GB Hard disc 5 400 rpm SATA 5 GB free memory Solid State Drive SSD 50 GB free memory Interface High Speed USB 2 0 Super Speed USB 3 0 Operating system Windows 7 32 bits Windows 10 64 bits Screen Size 17 Resolution 1 280 x 1 024 Size 19 Resolution 1 280 x 1 024 Touch screen ...

Page 26: ... back of the scanner Plug the connector of the power unit into a socket Please absolutely observe the following The scanner must only be connected to a grounded socket with VDE homologation The socket has to be protected by fuses 10 A When several devices are connected to one socket using an extension cord and or a multiple socket the total current draw shall not exceed 10 A The socket has to be l...

Page 27: ...ither be connected to power supply nor PC Should you use mouse and keyboard on the scanner top place the cables in a way that they do not obstruct the paper outlet First install the software on the PC The scanner must be connected only afterwards The power unit of the scanner is fitted with a grounded three core power plug Only skilled workers are allowed to modify plug and socket Never bypass or ...

Page 28: ...4 on Page 16 4 2 Starting Software Installation In order to install the software you need the supplied CD Rom First switch the computer On which is not yet connected to the scanner Put the CD Rom into the CD Rom drive of the PC Usually installation of the software starts automatically If not start from the CD by double clicking autorun exe The dialog box shown in Fehler Verweisquelle konnte nicht ...

Page 29: ... Figure 4 3 Welcome dialog box 4 3 Selecting Folder When selecting the folder Fehler Verweisquelle konnte nicht gefunden werden a folder where to install the ROWE Scan 850i software is already suggested The shown figures have the following meaning 1 Destination folder Currently selected folder is displayed 2 Browse Selecting another folder 3 Information on the required and available storage space ...

Page 30: ...ting that the appropriate drivers for the device are being installed During installation Windows Windows XP may point out that the drivers did not pass the so called Windows logo testing Fehler Verweisquelle konnte nicht gefunden werden This is normal and installation can be continued by clicking Continue anyway Figure 4 6 Windows logo testing After having installed the drivers on the computer the...

Page 31: ...alog box Fehler Verweisquelle konnte nicht gefunden werden you are prompted to accept the license agreement Select I agree Figure 4 9 License agreement for plug ins The required plug ins are now installed automatically In the dialog box seen afterwards Fehler Verweisquelle konnte nicht gefunden werden you have to click Finish to complete installation Then another installation dialog box appears fo...

Page 32: ...t until the computer has been shut down and switched OFF Figure 4 11 Prompt to shut computer down After having switched the computer OFF proceed as follows 1 Connect the computer to the scanner using the USB cable Use the supplied USB cable see Fehler Verweisquelle konnte nicht gefunden werden 2 Connect the scanner to the power supply using the supplied power unit 3 Switch the computer ON again Fi...

Page 33: ... not this time and click the Next button in Fehler Verweisquelle konnte nicht gefunden werden Figure 4 13 Disable Windows update Afterwards select Install the software automatically in Fehler Verweisquelle konnte nicht gefunden werden to use the driver already installed Figure 4 14 Installing driver automatically Afterwards select Continue anyway in the dialog box shown in Fehler Verweisquelle kon...

Page 34: ... Start Setup Wizard The Setup Wizard now establishes the connection between scanner and computer automatically This process may take some time depending on the PC performance If you actuate the Cancel button during the connection process installation is canceled If the connection cannot be established check the connection lines and whether the scanner is switched ON If the operating LED is flashin...

Page 35: ...an 850i with additional functions you can confirm the button labeled 3 Order license If a connection to the Internet is given your Internet browser pops up automatically and you access the ROWE website where you can order further license options As an option you can also contact the ROWE Sales Department see Chapter 3 1 Figure 4 19 License installation 4 11 Calibration of Scanner Now the scanner n...

Page 36: ...ease handle the calibration chart with care After calibration put it back into the provided cardboard box After completion of calibration the scanner is in working order and ready for use For this purpose read chapter Simple Scan Figure 4 20 Calibration of scanner In general the Scan 850i software on the supplied CD ROM is the most recent version However it may also occur that a more recent versio...

Page 37: ...5 Switching Scanner ON OFF Operate the ROWE scanner at a supply voltage of 100 to 240 volts and a frequency of 50 60 Hz only ...

Page 38: ...or to use Plug the connector of the power unit into the socket to switch the device ON Figure 5 1 Position connector power unit On the control panel of the scanner see alsoFehler Verweisquelle konnte nicht gefunden werden on Page 15 you see two LEDs After having switched ON the device the operating LED under the green button 2 lights up Should a failure occur e g paper jam the LED under the red bu...

Page 39: ...6 Simple Scan Moreover the ROWE Scan 850i scanners are fitted with automatic width detection see scan format Chapter 5 on Page 57 ...

Page 40: ... the scanner takes it in Select the requested color mode in ROWE SCAN APP see Chapter 7 10 3 1 on Page 52 Select the requested scan format in ROWE SCAN APP see Chapter 7 10 3 3 on Page 57 if applicable For the document width being recognized automatically select the default setting Auto Select the storage location in ROWE SCAN APP see Chapter 7 10 1 1 on Page 46 if required Figure 6 2 How to posit...

Page 41: ...orts the original back to start position Start the scan as described in 6 1 The height adjustment feature can transport documents with a height of up to 30 mm and a weight of up to 5 kg only The originals must not be bend Only even originals can be transported In general the scanner top has to be moved into its bottom position before switching OFF the scanner Should the position not be reached pre...

Page 42: ...7 ROWE APP CENTER The ROWE APP CENTER is the central software needed to operate the ROWE Scan 850i series The present chapter describes how to use the scanner efficiently by means of this software ...

Page 43: ...clients Cloud USB Preview ROWE AUTO CROP recognizes and eliminates white borders automatically Printjobs management Personalized intelligent printjob creation and progress Queue management with preview and editing additional output queues PRINT QUEUES List of supported printers available in ROWE APP CENTER ROWE EDIT PROFESSIONAL APP 2 point deskew measuring of areas and lengths direct in scanned s...

Page 44: ...nly slightly For detailed information please refer to Chapter 7 15 For being able to use all functions of ROWE SCAN COPY APP you have to connect the scanner to the PC and switch it ON Otherwise the APP can be used in a limited demo mode only The ROWE COPY APP is supplied with one printer driver each for an inkjet printer and a ROWE printer only Drivers for further printers are to be purchased as a...

Page 45: ...ed view preview for detailed information refer to Chapter 7 5 Page 39 4 Settings automatically adjusts to the respective function refer to Chapter 7 10 Page 44 5 Toolbar editing and measuring functions refer to Chapter 7 9 Page 43 6 Overview to display complete scan refer to Chapter 7 6 Page 40 7 Toolbar with keys refer to Chapter 7 7 Page 40 7 3 Selection of Language Should ROWE SCAN APP display ...

Page 46: ...ct Copy if you want to output copies of originals on a printer For detailed information see chapter 7 10 2 page 48 This function can only be used by purchasing ROWE COPY APP Scan Select Scan if you want to scan originals and save them as image files For detailed information see Chapter 7 10 1 Page 45 This function can only be used by purchasing ROWE SCAN APP Job list Select Job list if you want to...

Page 47: ...key down This area will then be enlarged The viewer includes the following components 1 Image display area Preview detailed view 2 Toolbar of viewer see Chapter 7 8 Page 42 3 Status bar Display of useful information on the depicted image resolution dimensions color mode etc As soon as you make changes in the Settings Page 44 affecting the appearance of the image e g brightness color mode etc the v...

Page 48: ... always highlighted by a red frame 2 in the overview viewer Now you can grab this frame by means of the mouse and move it to another position to show another area in the main viewer If you want to display a smaller or bigger section in the main viewer you can also grab the four edges of the viewer and shift them The General Viewer is deactivated in the touchscreen optimized version see Chapter 7 1...

Page 49: ...ion key 5 to start output on the basis of the selected settings Fast prescan A fast scan with reduced resolution is affected and shown in the viewer Afterwards the original is transported back and you are asked whether you want to select a scan section Afterwards you can select with the mouse an area in the preview the dimensions and position of which are set automatically as user defined format W...

Page 50: ...yed in a higher quality in the Viewer In particular when processing drawings with very fine structures they are possibly not displayed completely in the Viewer in particular in the General View as the image has to be scaled down to fit into the Viewer The HQ mode reduces this effect considerably but results in the fact that it takes a little bit longer until the picture is fully displayed For orig...

Page 51: ...o and Repeat By means of this tool you can undo the last activities Actions undone before can be repeated only A document CANNOT be loaded into the Viewer again with this tool However any type of modification such as black correction can be undone and or repeated 7 9 Toolbar Editing and Measuring Functions Figure 7 10 Toolbar under Main Viewer The toolbar under the Main Viewer provides functions f...

Page 52: ...ere you can read the measured value Here you can also select a unit and define a scale for conversion E g this function is useful when measuring structures in a construction drawing or map 7 Calculate area By means of this feature you can calculate the area of any polygon within a drawing After having pressed the button you can define the polygon by clicking on any number of points using the left ...

Page 53: ...and select other image settings Expert mode For detailed information see 7 10 3 2 Scan format Here you can select whether the document width is to be detected automatically in subsequent scans or if you want to define a standard format As an option you can also define the dimensions User defined For detailed information see 7 10 3 3 Storage location Here you define where to save the scanned docume...

Page 54: ...ticular folder Press button Location to select and or change the folder Figure 7 13 Target folder E Mail Press this button if you want to attach a file to an e mail and send it After scanning or when actuating the Send key allocation of Prescan key changes your standard e mail program pops up Depending on your computer configuration the operating system may ask for your standard e mail program Mak...

Page 55: ...Here you can define whether files are to be numbered automatically In the text box you can define the start number When saving a new file this number is incremented In this way you can save many scans in one directory one after another without having to adjust the file name before each scan You can place the number at any position in the file name For this purpose enter the character at the reques...

Page 56: ... this button if you want to delete the page added last 4 Interrupt With this button you can perform a normal scan or saving operation in between which will not be added to the multipage file afterwards you can add pages to the multipage file again by selecting Multipage TIFF and or PDF as file format again 5 Complete Press this button after having scanned the last page for the multipage file Figur...

Page 57: ... activated if you want to unite several scans in one set This set can then be output on the printer A detailed description of the set function can be found in Chapter 7 10 2 4 Page 52 Info see 7 10 3 5 7 10 2 1 Printer Selection Here you can select on which printer you want to output a document Depending on the selected printer 1 other options may be available e g Folding for ROWE printers 1 Print...

Page 58: ...yor 4 Fallback folding machine Response to folding machine not existing or not ready also refer to 7 13 4 5 Fallback tab Response to missing tab if a folding program with tab is selected also refer to 7 13 4 6 Fallback output bin Response to output bin which is not available and or full also refer to 7 13 4 After having enabled all requested settings you return to the previous view by pressing Bac...

Page 59: ...al and or format of the print medium is not available Options are Fit Printer does not print and instead requires the respective roll format giving a message Larger Printer uses the larger format available next e g ISO A0 instead of A1 Larger roll empty fit If a fitting medium format is inserted but empty the printer does not print but requires the respecting roll format Otherwise the printer prin...

Page 60: ...1 Color Mode Figure 7 25 Color mode One of the most important settings is the color mode 1 Selection of Color RGB and gray scale and or black white The following scan is effected in the mode set here If you effected a gray scale and or black white scan and switch to color later the image is however displayed in gray scale in the Viewer 2 Set type of original Here you can easily achieve the best qu...

Page 61: ...1 Resolution Selection of the resolution to be used for the next scanning operation The selection has to be made before the scan In case of the available Turbo modes a lower scanning resolution is used in feeding direction and afterwards interpolation is affected A significantly higher speed is achieved thereby In the selected optical resolution the original is scanned perpendicular to the feed di...

Page 62: ...tion carefully in order not to lose any information e g in color gradients But also in drawings with lines information which is very bright can get lost In case of doubt simply check the result in the Viewer 5 Sharpening By means of this slide control you can increase the sharpness of the image setting range 0 255 0 neutral If you select a very high value slight color fringes may occur at edges in...

Page 63: ... RGB the color information is usually coded with 8 bits per color channel R G and B i e 24 bits per pixel This may result in relatively large files In particular for originals with only a few colors e g CAD drawings it may be reasonable to reduce the color depth This can be achieved by selecting the option Indexed color The color depth is then reduced from 24 to 8 bits per pixel so that 256 colors...

Page 64: ...the file is to be saved In general sRGB is appropriate If you want to save a color scan in the device color space of the scanner select None 7 Color table By means of color replacement tables defined colors can be replaced by certain selected colors This function may be useful to ensure that a logo is shown in a clearly defined shade ...

Page 65: ...ndscape Select whether the default format is portrait or landscape Fixed format On Off If the fixed format is activated On the length in feeding direction is considered in addition to the width when adjusting to the default format Otherwise the width is adapted to the default format only The document has to be placed in the center If the fixed format is enabled one part of the information is cut o...

Page 66: ...document Enter positive values in the four text fields in order to enlarge the left 1 right 2 front 3 and or rear margin 4 white If you want to cut the margin off simply enter negative values By means of the Zoom button you access a submenu where you can select extensive scaling options Figure 7 33 Scaling margin Scale factor Enlargement and or reduction factor in 100 no scaling Setting range 1 0 ...

Page 67: ...e selected in the ROWE SCAN COPY APP settings see 7 13 5 Figure 7 35 Area Info 7 11 Favorites ROWE SCAN COPY PRINT APP provides a vast range of settings to adjust scans and copies according to individual requirements Often a manageable number of settings and or combinations of settings are used over and over again In order that you do not have to set and adjust each option individually again you c...

Page 68: ...ee Chapter 7 11 1 Figure 7 36 Favorites If you press the Edit favorites button see Fehler Verweisquelle konnte nicht gefunden werden the depicted menu pops up 1 Allocate favorite key Here you can allocate a favorite to a numeral key on the control panel of the scanner For this purpose enter the number of the key 1 4 into the text field 1 The favorite settings are then loaded if you actuate the cor...

Page 69: ...ically distinguish the parameters saved in the favorite by Scanning parameters e g color mode scan resolution scan format etc Output parameters e g printer scaling factor background compensation etc Accordingly a favorite as described in Chapter 7 11 includes a package of parameters parameter set for the scan and exactly one parameter set for the output The Multiprint approach now extends this con...

Page 70: ...target folder is indicated In the shown example the favorite New favorite is a Multiprint favorite with three output options Scan to File on drive C copy copies on printer HP5500 as well as copy copies on printer RCS6000 Now you have the following options Add new output configuration 2 Another output configuration is added The new configuration includes the parameters currently set in the ROWE COP...

Page 71: ...mber of copies in this text box before starting if more than one copy is needed Here the name of the printer is also shown For Scan to File the target folder appears 3 Start By pressing the Start button the operation is started Figure 7 41 Multiprint output 7 12 Job List The function Print jobs of serves the management of print jobs The general structure of the job list is shown in Fehler Verweisq...

Page 72: ...elete the job if you do not want to output it 4 View View the files inside the printjob Figure 7 43 Edit print jobs Moreover the buttons above the table provide the following options 1 Active jobs Displays jobs which have not yet been processed 2 Ready jobs Displays jobs which have already been finished provided for future updates 3 Delete all jobs By means of this button you can cancel all print ...

Page 73: ... to the file highlighted in list 1 see Chapter 7 13 3 3 Job settings The settings made here apply to all files of a print job see Chapter 7 13 4 4 Action Buttons Print Button to start the print job C Button Load default settings for PRINT APP General settings see 7 13 5 7 13 2 File List Figure 7 45 ROWE PRINT APP File list By means of the file list you can administer which files belong to a print ...

Page 74: ...es In addition to the file name further information is given Dimensions in mm Number of pages for TIFF PDF files with several pages By pressing and holding the Shift and or Strg key you can also highlight several files in the list as in Windows explorer As soon as you highlight a file in the list by clicking the corresponding settings are shown under File presets see 7 13 3 Figure 7 46 File previe...

Page 75: ...ed document will be printed first as one of three files 4 File information Here useful information on the depicted file is given Dimensions color mode file format and resolution 5 Browse file list By means of the arrow keys left right you can easily switch to the next previous file within the file list in the preview 7 13 3 File Settings Figure 7 47 ROWE PRINT APP File settings All settings made i...

Page 76: ...t from CAD when using HPGL files for input Using other file formats the output will be identically f Mono All elements which are not completely white are printed as black Only real white brightness 255 is printed white g Neutral All parameters are set to neutral values Particularly the output is done without any sharpening etc other settings are as in Mixed mode 3 Copies Number of copies to be pre...

Page 77: ...e exceeded in for the document being printed on the next smaller roll nonetheless 2 Copies Here you define the number of copies of the complete set 2a Sorting If you want to prepare more than one copy of the set you can additionally define how to sort the output by means of button 2a In the default setting output is affected in the same order as if you printed the set several times individually on...

Page 78: ...o the job list normally Low All print jobs with a higher priority are prioritized High The print job is started as soon as possible Suspended For the time being the drawing is not printed but the job has to be started manually on the printer 5c Info texts With info texts you can include user defined text information into a print job Those texts can be integrated dynamically into stamps for example...

Page 79: ...to missing tab if a folding program with tab is selected Fit The printer does not print the job and instead requires a new tab roll giving a message Ignore The folding program is effected without applying a tab 5 Output bin runout Response to full output tray of sorter and or output bin of printer top or back Default Use standard response of respective printer where the sorter is and or should be ...

Page 80: ...ng off 0 no auto logoff Show all favorites temporarily If you need to change or check the settings of a special favorite e g a listener activate this option in order to be able to select the favorite in the favorites selection Activating this option will take effect until the next restart Clear filelist after printing Here you can define if the filelist should be automatically be cleared after cre...

Page 81: ...nd reduced feed speed to protect sensitive originals The height of the reduced speed can be set in the ConfigManager see Chapter 8 10 Backlight Enhanced presentation of extremely dark originals Prescan mode Determine behavior when pressing the Prescan button Normal prescan Prescan is effected with the selected settings The preview then corresponds to the result obtained when pressing the Start but...

Page 82: ...tic loading deactivated Settings color depth b w Here you can influence the color depth for output in b w mode which is hidden behind the color mode buttons so called Presets in b w and or gray scale mode You can set the behavior for each b w mode line photo mixed and more separated by Scan to File Copy By means of buttons 1 and 2 you select to which mode the setting selected in 3 refers You can s...

Page 83: ...gure 7 53 ROWE SCAN COPY APP TOUCH As a conventional keyboard is usually not available when using a touch screen a virtual keyboard is shown when an entry is required By means of the buttons you can enter the desired text and or figures by finger Every time a number needs to be entered a virtual numeric keypad is shown automatically Figure 7 54 Numeric keypad ...

Page 84: ...If you touch a text field with the finger where a text needs to be entered e g a file name a virtual keyboard is shown automatically Figure 7 55 Virtual keyboard ...

Page 85: ...Manager provides all administrative functions for the scanners of the ROWE Scan 850i series Apart from configuring all basic settings printers can be set license upgrades can be loaded or the scanner can be recalibrated here among others ...

Page 86: ...r Overview The ConfigManager layout is similar to that of ROWE SCAN COPY APP Similar to them the provided configuration options in the ConfigManager are divided into different functions by topics Status Different status information on the scanner is displayed see 8 3 Calibration Here you can calibrate the scanner again see 8 4 Printer Management of printers which can be used in ROWE COPY PRINT APP...

Page 87: ...tamps only available with ROWE EDIT PROFESSIONAL APP see 8 6 Listener Confguration and editing of listeners directories for print jobs only available with copy system ROWE ecoPrint see ROWE ecoPrint manual for details Scanboxes Configuration for scanboxes only available with copy system ROWE ecoPrint see 8 7 In some sections of ConfigManager you are guided through the setup of the selected options...

Page 88: ... of the scanner Under Version you can see detailed information on the software version as well as firmware of the scanner Usually only the entry Software Release here 1 3 0 is important Figure 8 3 ConfigManager Status 8 4 Calibration Under Calibration you can calibrate the scanner again A new calibration is always recommended if the scan quality seems to have deteriorated Moreover calibration is t...

Page 89: ... not logged in as administrator you are requested to do so as soon as you press one of the buttons see 8 11 8 5 1 Adding Printer If you want to add a printer press the button Add printer Fehler Verweisquelle konnte nicht gefunden werden Afterwards you are prompted to enter the printer manufacturer For this purpose select the appropriate manufacturer from the list and click Next The available manuf...

Page 90: ...this name see printer selection Chapter 7 10 2 1 The printer name is also saved under the favorites Should a printer be saved in a favorite which is NOT available name changed not available license invalid etc a corresponding message is displayed when starting ROWE COPY PRINT APP In this case the loaded favorite should be modified Check for Correct name network connection license etc Figure 8 9 Pr...

Page 91: ...alibration option This means that the printer prints a specific color pattern a so called target about which the precise color values are known Afterwards this target is scanned with the printer and the actual color values of the individual color fields are established An ICC profile is then calculated on the basis of the measured data and the reference data which compensates color errors as well ...

Page 92: ...ou can perform a so called gray balance optimization For this purpose another target which has been optimized for the gray scale reproduction is printed and scanned Simply follow the instructions on the screen Normally gray balance optimization is not required On request you can skip this step Afterwards you can complete the process by pressing Finish Figure 8 14 Inkjet profiling target 8 5 4 Conf...

Page 93: ...ll only for color printers Call extended settings see Fehler Verweisquelle konnte nicht gefunden werden Figure 8 17 Extended printer settings In the extended settings you can make some complex settings affecting the behavior of the printer quite individually The most important settings refer to the printable area of inkjet printers and margins You should not make any modifications in this section ...

Page 94: ...tamps you can integrate user defined graphics and or texts in your printouts or scanned files Those elements are placed onto the sheets as classical stamps The ConfigManager provides comprehensive possibilities to create and edit stamps Add stamps Delete stamps Configure stamps If you are not already logged in as administrator user you are requested to do so as soon as you press one of the buttons...

Page 95: ... specifying the desired settings press Apply In the next step an external tool inkscape will be started in order to create the actual stamp drawing Figure 8 20 Stamp parameter Now create the the drawing With the help of the editor you can draw any user defined graphics and texts All objects can be applied with special effects like transparencies for example You can use special placeholder texts in...

Page 96: ...s Scanboxes are directories which can be used to file scans and to access them via the network In general there a two types of scan boxes Local scan boxes The scan directory is located on the device and can be accessed via the network by way of a Windows access permission Remote scan boxes The scan directory is located on a host in a network which can be accessed by the printer by way of a Windows...

Page 97: ...hown in Fehler Verweisquelle konnte nicht gefunden werden The following parameters are available Scanbox Name A freely selectable name without special characters Afterwards the scan box can be identified by this name in the scan box configuration and the ROWE SCAN APP Username Password Here you have to enter the access data to access the shared directory in the network Attention Write protection r...

Page 98: ...er then automatically opens the ROWE website using your Internet browser where you can order the requested upgrades But you can also contact the ROWE Support e g if you do not have an Internet connection on your computer For the contact details please see Page 9 8 9 Update As ROWE intends to continuously enhance its software products they undergo permanent further development This is why new versi...

Page 99: ... 5 to prevent unauthorized persons from changing them Force USB 2 0 Activate the USB 2 0 mode of the scanner Correction scale factor length If you want to scan special originals which are particularly light or heavy and find out that the scale in feed direction is not exact you can define a correction factor here But normally you should not make any modifications Enter a value of more than 1 0 if ...

Page 100: ...uter as if switched OFF The operating LED is flashing By pressing the start key on the control panel you can wake the scanner up Delete processed printjobs after said time Define how long finished printjobs are hold before they are deleted Secure delete iterations If your printjobs contain confidential data and you desire to be sure that all files are really wiped from disk after printing you can ...

Page 101: ...y when logged in by clicking Change password You are then prompted to enter the old password first and then to enter the new password two times Figure 8 32 ConfigManager Change password 8 12 Favorites Figure 8 33 ConfigManager Favorites In addition to the numerous ROWE SCAN COPY PRINT APP options regarding handling of favorites see 7 11 in the function Favorites you can define for each individual ...

Page 102: ...ting from the favorite shall be used Parameter not included in the favorite After loading the favorite the parameter set in the ROWE SCAN COPY PRINT APP when loading the favorite remains By default all check marks are set i e all parameters are included in the favorite In order to change the setting first select the favorite to be changed selection of favorite If it is a Multiprint favorite the la...

Page 103: ... a limitation of device use if required The ROWE COST TRACKER APP records all relevant data of a scanning printing and or folding operation are and provides the results in a table in ROWE ConfigManager for evaluation see Chapter 9 2 The ROWE COST CENTER APP provides a clearly more extensive scope of functions in which a comprehensive user and cost center management is included allowing precise bre...

Page 104: ...g components 1 Via this tab in the ConfigManager Cost Control can be opened 2 Menu Order report see 9 2 3 Menu User administration see 9 4 4 Men Cost center administration see 9 5 5 Menu Configurations see 9 6 6 Toolbar with action keys2 7 Main window for presentation of order report and editing of menu entries 2 Overview of ROWE COST CENTER APP with job report ...

Page 105: ...ble filter criteria Description User login If active the order report will provide information on the selected user only Job category If active the order report will provide information on the selected job category only e g scanning Color mode Modus If active only information on the selected color mode will be displayed e g color or black white Date from to If active only information on the select...

Page 106: ...ocated to the CSV file to be created By default orderreport csv is used File extension csv will be added by the program automatically By means of the Explorer 5 button the set folder can be opened to access the exported file directly Figure 9 3 Order report table In the tabular view of the order report information is sorted by date of creation see Fehler Verweisquelle konnte nicht gefunden werden ...

Page 107: ... directly to a person have top priority 2 Afterwards limits allocated to a user group follow 3 Limits allocated to a cost center or cost center group have the same priority but are checked in the third place The course of a job entirely monitored with ROWE Cost Control Professional is as follows A person logs into ROWE SCAN COPY PRINT APP with user name and password The job is started e g black wh...

Page 108: ...ibes the configuration of limits and discounts in detail Setting of limits for users user groups cost centers and cost center groups is affected identically and is therefore described for user group specific limits in Chapter 9 4 3 as an example Information about the user is displayed in the order report in a pop up window when moving the mouse pointer over this name Figure 9 5 User info box in or...

Page 109: ...ou can create a user account opens In this menu various information about the user is entered The fields marked with an asterisk have to be completed E mail address Login Password The remaining fields are intended for detailed information on the user By means of the field Status a user can be disabled temporarily to prevent login to ROWE SCAN COPY PRINT APP If user groups are available the user ca...

Page 110: ... groups available in the system pops up Figure 9 10 User group administration Figure 9 11 User group list By double click the user group selected before opens to make changes or to view a list of the users currently allocated By pressing the Add button the menu for a new entry opens The name of a user group has to be unique The fields Location and Description only serve ease of administration By m...

Page 111: ...the menu for setting limits and discounts opens In order to create a new limit6 select an existing job category from the list In the field Limit the upper limit is defined for this job category Please pay attention to the scale In the field Discount a discount in can be granted for the selected job category and the allocated user Figure 9 15 Job categories Define limit The field Current consumptio...

Page 112: ...quelle konnte nicht gefunden werden Figure 9 17 Error message Limit exceeded 9 4 4 User Group Limits See Chapter 9 4 3 Setting of user group limits is similar to user limits If user groups have not yet been defined an empty list appears with the note that at least one user group needs to be defined 9 5 Menu Cost Center Administration This menu includes four areas where the administrator can create...

Page 113: ...unique The fields Status and Available date serve to allow bookings on this cost center in the ROWE SCAN COPY PRINT APP or not It is not possible to charge to inactive cost centers and cost centers with an expired date under Available date7 Figure 9 20 Create edit cost centers After successful definition of a cost center users can be allocated to the latter For this purpose select the user you wan...

Page 114: ... name for the cost center group The field Status defines whether job category limits can be used for this cost center group in ROWE SCAN COPY PRINT APP Figure 9 22 Define modify cost center group After successful definition of the cost center group cost centers can be added to this group For this purpose corresponding buttons are displayed in the toolbar under the main window They are used similar...

Page 115: ... one cost center group needs to be established 9 6 Menu Config Setup In this menu the behavior of the ROWE SCAN COPY PRINT APP with Cost Control Professional being activated is defined Moreover it is possible to save and restore the recorded consumption data as well as any user and cost center data ...

Page 116: ...PY PRINT APP relating to the ROWE COST CENTER APP is defined Changes in this menu have to be confirmed by the Save button for being effective in ROWE SCAN COPY PRINT APP A note regarding the saving status is given in red and or green font Figure 9 24 Menu Config Setup Cost Control ...

Page 117: ...list from which the user may select one when logging onto ROWE SCAN COPY PRINT APP A combination with 2 is possible 4 Cost center check Define whether the cost center entered by the user has to exist be active and be provided with sufficient limit to accept jobs 5 Default cost center Define which cost center to be used if the user is not allowed to select a cost center him herself due to 2 and 3 6...

Page 118: ...Name of the job category is defined by the system and cannot be modified This also applies to the Color mode The field Price defines the height of costs of the job category per set unit of measure A currency has been waived intentionally in order to ensure utmost flexibility Accordingly data included in the CSV file after exporting the order report can for example be processed and interpreted as r...

Page 119: ...A change of the units of measure and or price may result in irreproducible entries in the order report and should be effected only when performing an overall reset of the consumption data if possible ...

Page 120: ...nformation of the previous three months and the information on the current month will be given in the order report The selection of years works in the same way so that the information on the current month and on the number of previous years is available in the order report When selecting zero the monthly backup files will ALWAYS remain in the order report The name of the monthly backup file jobdb_...

Page 121: ...export import functions backups of existing data records can be established and loaded again In general it is possible to include all data in a backup i e order records including incurred costs as well as master data users user groups cost centers cost center groups and current configuration In order to be able to open this menu you have to have service access rights at least In the field Export d...

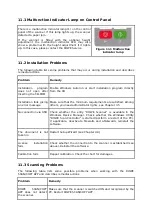
Page 122: ...pril and May 2012 9 7 Warnings Limits Errors This chapter describes warnings and error messages which may occur Moreover examples for the limits are given 9 7 1 Warnings 9 7 1 1 Login If in the menu Cost Control Use login password is activated a window pops up when ROWE SCAN COPY PRINT APP has been started After having entered login name and password the authentication is started when pressing Sta...

Page 123: ...o highlight a line in the corresponding list first This warning may appear if you try to delete or change an entry without having highlighted it before Figure 9 38 Error message No selection made The fields in the administration menus marked with an asterisk have to be completed If all highlighted fields are completed click Save again Figure 9 39 Please fill ALL mandatory fields If the login name ...

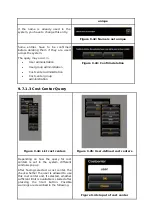
Page 124: ...group administration Figure 9 43 Confirm deletion 9 7 1 3 Cost Center Query Figure 9 44 List cost centers Figure 9 45 User defined cost centers Depending on how the query for cost centers is set in the system different windows pop up After having selected a cost center the check whether the user is allowed to use this cost center and if selected whether sufficient limit is available is started aft...

Page 125: ...amples for Limits If you want to use limits a user has to be allocated to at least one cost center where his her jobs may be entered 9 7 2 1 Limit by User Groups In order to implement a user group related access and or consumption control you may proceed as follows Define user groups for different tasks such as group Scanning and group Printing Allocate the corresponding job categories and define ...

Page 126: ...set ...

Page 127: ...bs affected in ROWE SCAN COPY PRINT APP are then entered in the respective cost center group The advantage of this limitation is that only a few settings are required for the job category limit if some cost centers can be included in groups Cost centers and cost center groups have the same priority If a job category limit is also set for a cost center it is checked first whether the consumed quant...

Page 128: ...10 Maintenance of Scanner The present chapter describes how to clean the scanner of the ROWE Scan 850i series and how to replace wear parts ...

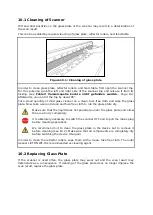
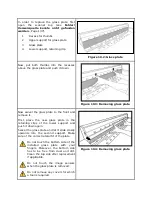
Page 129: ...te Now take a second clean and fuzz free cloth to rub the glass plate dry Make sure that the liquid does not penetrate under the glass plate and allow the area to dry completely It is absolutely necessary to switch the scanner OFF and to pull the mains plug before cleaning operations We recommend not to clean the glass plate in the device but to remove it before cleaning see 10 2 Make sure that al...

Page 130: ... the front and remove it First place the new glass plate in the retaining clips of the lower support and push it down again Swivel the glass plate and let it slide slowly upwards into the second support Make sure of the correct lateral fit of the plate Do not touch the bottom side of the installed glass plate with your fingers Moreover the bottom side has to be free from dust and dirt Clean the to...

Page 131: ...11 Trouble Shooting This chapter describes the actions to be taken if a problem occurs when using the scanner ...

Page 132: ...r message Make sure that the minimum requirements are satisfied Among others you need administrator rights see Chapter 3 5 No connection via USB Check whether the entry ROWE Scanner is available in the Windows Device Manager Check whether the Windows Utility ROWE Scan Controller is started perform a restart of the PC If applicable deactivate firewalls and afterwards reinstall the software The docu...

Page 133: ... are missing on at least one side Make sure that the original is positioned in a straight and centered way Check the original for damages in particular at the front and front edges Should the background color paper white of the original be equal to the color of the transport rollers and should the original be very thin faulty detection may occur Image too wide on both sides Make sure to use the sc...

Page 134: ...of very thin originals For extremely thin and light originals a minor offset may occur at the front edge when composing the image which is caused by the feed In this case it may be useful to stabilize the front edge with transparent adhesive tape ...

Page 135: ... In order to be able to use all functions of the ROWE APPS a Java Runtime Environment version 1 6 0 update 39 or higher has to be installed If it is not yet installed on your computer it will be installed together with the ROWE applications see Chapter 4 ...

Page 136: ...e ROWE products or need any technical support in case of problems with your ROWE device do not hesitate to contact our Service Department Phone 49 0 2743 9217 21 Fax 49 0 2743 2018 E mail service rowe de www rowe de ROTH WEBER GmbH 57520 Niederdreisbach Germany ...

Page 137: ...C About this System Copyright 2003 2017 ROTH WEBER GmbH All rights reserved ...

Page 138: ...sourceforge net projects xmlrpcpp License Copyright The authors of the argyII color management http www argyllcms com License Copyright The authors of the JasPer library http www ece uvic ca mdadams jasper License Copyright The authors of the ZBar Barcode Readers http zbar sourceforge net License Copyright The authors of zlib http zlib net License Copyright The authors of FreeType Font Engine http...

Page 139: ...C 2 Production date The production date can be found on the type label ...

Page 140: ...D Declaration of conformity ...

Page 141: ......

Page 142: ...k ScanManager 32 Figure 6 2 How to position the document 32 Figure 6 3 Start button control panel 32 Figure 6 4 Control Panel 33 Figure 7 1 Desktop link ROWE SCAN APP 36 Figure 7 2 ROWE SCAN APP overview 37 Figure 7 3 Settings button 37 Figure 7 4 ROWE SCAN APP Settings 38 Figure 7 5 ROWE APP CENTER SCAN COPY PRINT APP 38 Figure 7 6 Main viewer 39 Figure 7 7 Interaction General Viewer Main Viewer ...

Page 143: ...printer actions 81 Figure 8 6 Selection of printer manufacturers 81 Figure 8 7 Selection of printer model 82 Figure 8 8 Printer IP host name 82 Figure 8 9 Printer name 82 Figure 8 10 Warning printer name 82 Figure 8 11 Printer selection 83 Figure 8 12 Printer selection 83 Figure 8 13 Selection of paper grade 83 Figure 8 14 Inkjet profiling target 84 Figure 8 15 Printer selection 84 Figure 8 16 Rol...

Page 144: ...ministration 110 Figure 9 27 List of job categories 110 Figure 9 28 Edit job category administration 110 Figure 9 29 Order report administration 112 Figure 9 30 Backup settings 112 Figure 9 31 Delete order report 113 Figure 9 32 Export backup of tables 113 Figure 9 33 Import Restore tables 114 Figure 9 34 Cost Control login 114 Figure 9 35 Error message User not active 114 Figure 9 36 Error messag...
Reviews: