DLW-1 Phonograph
10-30
21822662
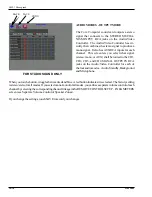
ONE STEREO ZONE and TWO MONO ZONES
This requires a second amplifier. The Main/Phono Amplifier gets its input from Audio/Video Controller outputs Ch1
and Ch2 and supplies a stereo zone. The second amplifier gets its input from Audio/Video Controller outputs Ch3 and Ch4
and supplies two mono zones.
Step 1.
Set the output mode of Audio/Video Controller Ch1&Ch2 to stereo/stereo, and Ch3&Ch4 to mono/mono.
•
Push SERVICE SWITCH to enter Main Menu.
• Touch
Hardware/Diagnostics.
• Touch
Configure Hardware.
• Touch
Audio Modes to view Audio Modes, Input Select screen.
• Touch
Output Mode to view Audio Modes, Output Mode screen.
•
The stereo/stereo column needs to have red dots for all Ch1&Ch2.
Touch
blue to make it red.
•
The mono/mono column needs to have red dots for all Ch3&Ch4.
Touch
blue to make it red.
• Touch
BACK arrow to return to Hardware Setup.
Step 2.
Set the Channel linkage for linked control of Ch1&Ch2, and of separate volume control Ch3&Ch4.
• Touch
Remote Control Setup to view Remote Control, Parameters screen.
•
Repeatedly
Touch
the Channel Linkage choices until it shows (Ch1, Ch2); (Ch3); (Ch4)
• Touch
SAVE arrow to record your changes.
• Touch
BACK arrow to return to Hardware Setup.
• Touch
Quit.
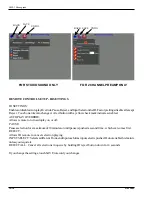
TWO STEREO ZONES
This requires a second amplifier. The Main/Phono Amplifier gets its input from Audio/Video Controller outputs Ch1 and
Ch2 and supplies one stereo zone. The second amplifier gets its input from Audio/Video Controller outputs Ch3 and Ch4
and supplies another stereo zone.
Step 1.
Set the output mode of Audio/Video Controller to mono/mono.
•
Push SERVICE SWITCH to enter Main Menu.
• Touch
Hardware/Diagnostics.
• Touch
Configure Hardware.
• Touch
Audio Modes to view Audio Modes, Input Select screen.
• Touch
Output Mode to view Audio Modes, Output Mode screen.
•
The stereo/stereo column needs to have all red dots.
Touch
blue to make it red.
• Touch
BACK arrow to return to Hardware Setup.
Step 2.
Set the Channel linkage for linked volume control of Ch1&Ch2, and linked volume control of Ch3&Ch4
• Touch
Remote Control Setup to view Remote Control, Parameters screen.
•
Repeatedly
Touch
the Channel Linkage choices until it shows (Ch1, Ch2); (Ch3, Ch4)
• Touch
SAVE arrow to record your changes.
• Touch
BACK arrow to return to Hardware Setup.
• Touch
Quit.
Summary of Contents for StarLink DLW-1
Page 8: ......
Page 22: ...DLW 1Phonograph 1 12 21822662 This page left intentionally blank...
Page 37: ...Section 3 Venue Installation 21822662 3 11 THIS PAGE INTENTIONALLY LEFT BLANK...
Page 39: ...Section 3 Venue Installation 21822662 3 13 THIS PAGE INTENTIONALLY LEFT BLANK...
Page 50: ...DLW 1Phonograph 4 4 21822662 This page intentionally left blank...
Page 72: ...DLW 1 Phonograph 5 22 21822662 This page intentionally left blank...
Page 90: ...DLW 1Phonograph 8 8 21822662 This page intentionally left blank...
Page 96: ...DLW 1 Phonograph 9 6 This Page Intentionally Left Blank...
Page 120: ...DLW 1 Phonograph 10 24 21822662 SPANISHUSERINTERFACE...
Page 128: ...DLW 1 Phonograph 10 32 21822662 This page left intentionally blank...
Page 130: ...11 2 21822662 This page intentionally left blank...
Page 139: ...11 11 21822662 This page intentionally left blank...
Page 141: ...11 13 21822662 7 8 Figure 11 3A Shell Assembly Internal View 1000 Watt 2 Channel Preamp...
Page 145: ...11 17 21822662 This page intentionally left blank...


