5
- The iron remains flat or on its side for more than 30 seconds.
- To restart the iron, just move it gently until the warning light stops flashing.
AFTER USE
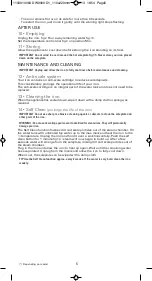
10 • Emptying
Unplug the iron.
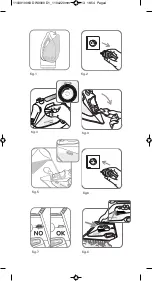
fig.2
Pour away remaining water
fig.13
.
Set the temperature control dial
fig.3
on position Min.
11 • Storing
Allow the appliance to cool down before storing the iron standing on its heel.
IMPORTANT Do not wind the cord around the hot soleplate
fig.15
. Never store your iron placed
down on the soleplate.
MAINTENANCE AND CLEANING
IMPORTANT Unplug and allow the iron to fully cool down before maintenance and cleaning.
12 • Anti-scale system
Your iron contains an anti-scale cartridge to reduce scale deposits.
This considerably prolongs the operational life of your iron.
The anti-scale cartridge is an integral part of the water tank and does not need to be
replaced.
13 • Cleaning the iron
When the appliance has cooled down, wipe it down with a damp cloth or sponge, as
required.
14 • Self Clean
(prolongs the life of the iron)
IMPORTANT Do not use sharp or abrasive cleaning agents or objects to clean the soleplate and
other parts of the iron.
WARNING : Do not use descaling agents even if advertised for steam irons. They will permanently
damage your iron.
The Self Clean function flushes dirt and scale particles out of the steam chamber. Fill
the water tank with untreated tap water up to the max mark and heat the iron to the
••• temperature. Unplug the iron and hold it over a sink horizontally. Push the self
clean button for 1 minute
fig.14
: steam will now begin to build up. After a few
seconds water will emerge from the soleplate, rinsing dirt and scale particles out of
the steam chamber.
Plug in the iron and allow the iron to heat up again. Wait until the remaining water
has evaporated. Unplug from the mains and allow the iron to fully cool down.
When cool, the soleplate can be wiped with a damp cloth.
TIP Use the Self Clean function approx. every 2 weeks. If the water is very hard, clean the iron
weekly.
(*) Depending on model
1103910063 DW9000 D1_110x220mm 16/04/13 16:54 Page5
Summary of Contents for DW9000
Page 1: ...1103910063 49 12 DW9 D1 1103910063 DW9000 D1_110x220mm 16 04 13 16 54 Page1...
Page 6: ...1103910063 DW9000 D1_110x220mm 16 04 13 16 54 Page2...
Page 62: ...57 1 8 8 1103910063 DW9000 D1_110x220mm 16 04 13 16 55 Page57...
Page 66: ...61 1 14 SELF CLEAN 2 1103910063 DW9000 D1_110x220mm 16 04 13 16 55 Page61...
Page 73: ...68 AR 1103910063 DW9000 D1_110x220mm 16 04 13 16 55 Page68...
Page 74: ...69 1103910063 DW9000 D1_110x220mm 16 04 13 16 55 Page69...
Page 75: ...70 1103910063 DW9000 D1_110x220mm 16 04 13 16 55 Page70...
Page 76: ...71 1103910063 DW9000 D1_110x220mm 16 04 13 16 55 Page71...
Page 77: ...72 1103910063 DW9000 D1_110x220mm 16 04 13 16 55 Page72...
Page 78: ...73 1103910063 DW9000 D1_110x220mm 16 04 13 16 55 Page73...

