


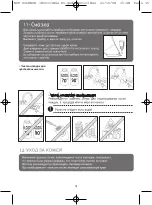

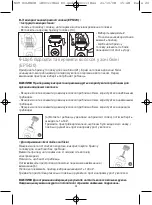
• Cleaning the trimmer head (EP5420)
Stop the appliance and unplug it.
Press the release button to remove the epilator head.
Remove the comb and clean hair from the trimmer head with the
brush.
Rinse the trimmer head under cold tap water for 5 or 10 seconds.
Shake the trimmer head vigorously and dry it with a towel.
IMPORTANT Systematically clean the appliance’s trimmer head after each use.
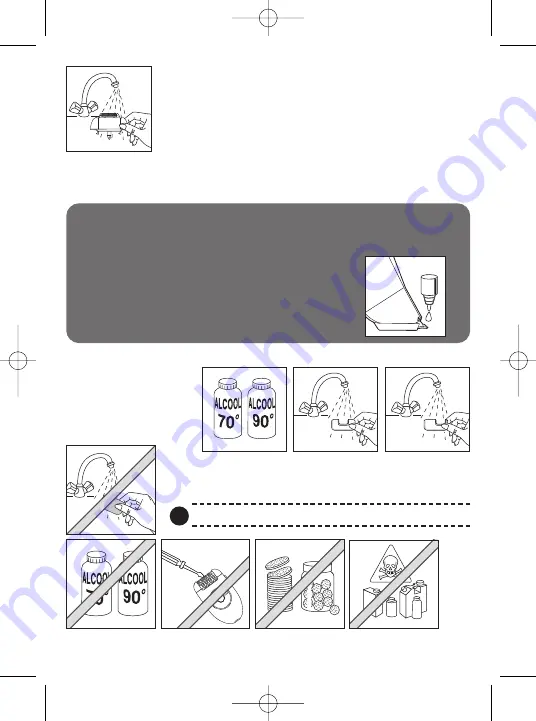
The appliance must not be submerged in water. It must not be used in the sho-
wer or bath.
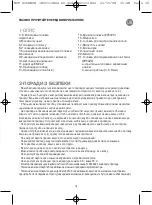
11-LUBRICATION
To keep your appliance working effectively, the blades should be oiled
regularly (notably after washing in water) using the lubricant supplied
or, if you have none, with the type of oil used for
sewing machines.
Stop the appliance and unplug it.
Clean the trimmer head with the brush.
Lubricate the blades : one drop is enough.
Run the trimmer for a few seconds.
Clean the excess oil off with a cloth.
A
Av
vo
oiid
d a
ap
pp
plly
yiin
ng
g a
allc
co
oh
ho
oll tto
o tth
he
e b
bo
od
dy
y o
off tth
he
e a
ap
pp
plliia
an
nc
ce
e s
so
o a
as
s n
no
ott tto
o ffa
ad
de
e iitts
s c
co
ollo
ou
urrs
s..
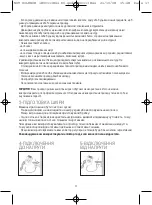
• Cleaning the sensi-
tive areas accessories
• Cleaning the Exfoliator Head.
We recommend that you change the exfoliating band after three
sessions of exfoliation or when it is worn out.
Do not clean the band under running water.
!
7
2
1
0
0
2
1
0
2
1
10
11
7
1
4
3
12
13
13
17
18
16
19
17
20
15
6
5
21
a
b
CLIC!
1
1
2
2
b
a
0
2
1
0
2
1
0
2
1
2
1
0
2
1
0
2
1
0
2
1
0
2
1
0
2
1
0
2
1
0
2
1
0
2
1
0
2
1
0
2
1
0
2
1
0
2
1
0
2
1
0
2
1
0
2
1
0
2
1
0
2
1
0
2
1
0
2
1
0
CLIC!
2
1
0
CLIC!
CLIC!
9
8
2
2
1
0
0
2
1
0
2
1
10
11
7
1
4
3
12
13
13
17
18
16
19
17
20
15
6
5
21
a
b
CLIC!
1
1
2
2
b
a
0
2
1
0
2
1
0
2
1
2
1
0
2
1
0
2
1
0
2
1
0
2
1
0
2
1
0
2
1
0
2
1
0
2
1
0
2
1
0
2
1
0
2
1
0
2
1
0
2
1
0
2
1
0
2
1
0
2
1
0
2
1
0
2
1
0
2
1
0
CLIC!
2
1
0
CLIC!
CLIC!
9
8
2
2
1
0
0
2
1
0
2
1
10
11
7
1
4
3
12
13
13
17
18
16
19
17
20
15
6
5
21
a
b
CLIC!
1
1
2
2
b
a
0
2
1
0
2
1
0
2
1
2
1
0
2
1
0
2
1
0
2
1
0
2
1
0
2
1
0
2
1
0
2
1
0
2
1
0
2
1
0
2
1
0
2
1
0
2
1
0
2
1
0
2
1
0
2
1
0
2
1
0
2
1
0
2
1
0
2
1
0
CLIC!
2
1
0
CLIC!
CLIC!
9
8
2
2
1
0
0
2
1
0
2
1
10
11
7
1
4
3
12
13
13
17
18
16
19
17
20
15
6
5
21
a
b
CLIC!
1
1
2
2
b
a
0
2
1
0
2
1
0
2
1
2
1
0
2
1
0
2
1
0
2
1
0
2
1
0
2
1
0
2
1
0
2
1
0
2
1
0
2
1
0
2
1
0
2
1
0
2
1
0
2
1
0
2
1
0
2
1
0
2
1
0
2
1
0
2
1
0
2
1
0
CLIC!
2
1
0
CLIC!
CLIC!
9
8
2
2
1
0
0
2
1
0
2
1
10
11
7
1
4
3
12
13
13
17
18
16
19
17
20
15
6
5
21
a
b
CLIC!
1
1
2
2
b
a
0
2
1
0
2
1
0
2
1
2
1
0
2
1
0
2
1
0
2
1
0
2
1
0
2
1
0
2
1
0
2
1
0
2
1
0
2
1
0
2
1
0
2
1
0
2
1
0
2
1
0
2
1
0
2
1
0
2
1
0
2
1
0
2
1
0
2
1
0
CLIC!
2
1
0
CLIC!
CLIC!
9
8
2
2
1
0
0
2
1
0
2
1
10
11
7
1
4
3
12
13
13
17
18
16
19
17
20
15
6
5
21
a
b
CLIC!
1
1
2
2
b
a
0
2
1
0
2
1
0
2
1
2
1
0
2
1
0
2
1
0
2
1
0
2
1
0
2
1
0
2
1
0
2
1
0
2
1
0
2
1
0
2
1
0
2
1
0
2
1
0
2
1
0
2
1
0
2
1
0
2
1
0
2
1
0
2
1
0
2
1
0
CLIC!
2
1
0
CLIC!
CLIC!
9
8
2
2
1
0
0
2
1
0
2
1
10
11
7
1
4
3
12
13
13
17
18
16
19
17
20
15
6
5
21
a
b
CLIC!
1
1
2
2
b
a
0
2
1
0
2
1
0
2
1
2
1
0
2
1
0
2
1
0
2
1
0
2
1
0
2
1
0
2
1
0
2
1
0
2
1
0
2
1
0
2
1
0
2
1
0
2
1
0
2
1
0
2
1
0
2
1
0
2
1
0
2
1
0
2
1
0
2
1
0
CLIC!
2
1
0
CLIC!
CLIC!
9
8
2
2
1
0
0
2
1
0
2
1
10
11
7
1
4
3
12
13
13
17
18
16
19
17
20
15
6
5
21
a
b
CLIC!
1
1
2
2
b
a
0
2
1
0
2
1
0
2
1
2
1
0
2
1
0
2
1
0
2
1
0
2
1
0
2
1
0
2
1
0
2
1
0
2
1
0
2
1
0
2
1
0
2
1
0
2
1
0
2
1
0
2
1
0
2
1
0
2
1
0
2
1
0
2
1
0
2
1
0
CLIC!
2
1
0
CLIC!
CLIC!
9
8
2
2
1
0
0
2
1
0
2
1
10
11
7
1
4
3
12
13
13
17
18
16
19
17
20
15
6
5
21
a
b
CLIC!
1
1
2
2
b
a
0
2
1
0
2
1
0
2
1
2
1
0
2
1
0
2
1
0
2
1
0
2
1
0
2
1
0
2
1
0
2
1
0
2
1
0
2
1
0
2
1
0
2
1
0
2
1
0
2
1
0
2
1
0
2
1
0
2
1
0
2
1
0
2
1
0
2
1
0
CLIC!
2
1
0
CLIC!
CLIC!
9
8
2
2
1
0
2
1
0
2
1
0
2
1
0
0
2
1
0
2
1
2
1
0
NOT SILENCE 1800113844 D0.qxd:1800113844 21/10/08 15:47 Page 7


