background image

Roxio Easy VHS to DVD Getting Started Guide

www.roxio.com

20

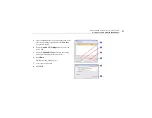
Each clip you record appears in the video list. Now you are ready to record the next clip.

15

Repeat Step 9 to Step 14 for each clip you wish to record.

16

After recording your final clip, review the video list. Use the 

Remove

 buttons to delete any clips you do not want to keep.

17

Click the 

Ready to Export

 button.

A list of devices and settings appears.

Summary of Contents for Easy VHS to DVD

Page 1: ...Roxio Easy VHS to DVD Getting Started Guide ...

Page 2: ...Roxio Easy VHS to DVD Getting Started Guide www roxio com ii ...

Page 3: ...S to DVD 7 What you get Software 8 What you get Hardware 10 Connecting a VHS player to your computer 11 Converting VHS tapes with Easy VHS to DVD 14 Converting LPs or audio tapes with Sound Editor 22 Enhancing audio with Sound Editor 24 Creating an audio CD with Sound Editor 26 ...

Page 4: ...Roxio Easy VHS to DVD Getting Started Guide www roxio com 4 ...

Page 5: ...or reformat it for playback on a wide range of hand held devices We ve also included software to help you digitize your LP collection and create disc labels About this guide This guide provides an overview of Easy VHS to DVD to help you get started It explains how to connect your VCR to your computer how to use the included capture device and how to burn VHS video onto a DVD For detailed informati...

Page 6: ... requirements Windows 7 Windows Vista with Service Pack 1 Windows XP 32 bit with Service Pack 3 and Windows 64 bit with Service Pack 2 1GHz processor 512 MB RAM DirectX 9 compatible graphics card or higher sound card and DVD burner 2 GB free hard drive space for installation ...

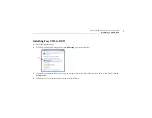
Page 7: ... Insert the installation disc 2 If a Windows Autoplay dialog appears click Run Setup exe as shown below 3 If a Windows Autoplay dialog does not appear navigate to the Easy VHS to DVD folder on the disc and double click the Setup exe file 4 Follow the on screen instructions to complete the installation ...

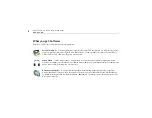
Page 8: ...eft Sound Editor Sound Editor is the go to application for converting your vinyl LPs to digital music files Sound Editor enhances recordings and saves them in many of the most popular music formats To launch Sound Editor double click its desktop icon shown at left Roxio Express Labeler Create professional quality disc labels using standard paper labels or the laser writing capabilities of your dis...

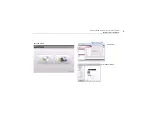
Page 9: ...Getting Started with Roxio Easy VHS to DVD What you get Software 9 Easy VHS to DVD Sound Editor Roxio Express Labeler ...

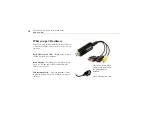
Page 10: ...io Video Capture USB Plug this converter into a USB 2 0 port on your computer Roxio Adapter This adapter connects the Capture device to video and audio cables coming from your VCR or stereo receiver USB Extension Cord This cord can make it easier to plug the Capture device into a USB 2 0 port on your computer Above The Roxio Video Capture USB device with the Roxio Adapter attached Left USB Extensi...

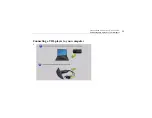
Page 11: ...Getting Started with Roxio Easy VHS to DVD Connecting a VHS player to your computer 11 Connecting a VHS player to your computer 1 ...

Page 12: ...o com 12 2 Tip Which connector should I use Depending on the VCR you ll have a choice of using either the Composite video connector the yellow plug or the higher quality S Video connector the single black plug Whenever possible we recommend using S Video ...

Page 13: ...Getting Started with Roxio Easy VHS to DVD Connecting a VHS player to your computer 13 3 ...

Page 14: ...nvert VHS tapes directly to DVDs You can also use it to create video clips from one or more VHS tapes and burn those clips to a DVD This section of the guide describes the steps to accomplish these typical tasks Project 1 Transfer a single VHS tape to a DVD Project 2 Burn multiple video clips to a DVD and create a menu Let s get started ...

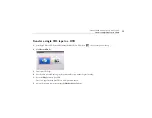
Page 15: ...ouble clicking the Easy VHS to DVD icon on your computer desktop 2 Click Record DVD 3 Insert your VHS tape 4 Fast forward or rewind the tape to the position where you want to begin recording 5 Press the Play button on your VCR The video appears in the Easy VHS to DVD preview window 6 Adjust the volume if necessary using the Playback Level control ...

Page 16: ...y by moving the Adjust Recording Level slider left or right The recording meter should barely reach the red area when the loudest portion of the tape is played 8 Give your DVD a title 9 Select the disc drive you will use to burn the DVD 10 Insert a blank disc into the drive you selected in the previous step ...

Page 17: ... just type it in If not enter an approximate value that you know to be slightly longer than the video duration 13 Use the controls on your VCR to return the tape to the correct starting position 14 Click the Record button on Easy VHS to DVD 15 If you set a recording duration Easy VHS to DVD will stop recording automatically If not click the Stop button when you reach the end of your tape 16 When t...

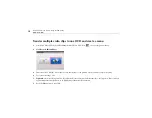
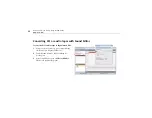
Page 18: ...ktop 2 Click Record Edit and Save 3 Insert your first VHS tape Fast forward or rewind the tape to the position where you want to begin recording 4 Give your recording a title 5 Optional Set the recording duration If you know the exact duration of the current video just type it in If not enter an approximate value that you know to be slightly longer than the video duration 6 Press the Play button o...

Page 19: ...e Stop button when you are done recording Your video appears in the video list Now you are ready to record the next clip 9 Click Record Video 10 Insert the next tape in your VCR or reset the current tape to the desired starting position 11 Give this recording a title 12 Optional Set the recording duration 13 Click the Record button 14 If you set a recording duration Easy VHS to DVD will stop recor...

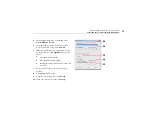
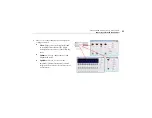
Page 20: ...ist Now you are ready to record the next clip 15 Repeat Step 9 to Step 14 for each clip you wish to record 16 After recording your final clip review the video list Use the Remove buttons to delete any clips you do not want to keep 17 Click the Ready to Export button A list of devices and settings appears ...

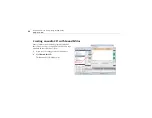
Page 21: ...ination Drive and insert a blank DVD in the destination drive 20 Enter a DVD Title 21 Select Add Menu 22 Click Change Menu to choose a menu style 23 Optional You may change the menu s aspect ratio to widescreen 16 9 by selecting File Preferences 24 Click Export 25 When the burning process is complete eject your new video disc if it does not eject automatically ...

Page 22: ...s with Sound Editor To convert LPs or audio tapes to digital music files 1 Connect a stereo receiver to your computer using the Roxio Video Capture USB device 2 Launch Sound Editor by double clicking its desktop icon 3 Once Sound Editor opens click Record Audio The Record Audio dialog opens ...

Page 23: ...P or tape and click Auto 6 If this is your first time converting an LP or tape we suggest that you click Options Here you can select a destination for your files file format and quality settings the length of silence needed before a new clip is created 7 Reset your LP or tape to the desired starting position 8 Start playing the LP or tape 9 On the Record Audio dialog click Record 10 When you are d...

Page 24: ... project is already open in Sound Editor skip to Step 3 If not click Add Audio File Media Selector opens 2 Use Media Selector to navigate to the audio file you want to enhance Click OK to open the project in Sound Editor 3 Under Project View select the clip you would like to enhance 4 Click Clean up Audio ...

Page 25: ...ngs as desired Clean Helps remove noise typically found in recordings from vinyl records Apply settings in any one or more of the following areas Enhancer Lets you enhance the bass and brighten the sound Equalizer Lets you boost or cut the amplitude volume for 10 bands of sound frequencies You can also choose from one of several presets ...

Page 26: ...ing an audio CD with Sound Editor Once you have recorded an LP or tape and enhanced the sound you can use Sound Editor to add audio tags and burn an audio CD Here s how 1 Open your recording project in Sound Editor 2 Click Burn Audio CD The Burn Audio CD dialog opens ...

Page 27: ...our disc burner and select the corresponding capacity from the Disc Size drop down menu 4 Click the Audio CD Settings button to give the disc a title 5 Click the Edit Audio Tags button to enter song and artist information for your tracks 6 Click Burn The Burn Setup dialog opens 7 Select your disc burner 8 Click OK ...

Page 28: ... CineMagic are trademarks or registered trademarks owned by Sonic Solutions in the United States and or other jurisdictions All other trademarks used are owned by their respective owners Use of this product is subject to the acceptance of the license agreements included in this package This product may be protected by one or more US and or foreign patents owned by Sonic Solutions ...

Reviews: