background image

12

4. 

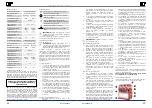
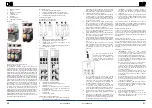
Switch on the device with the A button in models 

RCSL 2/12, RCSL 3/12 or 1 button in models RCSL 

2/15, RCSL 3/15 NOTE! Do not turn on the device 

dry (without the batch intended for processing into 

granita or cold drinks)

5. 

Using the F button in models RCSL 2/12, RCSL 3/12 

or 3 button in models RCSL 2/15, RCSL 3/15, activate 

the agitator for tanks that will produce granita or 

cold drinks

6. 

Turn on cooling of the device using the B button in 

models RCSL 2/12, RCSL 3/12 or 2 button in models 

RCSL 2/15, RCSL 3/15.

7. 

Turn on cooling for tanks that will produce granita 

or cold drink using the D button in models RCSL 

2/12, RCSL 3/12 or using control knobs of ice cream 

hardness 4 (in models RCSL 2/15, RCSL 3/15), 

• 

In models RCSL 2/12, RCSL 3/12, cold drinks can only 

be produced by the tank closest to the control panel. 

All tanks are adapted to produce granita.

If necessary, it is possible to adjust the hardness of the 

granita produced. Turn the knob to the right in order to 

increase hardness or to the left in order to reduce hardness.

In order to shorten the batch processing time, it is 

recommended to top up the tank when the batch level drops 

to the half of the cylinder cooling part (evaporator).

In RCSL 2/12, RCSL 3/12 models

If you want to leave the material in the device for a few hours 

or overnight, switch button B to position II. The night mode 

will be activated, which will keep the product in a liquid state 

and extend the lifetime of the compressor of the device.

In RCSL 2/15, RCSL 3/15 models)

If you intend to leave the material in the device for several 

hours or overnight, let the device operate (cool and stir) for 

at least an hour before switching it off. Before switching the 

device on again, make sure that no blockages have been 

created in the tank that hinder the movements of the agitator.

4.4 Cleaning and maintenance

• 

NOTE! Before each cleaning, maintenance or repair 

activity, and also if the device is not in use, pull out 

the mains plug and allow the device to reach room 

temperature.

• 

Cleaning and disinfection should be carried out every 

day and as often as required by law binding in the 

place where the device is used.

• 

Do not pour the device with water or do not allow 

the electrical parts of the machine get wet.

• 

The device should be cleaned before use and 

immediately after each use. In particular, it is 

necessary to clean all parts having contact with the 

liquid for production of granita and cold beverages.

• 

In order to prevent any bacteria from developing in 

the device, it is necessary to only use special cleaning 

agents designed for cleaning surfaces made of 

plastics and having contact with food.

• 

Never clean the machine with an automatic 

dishwasher as this may cause damage to parts.

• 

Never use aggressive disinfectants or corrosive 

detergents for cleaning.

• 

Dry all parts well after cleaning before the device is 

used again.

• 

In the event of a frost hazard, it is necessary to 

empty, clean and dry the device.

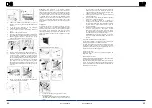
Washing of the device:

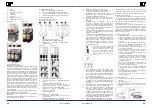
1.  

Pour out the contents of the device tank through the 

tap.

2.  

Remove the tank cover.

3.   Fill the tank with tap water (with temperature below 

40° C) and allow the device to stand for about 15 

minutes. 

D

• 

In RCSL 2/15, RCSL 3/15 models, when the ice 

hardness adjustment knob 4 is set to the value 0, 

cooling in the tank suitable for the knob is turned 

off. The higher the value indicated by the knob, the 

harder the consistency of granita will be. The most 

liquid consistency will be obtained at the level 1.

8.  

In order to turn on the tank backlight, it is necessary 

to press the button C (in models RCSL 2/12, RCSL 

3/12).

9.   Set the hardness of the ice cream according to your 

needs (in models RCSL 2/15, RCSL 3/15).

10.   Wait for the time the machine needs to process 

the liquid intended for granita production or cold 

beverage production.

11.   After processing the liquid intended for the 

production of granita or cold beverages, the 

processing effect (using the lever of the device tap) 

can be dosed into suitable containers, e.g. cups.


NOTE! Do not turn off the device when the ice cream 

reaches the required consistency, the device stops 

cooling and the agitator is still working.

12.   After  use,  always  turn  off  the  device,  disconnect  it 

from the power supply and wash all parts of it that 

come into contact with drinks or ice cream.

4.   Install the tank cover and start stirring (without 

cooling) in the device for about 3 minutes.

5.  

Switch  off  the  device  and  disconnect  it  from  the 

power supply.

Rev. 24.04.2018

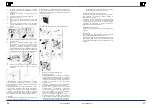
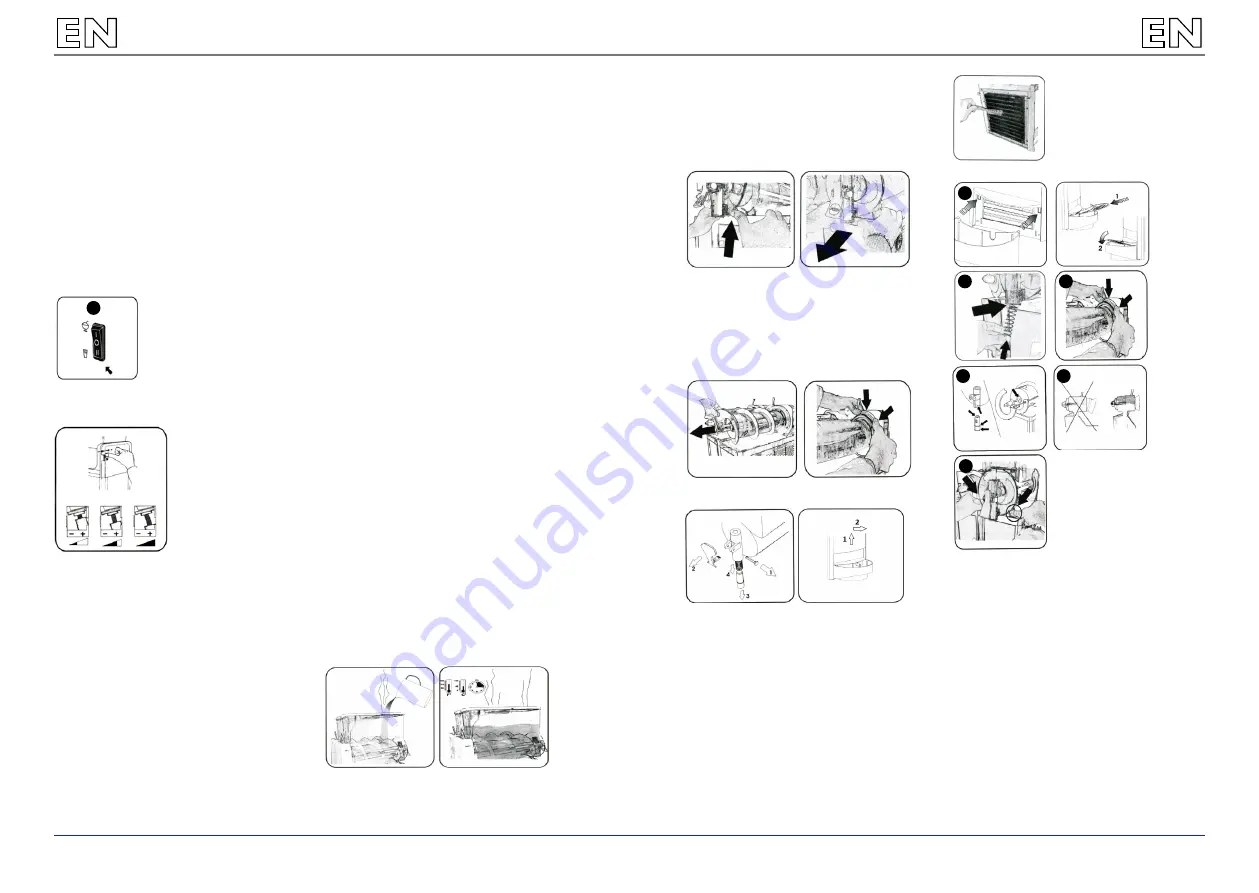
6.   Empty the tank, pouring out the contents by means 

of the tap of the device.

7. 

Remove the tank cover.

8.   Remove the tank by lifting its front part from the 

hooks, and then slide out the entire tank by pulling 

towards the front of the device.

9.   Remove the external agitator, and then (only in 

models RCSL 2/15, RCSL 3/15) the internal agitator.

10.   Remove the tank seal from the evaporator cylinder.

11.  Disassemble the tap. Unscrew the nut from the 

mandrel holding the lever in position, remove the 

mandrel and pull the piston out of the tap pipe. It 

is recommended to put the tap parts into bath in 

a disinfectant intended for cleaning surfaces having 

contact with food. The bath should be carried out 

in accordance with the recommendations of the 

disinfectant.

NOTE! In order to properly perform cleaning and disinfection 

of the device, a person performing these activities should 

thoroughly wash and disinfect their hands.

Wash all parts of the device that may have contact with 

drinks or ice cream. For cleaning, it is recommended to 

use a mild detergent designed for cleaning the surfaces 

having contact with food. After washing with detergent, it 

is necessary to rinse all disassembled parts with water, and 

those elements that remained fastened to the device should 

be wiped with a sponge soaked in water.

Disinfection

It is recommended to repeat the washing activities using 

warm water (approximately 40° C) and a disinfectant suitable 

for the surfaces having contact with food. After washing 

and / or disinfection it is necessary to allow the parts to 

dry. Regularly clean the ventilation openings of the device 

with a brush or tuft. The ventilation openings must not be 

clogged.

Assembly of the device after washing.

1

2

33

13

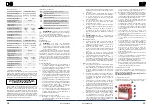
12.   Remove the drip trays by lifting them up and  

pulling in the opposite direction against the device.

1. 

Slide the drip trays into place.

2. 

Assemble the tap


NOTE!  Sufficient  slipping  of  moving  parts  of  the 

device and seals must be ensured. It is recommended 

to lubricate their cooperating surfaces with 

a lubricant intended for mechanical elements having 

contact with food. 

3. 

Install the tank seal in the back part of the evaporator 

cylinder.

4.   (Applicable to RCSL 2/15, RCSL 3/15). Mount the 

internal agitator in the evaporator cylinder.

5.  Mount the external agitator on the evaporator 

cylinder by connecting it with the internal agitator.


In the RCSL 2/12, RCSL 3/12 models before installing 

the agitator the gasket must be properly adjusted to 

the agitator opening. 

6. 

Slide the tank into its place by pressing it against 

the back gasket and pushing the front part down in 

order to snap it in with the hooks.


In order to facilitate assembling the gasket and the 

rim of the tank can be moistened.


NOTE! Poorly installed tank will prevent proper 

operation of the device.

6

4

5

Rev. 24.04.2018

Summary of Contents for RCSL 2/12

Page 1: ...expondo de BEDIENUNGSANLEITUNG User manual Manuel d utilisation Istruzioni per l uso Manual de instrucciones Instrukcja Návod k použití RCSL 2 12 RCSL 3 12 RCSL 2 15 RCSL 3 15 SLUSH MACHINE ...

Page 2: ...nd in feuchter Umgebung geerdet ist Wasser das in das Gerät eintritt erhöht das Risiko von Beschädigungen und elektrischen Schlägen c Verwenden Sie das Kabel nicht in unsachgemäßer Weise Verwenden Sie es niemals zum Tragen des Gerätes oder zum Herausziehen des Steckers Halten Sie das Kabel von Hitze Öl scharfen Kanten oder beweglichen Teilen fern Beschädigte oder geschweißte Kabel erhöhen das Risi...

Page 3: ... Oberfläche auf der das Gerät aufgestellt wird darf nicht um mehr als 10 geneigt werden q Stecken Sie nichts in den Wasserhahn des Geräts r Es ist nicht erlaubt die maximale Kapazität der Behälter zu überschreiten und es sollte auf das Phänomen geachtet werden dass sich die Flüssigkeitsmenge nach dem Gefrieren ausdehnt 4 Nutzungsbedingungen Die Slush Eismaschine ist für die Herstellung von Eis und...

Page 4: ...SL 3 15 Wenn Sie das Material für mehrere Stunden oder über Nacht im Gerät belassen möchten lassen Sie das Gerät mindestens eine Stunde lang arbeiten kühlen und rühren bevor Sie es ausschalten Bevor Sie das Gerät wieder einschalten vergewissern Sie sich dass keine Verstopfungen aus dem Tank entstanden sind die das Bewegen des Rührwerks erschweren 4 4 Reinigung und Wartung ACHTUNG Vor jeder Reinigu...

Page 5: ...items inside the device 3 1 Electrical safety a The plug has to fit the socket Do not modify the plug in any way Using original plugs and matching sockets reduces the risk of electric shock b Avoid touching earthed elements such as pipes heaters boilers and fridges There is an increased risk of electric shock if the earthed device is exposed to rain in direct contact with a wet surface or operatin...

Page 6: ... anything into the tap of the device r It is not allowed to exceed the maximum capacity of tanks and attention should be paid to the phenomenon of increasing the volume of liquid after freezing 4 USE GUIDELINES The Slush Machine is intended for the production of granita and cold drinks such as iced coffee frozen cappuccino frozen yogurt frozen alcoholic beverages The user is liable for any damage ...

Page 7: ...ss the button C in models RCSL 2 12 RCSL 3 12 9 Set the hardness of the ice cream according to your needs in models RCSL 2 15 RCSL 3 15 10 Wait for the time the machine needs to process the liquid intended for granita production or cold beverage production 11 After processing the liquid intended for the production of granita or cold beverages the processing effect using the lever of the device tap...

Page 8: ...ądzenia na bezpośrednie działanie deszczu mokrej nawierzchni i pracy w wilgotnym otoczeniu Przedostanie się wody do urządzenia zwiększa ryzyko jego uszkodzenia oraz porażenia prądem c Nie należy używać przewodu w sposób niewłaściwy Nigdy nie używaj go do przenoszenia urządzenia lub do wyciągania wtyczki z gniazda Trzymaj przewód z dala od źródeł ciepła oleju ostrych krawędzi lub ruchomych części U...

Page 9: ...rumieniem wody p Powierzchnia na której ustawione będzie urządzenie nie może być odchylona od poziomu bardziej niż 10 q Niewolno niczego wkładać do kranu urządzenia r Nie wolno przekraczać maksymalnej pojemności zbiorników oraz należy zwrócić uwagę na zjawisko zwiększenia objętości cieczy po zamarznięciu 4 Zasady użytkowania Granitor przeznaczony jest do wytwarzania granity oraz zimnych napojów ta...

Page 10: ...ć aby urządzenie pracowało chłodziło i mieszało przez co najmniej godzinę przed jego wyłączeniem Przed ponownym włączeniem urządzenia należy upewnić się że z zbiorniku nie powstały żadne blokady utrudniające ruch mieszadła 4 4 Czyszczenie i konserwacja UWAGA Przed każdym czyszczeniem czynnością konserwacyjną lub naprawą a także jeżeli urządzenie nie jest używane należy wyciągnąć wtyczkę sieciową i...

Page 11: ...ních standardů PŘED ZAHÁJENÍM PRÁCE SI DŮKLADNĚ PŘEČTĚTE TENTO NÁVOD A SNAŽTE SE JEJ POCHOPIT Pro zajištění dlouhého a spolehlivého fungování zařízení provádějte pravidelný servis a údržbu v souladu s pokyny uvedenými v tomto návodu Technické údaje a specifikace uvedené v návodu k obsluze jsou aktuální Výrobce si vyhrazuje právo provádět změny pro zvýšení kvality Vzhledem k technickému pokroku a m...

Page 12: ...popis se týká modelů RCSL 3 15 ostatní modely mají podobnou konstrukci d Opravy zařízení může provádět pouze servis výrobce Opravy neprovádějte sami e V případě vzniku požáru k hašení zařízení pod napětím používejte pouze práškové nebo sněhové hasicí přístroje CO2 f Na pracovišti se nesmí zdržovat děti a nepovolané osoby Nepozornost může způsobit ztrátu kontroly nad zařízením PAMATUJTE Při práci s...

Page 13: ...kud chcete nechat dávku v zařízení na několik hodin nebo přes noc přepněte přepínač B do polohy II Zapne se noční režim který udrží dávku v tekutém stavu a prodlouží životnost kompresoru zařízení U modelů RCSL 2 15 RCSL 3 15 Pokud chcete ponechat dávku v zařízení na několik hodin nebo přes noc nechte zařízení pracovat chladit a míchat alespoň jednu hodinu před jeho vypnutím Před opětovným zapnutím...

Page 14: ...telle assurez vous que l interrupteur est en position d arrêt avant de connecter l appareil à une source d alimentation d Retirez les outils de réglage ou les clés avant de mettre l appareil en marche Un outil ou un bouton qui reste dans une partie rotative de l appareil peut causer des blessures 3 4 Utilisation sûre de l appareil a Ne surchauffez pas l appareil Utilisez des outils appropriés pour...

Page 15: ...dans les réservoirs qui produisent la glace ou les boissons froides Pour les modèles RCSL 2 12 RCSL 3 12 les boissons froides ne peuvent être produites que par le réservoir le plus proche du panneau de commande Tous les réservoirs sont généralement adaptés à la production de la crème glacée Si nécessaire la dureté de la masse de glace produite peut être réglée Tournez le bouton dans le sens des ai...

Page 16: ...de ventilation de l appareil avec un pinceau ou une brosse Les orifices de ventilation ne doivent pas être bloqués Installation de l appareil après le nettoyage 1 2 3 3 6 4 5 12 Retirez les bacs d égouttage en les soulevant et en les tirant vers la direction opposée de l appareil 1 Faites glisser les bacs d égouttage à leur place 2 Montage du robinet 30 Rev 24 04 2018 ATTENTION Une mobilité approp...

Page 17: ...durante l utilizzo del dispositivo È sufficiente un momento di disattenzione durante l utilizzo del dispositivo per correre il rischio di gravi lesioni c Per evitare la messa in funzione accidentale del dispositivo prima di collegare la spina di alimentazione alla presa accertarsi che l interruttore di accensione sul dispositivo non sia azionato d Prima di accendere il dispositivo assicurarsi di r...

Page 18: ...re situato vicino al panello di controllo Tutti i contenitori sono generalmente adatti per la preparazione di granite All occorrenza la densità della granita preparata può essere adattata Basta ruotare l apposito tasto in senso orario per aumentarne la densità Ruotare quindi l apposito tasto in senso antiorario per diminuirne la densità che sono entrate in contatto con le bevande e la granita La q...

Page 19: ...interno Nei modelli RCSL 2 12 RCSL 3 12 inserire prima la guarnizione sul foro di miscelazione e successivamente montare l agitatore 6 Inserire il contenitore spingendolo contro la guarnizione posteriore e spingere la parte anteriore verso il basso fino a quando non viene incastrato con la leva e non fa uno scatto Per facilitare il montaggio inumidire la guarnizione e il bordo del contenitore 6 4 ...

Page 20: ...s c Para evitar una puesta en marcha accidental asegúrese de que el interruptor esté apagado antes de conectarlo a una fuente de alimentación d Antes de encender el equipo aleje todas las herramientas o destornilladores utilizados para su ajuste Los objetos que puedan quedar sobre piezas rotatorias pueden ocasionar desperfectos y lesiones 3 4 Manejo seguro del aparato a No permita que el aparato s...

Page 21: ... el enfriamiento del tanque En los modelos RCSL 2 12 RCSL 3 12 se pueden elaborar bebidas frías únicamente en el contenedor más próximo al panel de control Todos los contenedores son aptos para la elaboración de granizada En caso de necesidad se puede modificar la densidad del granizado Gire el mando en sentido de las agujas del reloj para aumentar la densidad o en sentido contrario para disminuir...

Page 22: ... del aparato tras la limpieza 1 2 3 3 6 4 5 12 Retire las bandejas recogegotas levantándolas y tirando de ellas hacia el exterior 1 Coloque las bandejas recogegotas en su sitio 2 Montaje del grifo ATENCIÓN Deberá garantizarse la posibilidad de un deslizamiento adecuado de las piezas móviles y las juntas 42 Rev 24 04 2018 Por esta razón se recomienda engrasar todos los elementos mecánicos que entre...

Page 23: ...gsnummer Produktionsjahr PL Zakres temperatur Pojemność Czynnik chłodniczy Ilość czynnika chłodniczego Numer serii Rok produkcji FR Plage de température Capacité Fluide frigorigène Quantité de réfrigérant Numéro de série Année de production IT Scala di temperatura Capacità Agente frigorigeno Quantità di agente frigorigeno Numero di serie Anno di produzione ES Rango de temperatura Capacidad Refrige...

Page 24: ...t conformes aux normes CE PL Niniejszym potwierdzamy że urządzenia opisane w tej instrukcji są zgodne z deklaracją CE IT Con la presente documentazione si certifica che i dispositivi descritti all interno del manuale sono conformi alle vigenti norme CE ES Por la presente confirmamos que los dispositivos detallados en este manual son conformes con las normativas de la CE CZ Tímto potvrzujeme že vše...

Page 25: ...ch über Ihren lokalen Abfallkalender oder bei Ihrer Stadt oder Gemeindeverwaltung über die in Ihrem Gebiet zur Verfügung stehenden Möglichkeiten der Rückgabe oder Sammlung von Altgeräten 1 RICHTLINIE 2002 96 EG DES EUROPÄISCHEN PARLAMENTS UND DES RATES ÜBER ELEKTRO UND ELEKTRONIK ALTGERÄTE 2 Gesetz über das Inverkehrbringen die Rücknahme und die umweltverträgliche Entsorgung von Elektro und Elektr...

Reviews: