background image

Page 2

GB

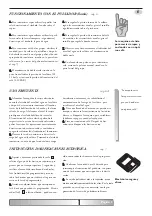
INSTALLATION

Ch. 3

Carefully read 
the instructions 
opposite.

The coffee machine

is automatically filled

with water up to the

set level.

1.

2.

3.

Connect the drinking water delivery pipe

(3/8”). Only use a certified pipe suitable for

drinking water

complying with D.M. 21.03.73.

Connect the drainpipe to the plastic container.

egulations set by the rele-

vant institutes of each state, region or country).

4.

Connect the power supply wire (type H07RN-

F 5x2,5 mm

2

) either to a certified industrial

three-phase socket, 16A 400V˜3N+EARTH or to

the terminals of a multipolar certified I-O main

switch, fitted with 16A fuses, installed upstream

(distance of contacts

3mm). Installation has to

be performed by qualified personnel, in com-

pliance with these instructions and with the

General Regulation on electric plants CEI 64.8.

Before starting the coffee machine, check that the

mains socket is fitted with an 

EFFICIENT AND

SAFE GROUND CLAMP

: check ground system

efficiency.

ERGONOMIC MODEL

Ch. 5

1.

Turn off the water delivery tap and check for

leaks.

2.

Rotate the knob of the internal tap located

below the tank and check that the water level is

more than the minimum quantity and less than

the maximum quantity (as indicated on the level

indicator).

3.

Start the red switch near the level indicator.

Wait approximately 30 minutes to allow the

machine to reach its operating temperature. The

coffee machine is ready for use when the green

neon indicator goes off.

4.

It is recommended that the boilers is filled

before switching the machine on. (otherwise the

heating element in the boiler will burn because of

the absence of Water). 

Steam and 
water are under
pressure.
SCALD
HAZARD

OPERATING THE MACHINE: Switch to pos. 0

Ch. 4

1.

Turn off the water delivery tap and check for

leaks.

2.

Rotate the switch knob to position 1.

3.

The coffee machine will automatically be filled

with water up to the pre-set level (level probe

inside the boiler). These coffee machines also

have a manual filling function, as they can be fil-

led with water by rotating the knob of the inter-

nal tap.

N.B.:

Electronic models are fitted with a safety

level indicator. If the machine switches off during

filling and the LEDs on the console blink, follow

the instructions under ELECTRONIC DOSING

(refer to chapter 6 A.)

4.

Once the machine has been filled to the preset

level,  move the switch to 2 (wait approximately

30 minutes to allow the machine to reach its ope-

rating temperature. The coffee machine is ready

use when the geen neon indicator goes off.)

Attention : the net pressure must be comprise

between the MAX worth of 12 bar and the 

Remove the coffee machine from its parcking

and check that it has not been damaged. Level

the coffee machine by adjusting its feet. Check

that the voltage of your mains supply corresponds

to that indicated in the technical specifications.

Place the appliance on a stable top, close to the

mains sockets and water line connections.

(Comply with the r

MIN worth of 1,5 bar .

Summary of Contents for Diadema 2 Group

Page 1: ...MANUALE DI ISTRUZIONI I INSTRUCTIONS FOR USE GB MODE D EMPLOI F GEBRAUCHSANWEISUNG D MANUAL DE INSTRUCCIONES E 2 3 4 gr ...

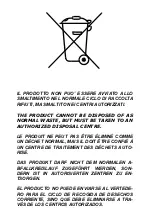
Page 2: ...AL CENTRE LE PRODUIT NE PEUT PAS ÊTRE ÉLIMINÉ COMME UN DÉCHET NORMAL MAIS IL DOIT ÊTRE CONFIÉ À UN CENTRE DE TRAITEMENT DES DÉCHETS AUTO RISÉ DAS PRODUKT DARF NICHT DEM NORMALEN A BFALLKREISLAUF ZUGEFÜHRT WERDEN SON DERN IST IN AUTORISIERTEN ZENTREN ZU EN TSORGEN EL PRODUCTO NO PUEDE ENVIARSE AL VERTEDE RO PARA EL CICLO DE RECOGIDA DE DESECHOS CORRIENTE SINO QUE DEBE ELIMINARSE A TRA VÉS DE LOS CE...

Page 3: ... qualsiasi responsabilità per eventuali danni a persone o cose Introduzione cap 1 L eventuale diverso utilizzo non contemplato nelle riportate istruzioni solleva la Ditta costruttrice da qualsiasi responsabilità per eventuali danni a persone o cose Da chi le macchine le pensa le progetta e le produce MANUTENZIONE QUOTIDIANA cap 2 Prima di qualsiasi operazione di pulizia e manutenzione staccare la ...

Page 4: ...IONE Interruttore in pos 0 cap 4 1 Aprire il rubinetto dell acqua di carico e verifi care che non ci siano delle perdite 2 Ruotare la manopola dell interruttore nella posizione I 3 La macchina inizierà a riempirsi di acqua auto maticamente sino al raggiungiento del livello impostato sonda autolivello in caldaia Le mac chine sono dotate di reimpimento manuale si può aiutare l entrata d acqua girand...

Page 5: ...uantità di caffè nel portafiltro e dopo averlo richiuso sul gruppo premere il pulsante apposito di erogazione posto sul frontale di acciaio o tra mite pulsantiera elettronica vedere cap 7 4 Il manometro a doppia scala posizionato fron talmente rileva in ogni momento la pressione della caldaia 0 9 1 1 BAR e la pressione di erogazione del caffè 8 10 BAR 5 Per regolare la pressione interna in caldaia...

Page 6: ...pporto interuttore cablaggio termostato 95 ADDOLCITORE A RESINE Calcio e magnesio determinano la durezza dell ac qua e provocano la formazione di quello che noi chiamiamo semplicemente calcare Avere installato un addolcitore a resine epossiddi che evita la formazione di calcare ma è sempre opportuno effettuare la rigenerazione dell addolci tore tramite sale apposito o grosso da cucina Na Cl clorur...

Page 7: ...s make alla machines made by the company safe reliable and funciontal No liability can be accepted by the company for any damage to persons or things caused by non compliance with these instructions Devised designed and produced by us DAILY MAINTENANCE ch 2 Always disconnect the coffee machine from the mains or press the main switch to 0 before any cleaning or maintenance Empty and clean the coffe...

Page 8: ... coffee machine is ready for use when the green neon indicator goes off 4 It is recommended that the boilers is filled before switching the machine on otherwise the heating element in the boiler will burn because of the absence of Water Steam and water are under pressure SCALD HAZARD OPERATING THE MACHINE Switch to pos 0 Ch 4 1 Turn off the water delivery tap and check for leaks 2 Rotate the switc...

Page 9: ...om the coffee spouts fill the filter holder with the correct quantity of coffee put it back above the coffee spout and press the relevant push button on the steel front if the machine is fitted with an electronic console refer to chapter 7 4 The double range pressure gauge on the front constantly measures boiler pressure 0 9 1 1 BAR as well as coffee delivery pressure 8 10 BAR 5 Adjust pressure in...

Page 10: ...element support switch wires 95 thermostat RESIN BASED SOFTENER Calcium and magnesium determine the hardness of water and cause the formation of what is known as scale Installing an epoxy resin water softener helps to prevent the formation of scale Regenerate the sof tener periodically with the appropriate salt or Na Cl sodium chloride coarse table salt Water is hard beetween 30 and 40 it is consi...

Page 11: ...ivre et l acier et les composants fiables garantissent que les machines fabri quées par la société sont sûres fiables et fonc tionelles Toute utilisation différente de celle indiquée dans le présent mode d emploi dégage la société de toute responsabilité pour Introduction chap 1 les éventuels dommages aux personnes ou aux biens Ces machines sont créées conçues et produites par nous ENTRETIEN QUOTI...

Page 12: ...upteur sur la position I 3 La machine commencera à se remplir d eau automatiquement jusqu à ce que le niveau établi soit atteint sonde de niveau automatique dans la chaudière Les machines sont équipées d un remplissage manuel il est possible de facilieter l entrée de l eau en tournant la manette du robi net intérieur NB Les machine à cafè électroniques sont munies d une système de niveau Si la mac...

Page 13: ...omique portant le symbole de la goutte d eau 3 Pour obtenir le débit du café des groupes doser la juste quantité de café dans le portefiltre et l accrocher au groupe appuyer sur le bouton poussoir correspondant au débit du cafè placé sur la partie frontale en acier dans le cas du clavier électronique voir chap 7 4 Le manomètre à double échelle situé sur la partie frontale de l appareil détecte à t...

Page 14: ...e plan supérieur de la machine à café Le Kit comprend résistance support interrupteur et câblage thermostat 95 ADOUCISSEUR À RÉSINES Le calcium et le magnésium déterminent la dureté de l eau et provoquent la formation de ce que l on appelle plus simplement le tartre L installation d un adoucissieur à résines époxydi ques évite la formation du tartre toutefois il est toujours conseillé d effectuer ...

Page 15: ...ll Ein von den Anleitungen abweichender Gebrauch enthebt die Firma von jeglicher Haftung für eventuelle Schäden an Personen oder Dingen Einleitung Kap 1 Von uns die wir uns die Maschinen ausdenken entwicheln und produzieren TÄGLICHE WARTUNG Kap 2 Vor Beginn einer jeden Reinigungs bzw Wartungsarbeit der Netzstecker ziehen oder den Hauptschalter auf Position O stellen Die Kaffeesiebe allabendlich en...

Page 16: ...lter auf 2 positionieren etwa 30 Minuten abwarten damit die Maschine ihre Betribstemperatur erreichen kann Das Abschalten der grünen Kontrollampe zeigt an daß die Espressomaschine jetzt betriebsbereit ist Dampf und Wasser stehen unter Druck VERBRENNUNGSGE FAHR BETRIEBSERGONOMIE Kap 5 1 Öffnen Sie den Hahn für die Wasserzufuhr und prüfen Sie daß kein Wasser austritt 2 Drehen Sie den Drehgriff des s...

Page 17: ...riff oder seitlich kompakt ergonomi sch auf dem das Wassertropfensymbol abgebil det ist 3 Für die Kaffeeabgabe aus der Einheiten dosie ren Sie die entsprechende Kaffeepulvermenge in das Sieb und nach dem erneuten Anbringen an der Abgabeeinheit drücken Sie den entsprechen den Abgabeschalter an der Stahlfront oder mit tels elektronischem Schaltfeld siehe Kap 7 4 Das Manometer mit doppelter Maßskala ...

Page 18: ...nte Halterung Schalter Verkabelung ENTHÄRTERVORRICHTUNG MIT HARZEN Kalzium und Magnesium bestimmen die Wasserhärte und verursachen die Bildung der Substanz die von uns der Einfachheit halber als Kalk bezeichnet wird Die Installation einer Enthärtervorrichtung mit Epoxydharzen verhindert die Kalkbildung Die Regenerierung der Enthärtervorrichtung sollte jedoch stets mit geeigneten Salzen oder grobem...

Page 19: ...sean realmente seguras confiables y mayormente funcionales La utilización ina decuada de las máquinas para otros fines no descritos en este manual exime a la empresa Introducción cap 1 de cualquier tipo de responsabilidad por las lesiones a personas o elementos que esto pueda ocasionar Quién piensa en las máquinas es quien las proyecta y produce MANTINIEMENTO DIARIO cap 2 Antes de cualquier operci...

Page 20: ...r 30 minutos permitiendo a la máquina de alcanzar la temperatura del trabajo Al apagarse la luz verde nos indica que la máquina esta lista para ser utili zada Vapor y agya caliente en presíon PELEGRINO DE USTIÓN ERGONOMIA EN FUNCION cap 5 1 Abrir la llave qua carga el agua y verificar que no exista alguna perdida 2 Girar la manopla de la llave interna situada bajo la palangana para poder controlar...

Page 21: ...espués de haberlo encerrado en el grupo pulsar el botón apropiado de suministro situado en la parte fron tal de acero o a través del pulsaor electrónico ver el cap 7 4 El manómetro de doble escala situado en la parte frontal indica la presión de la caldera 0 9 11 bar y así mismo la presión del suministro del café 8 10 BAR 5 Para regolar la presión interna de la caldera según las características us...

Page 22: ...o para mantener en temperatura las tazas esta situado en la parte superior de la máquina En el Kit resistencia soporte interruptor Cables Termostato 95 ENDULZADOR DE RESINAS El Calcio y el magnesio determinan la dureza del agua y provocan la formación de lo que conoce mos como caliza La instalación de un sistema que endulce a resinas epoxídicas material polimérico evita la forma ción de la cal per...

Page 23: ...O DEPRESSIÓN TUBO DE DEPRESSÃO E TUBO RIGENERAZIONE REGENERATION TUBE REGENERIERUNGSROHR TUYAU DE REGENERATION TUBO REGENERACIÒN TUBO DE REGENERAÇÃO F POMOLO APERTURA COPERCHIO COVER OPENING KNOBE GRIFF ÖFFENEN DECKEL POIGNÉE D OUVERTURE COUVERCLE POMO APERTURA TAPA MANIPULO ABERTURA TAMPA G TABELLA DUREZZA ACQUA RIGENERAZIONE IN GRADI FRANCESI MODELLO MODE MODELL MODELE MODELO MODELO L 8 L 12 L 1...

Page 24: ... la propia responsabilitdad que el producto cumple con todos los requisi tos de plancamiento y construcciòn de la directiva DIRETTIVA BASSA TENSIONE LOW VOLTAGE DIRECTIVE DIRECTIVE BASSE TENSION NIEDERSPANNUNGSRICHTLINE DIRECTIVA BAJA TENSION 72 23 CEE 93 68 CEE La conformità è stata verificata con l ausilio delle seguenti norme armonizzate Confromity has been controlled with the aid of the follow...

Page 25: ... EXIGENCES DE LA DIRECTIVE 97 23 CE FORMULAIRE A1 CATÉGORIE II ET SONT COMPSÉES PAR LES ÉQUIPEMENTS SOIVANTS QUI RENTRENT DANS LA MÊME DIRECTIVE CHAUDIÈRE EN CUIVRE MARQUÉE CE 0044 SOUPAGE DE SÉCURITÉ MARQUÉE CE 0044 UNSERE KAFFEEMASCHINEN WERDEN GEMÄß DER VORSCHRIFT 97 23 CE FORMULAR A1 KATEGORIE II HERGESTELLT UND BESTEHEN AUS FOLGENDEN UNTER DIESE RICHTLINIE FALLEN DE GERÄTE KUPFERHEIZKESSEL MA...

Page 26: ......
Page 27: ...TO DATE OF PURCHASE TIMBRO RIVENDITORE RETAILER S STAMP MATR N B F C s r l ESPRESSO COFFEE MACHINES Tel 39 0438 394979 Fax 39 0438 394587 Scomigo di Conegliano TV E mail bfc mch nline it TAGLIANDO DI GARANZIA GUARANTEE CERTIFICATE MATR N DATA D ACQUISTO DATE OF PURCHASE TIMBRO RIVENDITORE RETAILER S STAMP NOME NAME COGNOME SURNAME VIA STREET CITTÀ TOWN C A P ZIP CODE PROV PROVINCE ...

Page 28: ...MITTENTE B F C s r l ESPRESSO COFFEE MACHINES Via Martiri delle Foibe 26 31020 Scomigo di Conegliano TV ...

Reviews: