R
Foundation Kit Assembly Instructions
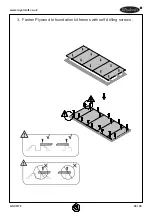
The foundation kit can be used as base for plywood, sand or stone.
PLEASE NOTE: Decking material and Self Drilling Screws for flooring are not
supplied, the owner can buy them locally.
Before You Begin:
1. SAFETY FIRST: Care must be taken when handling various pieces of
your kit since some contain sharp edges.
Please always wear work
gloves (2 pairs of golves are provided with the shed for safe construction),
eye protection
and
long
sleeves
when
assembling
or
performing
any maintenance on your kit.
2. GROUND MUST BE LEVEL!
Be sure foundation kit frames lie flat on
ground. To prepare the earth bed, remove sod and other organic debris,
level the high spots with a flat shovel, and tamp the bed down.
3. DO NOT STEP ON CHANNELS until flooring material is in place!
4. Be sure all the parts fit together properly before proceeding.
www.royalcraft.co.uk
ASCOT 2
25 / 28
Summary of Contents for ASCOT 2
Page 1: ......
Page 4: ...R Size Area of installation requirement www royalcraft co uk ASCOT 2 4 28 ...
Page 5: ...R www royalcraft co uk ASCOT 2 5 28 ...
Page 6: ...R www royalcraft co uk ASCOT 2 6 28 ...
Page 7: ...R www royalcraft co uk ASCOT 2 7 28 ...
Page 8: ...R www royalcraft co uk ASCOT 2 8 28 ...
Page 9: ...R www royalcraft co uk ASCOT 2 9 28 ...
Page 10: ...R www royalcraft co uk ASCOT 2 10 28 ...
Page 11: ...R www royalcraft co uk ASCOT 2 11 28 ...
Page 12: ...R www royalcraft co uk ASCOT 2 12 28 ...
Page 13: ...R www royalcraft co uk ASCOT 2 13 28 ...
Page 14: ...R www royalcraft co uk ASCOT 2 14 28 ...
Page 15: ...R www royalcraft co uk ASCOT 2 15 28 ...
Page 16: ...R www royalcraft co uk ASCOT 2 16 28 ...
Page 17: ...R www royalcraft co uk ASCOT 2 17 28 ...
Page 18: ...R www royalcraft co uk ASCOT 2 18 28 ...
Page 19: ...R www royalcraft co uk ASCOT 2 19 28 ...
Page 20: ...R www royalcraft co uk ASCOT 2 20 28 ...
Page 21: ...R www royalcraft co uk ASCOT 2 21 28 ...
Page 22: ...R www royalcraft co uk ASCOT 2 22 28 ...
Page 23: ...R www royalcraft co uk ASCOT 2 23 28 ...
Page 24: ...R www royalcraft co uk ASCOT 2 24 28 ...


