


3
#
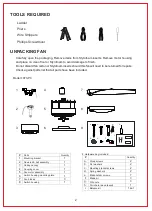
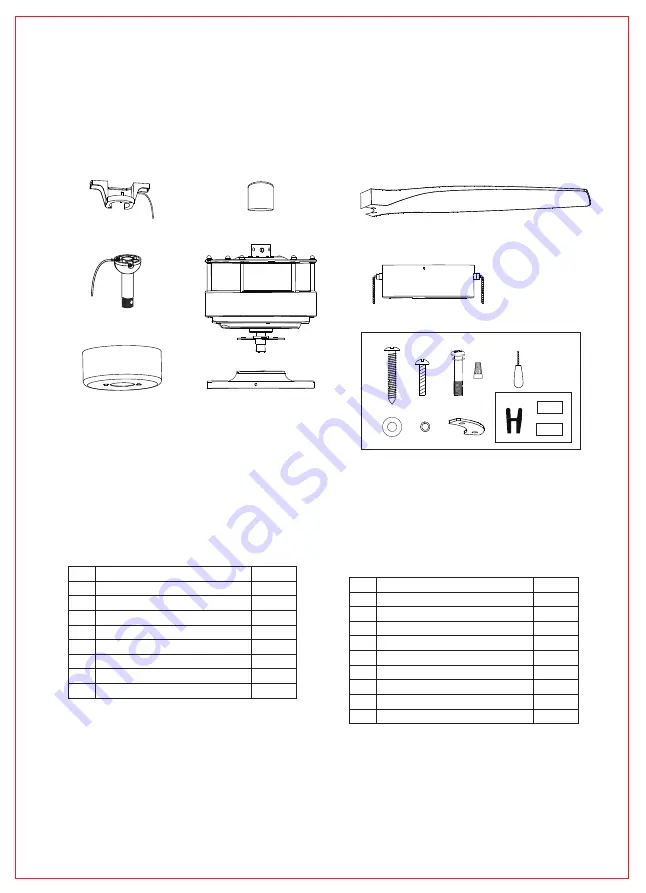
Parts
Quantity
1
Mounting bracket
1
2
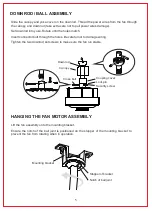
Downrod & ball assembly
1
3
Ceiling canopy
1
4
Coupling cover
1
5
Fan motor assembly
1
6
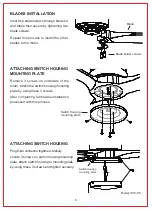
Mounting plate
1
7
LED Light kit
3
8
Fan blades
1
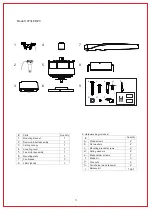
Model:1073LED-PC
1
4
5
6
7
8
9
2
3
f.
a.
b.
c.
d.
e.
g.
h.
i.
9. Hardware bag included:
#
Quantity
a.
Wood screws
2
b.
Mounting bracket screws
2
c.
Wire nuts
2
d.
2
e.
Flat washers
7
f.
Spring washers
3
g.
Blade kit
4
h.
Pull chains (wood tassels)
2
i.
Balance kit
1 set
Blade holder screws
Summary of Contents for 1073-PC
Page 1: ...1073 PC For Models Installation Guide 1073LED PC...
Page 16: ...RP 082119...


