background image

OPERATING INSTRUCTIONS


/


EN

10/15/10 Version No. 00

EN-7

5. OPERATING INSTRUCTIONS

 Push the power switch to the “ON” position.

 Set units to °C or °F as required.

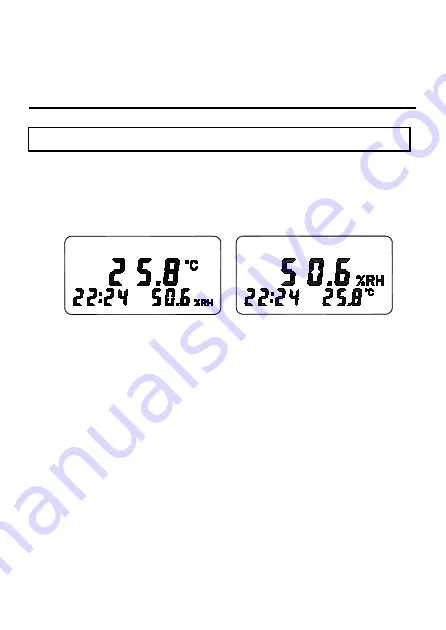
 Change to main display or secondary display as required.


 The humidity and temperature values will be

displayed.

Summary of Contents for RS-1361C

Page 1: ...RS Stock No 712 6045 Instruction Manual RS 1361C Humidity Temperature Meter Datalogger with RS 232 to USB Interface FR EN IT DE ES RS 232 HUMIDITY 10 95 RH 4 F 140 F TEMP 20 C 60 C ...

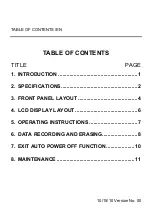
Page 2: ...ersion No 00 TABLE OF CONTENTS TITLE PAGE 1 INTRODUCTION 1 2 SPECIFICATIONS 2 3 FRONT PANEL LAYOUT 4 4 LCD DISPLAY LAYOUT 6 5 OPERATING INSTRUCTIONS 7 6 DATA RECORDING AND ERASING 8 7 EXIT AUTO POWER OFF FUNCTION 10 8 MAINTENANCE 11 ...

Page 3: ...ON Read the following information carefully before attempting to operate or service the meter Environmental conditions Altitude 2000 meters max Relatively humidity 95 max Operating temperature 0 to 60 C Indoor use only Complies with EMC Directive 89 336 EEC ...

Page 4: ...RH at 25 C 10 to 30 RH Temperature 0 8 C 1 5 F Sensor Type Humidity Precision capacitance sensor Temperature Semiconductor sensor Response time Humidity 45 RH to 95 RH 3 min 95 RH to 45 RH 5 min Temperature 1 C 2 seconds Sampling Rate 1 sample second Memory Capacity 7900 data records with total of 255 sets of results Logging interval Adjustable between 1 and 65 535 seconds Auto power off 30 minute...

Page 5: ... below 95 RH Storage temperature humidity 10 to 60 C below 70 RH Power supply Qty 1 x 9V Battery type 006P 9V or IEC 6F22 or NEDA 1604 Battery life Approximately 100 hours Dimensions 270x68x25mm Accessories Instruction manual Battery Carry case RS 232 to USB cable Data download software ...

Page 6: ...FRONT PANEL LAYOUT EN EN 4 10 15 10 Version No 00 3 FRONT PANEL LAYOUT OPEN RS 232 HUMIDITY 10 95 RH 4 F 140 F TEMP 20 C 60 C ...

Page 7: ... Version No 00 EN 5 Humidity Temp sensor cap Display Power ON OFF HOLD function switch Measurement units select switch LCD main display and secondary display Data RECORD button RS 232 to USB socket 3 5mm jack TX RX GND Battery cover ...

Page 8: ... 10 Version No 00 4 LCD DISPLAY LAYOUT Minus Measuring value main display Time information Measured value secondary display Units RH Unit C F Memory full indicator Data recording indicator Hold function indicator Low battery indicator ...

Page 9: ...5 10 Version No 00 EN 7 5 OPERATING INSTRUCTIONS Push the power switch to the ON position Set units to C or F as required Change to main display or secondary display as required The humidity and temperature values will be displayed ...

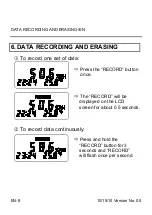
Page 10: ...ATA RECORDING AND ERASING To record one set of data To record data continuously Press the RECORD button once The RECORD will be displayed on the LCD screen for about 0 5 seconds Press and hold the RECORD button for 3 seconds and RECORD will flash once per second ...

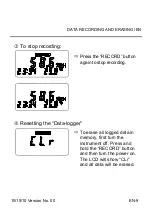
Page 11: ...stop recording Resetting the Data logger Press the RECORD button again to stop recording To erase all logged data in memory first turn the instrument off Press and hold the RECORD button and then turn the power on The LCD will show CLr and all data will be erased ...

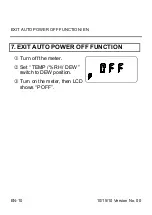
Page 12: ...EXIT AUTO POWER OFF FUNCTION EN EN 10 10 15 10 Version No 00 7 EXIT AUTO POWER OFF FUNCTION Turn off the meter Set TEMP RH DEW switch to DEW position Turn on the meter then LCD shows P OFF ...

Page 13: ... push the battery cover in the direction of the arrow to open Disconnect the battery from the instrument and replace with a new 9 Volt battery of the specified type Refit the battery cover Turn the instrument on and check for correct operation Dispose of the exhausted battery in accordance with local regulations Cleaning Periodically wipe the case with a damp cloth and mild detergent Do not use ab...

Reviews: