background image


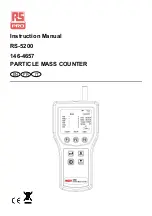
Instruction Manual 

RS-5200 

146-4657 

PARTICLE MASS COUNTER 

FR

EN

IT


Summary of Contents for RS-5200

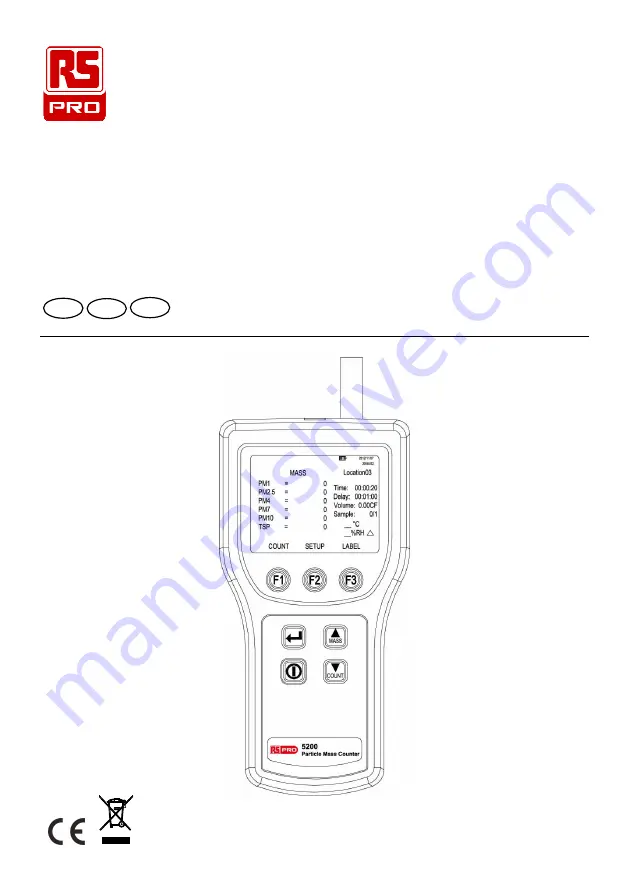
Page 1: ...Instruction Manual RS 5200 146 4657 PARTICLE MASS COUNTER FR EN IT...

Page 2: ...PECIFICATIONS 3 4 QUICK START 5 5 CONTROLS AND FUNCTIONS 6 6 DISPLAY 7 6 1 Main Screen 7 6 2 Setup Screen 8 6 3 Label Menu Screen 10 7 USING THE METER 13 7 1 Setup 13 7 2 Counter Operation 19 8 MAINTE...

Page 3: ...dispose of this product as unsorted municipal waste Conforms to relevant European Union directives Warning To avoid electric shock injury or damage to the meter follow these safety guidelines Use the...

Page 4: ...Warning Read Safety Information before using the meter The meter is a full featured battery operated handheld particle counter or mass monitor In the count mode the meter will measure particle counts...

Page 5: ...0 m 2 5 m 4 0 m 5 0 m 7 0 m 10 m Accuracy 10 to calibration aerosol Sensitivity 0 5 m Sample flow rate 2 83 L min Maximum particle concentration 70000 particles L coincidence loss max 5 Sample time 6...

Page 6: ...4 F 20 to 90 RH non condensing Storage 10 C to 50 C 14 F to 122 F Up to 90 RH non condensing Power AC Adapter 12 VDC at 3 A 100 to 240 VAC 50 to 60 Hz Rechargeable Battery Lithium ion 8 4 V at 2 5 Ah...

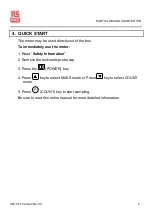
Page 7: ...out of the box To immediately use the meter 1 Read Safety Information 2 Remove the Isokinetic probe cap 3 Press the POWER key 4 Press key to select MASS mode or Press key to select COUNT mode 5 Press...

Page 8: ...key Press to turns the meter on and off 5 Arrow keys Press key to select MASS mode or press key to select COUNT mode Press to scroll within the selected screen 6 Return key Press to store the setup c...

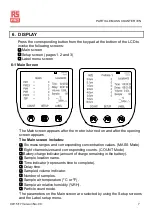
Page 9: ...appears The Main screen includes Six mass ranges and corresponding concentration values MASS Mode Eight channel sizes and corresponding counts COUNT Mode Battery charge indicator amount of charge rem...

Page 10: ...RTICLE MASS COUNTER EN 8 09 15 17 Version No 00 F1 6 2 Setup Screen 1 From the Main screen press F2 SETUP key the Setup screen Page 1 appears Press F2 key again to select the desired setup screen page...

Page 11: ...unt data Cumulative or Differential Number of samples Buffer select Flash or SD card The setup screen page 2 includes Alarm limit 1 to 100 000 Alarm size size of particles Buffer count number of sampl...

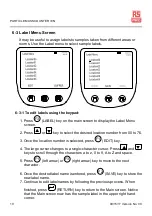
Page 12: ...to 76 3 Once the location number is selected press F1 EDIT key 4 The large cursor changes to a single character cursor Press and keys to scroll through the characters a to z 0 to 9 A to Z and space 5...

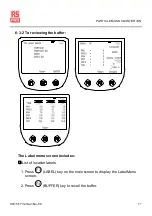
Page 13: ...9 15 17 Version No 00 11 6 3 2 To reviewing the buffer The Label menu screen includes List of location labels 1 Press F3 LABEL key on the main screen to display the Label Menu screen 2 Press F3 BUFFER...

Page 14: ...and its memory buffer 4 Press F3 ENTER key the Buffer review screen and the last record stored in the buffer is displayed 5 Press or key to scroll through the different samples 6 Press F3 Compare key...

Page 15: ...n the volume selected This mode should not be substituted for full sampling Totalize mode In Totalize mode the particle counts are displayed and accumulate as sampled When the sample is complete the r...

Page 16: ...F3 right arrow key to highlight the desired hours minutes or seconds digit 6 Once the hours minutes or seconds digits are selected press or key to change the values 7 Press F2 Save to save the setting...

Page 17: ...s key to move to the Cnt Data field 3 Press F1 left arrow or F3 right arrow key to change the method of counting data 4 Press RETURN key to select the desired data counting method and to return to the...

Page 18: ...ed when the count reaches the count limit on the selected particle size To set the alarm count and size 1 Press F2 SETUP key on the Main screen The Setup Page 1 screen is displayed 2 Press F2 PAGE 2 k...

Page 19: ...change the entry selected 6 Once the correct data has been entered press F2 SAVE key to store the data 7 Press RETURN key to return to the Main screen 7 1 8 Setting a delay between samples If continu...

Page 20: ...re 2 Use F1 left arrow or F3 right arrow key to select F or C 3 Press RETURN key to save the choice and return to the Main screen 7 1 10 Setting the K Factor coefficients The meter counts the particle...

Page 21: ...he cursor to the desired measurement range 5 Press F1 EDIT key to enter the edit mode 6 Press or key to setting the desired coefficient value from 0 1 to 9 99 default value is 1 00 7 Once the desired...

Page 22: ...nit for approximately 5 minutes in count mode 4 Verify the data on the display On average not more than one particle greater than 0 5 m in five minutes or not more than one particle per 0 5 cubic foot...

Page 23: ...the setup screen Press F2 SETUP key than select the required settings on the setup Page 1 screen 3 Press F2 Page 2 key to select the required settings on the setup Page 2 screen 4 Press RETURN key to...

Page 24: ...ple data to PC To transfer sample data from the meter to a PC 1 Connect USB cable to PC and the meter 2 Power on the PC until the PC into the Window screen then press the POWER key to turn on the mete...

Page 25: ...buffer At some point the user may wish to clear the meter buffer To clear the buffer 1 Press F2 SETUP key on the Main screen 2 Press F2 PAGE 2 key the Setup Page 2 screen is displayed 3 Press key to m...

Page 26: ...r Recharge the battery as soon as LOW BATTERY appears on the display The battery symbols on the display show the status of the battery The battery is in Fast Charge mode The ac adapter is connected an...

Page 27: ...particle count mode and the Low Battery mark is displayed 8 3 Purging the Meter Sensor Caution To avoid possible damage to the meter avoid using the meter in an excessively dirty or dusty atmosphere E...

Page 28: ......

Reviews: