background image

7

8

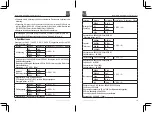
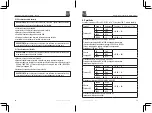
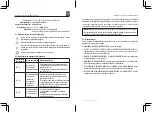
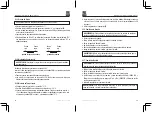
indicador "MIN" aparecerá en la pantalla LCD. El medidor mostrará y mantendrá la lectura 
mínima y se actualizará cuando se produzca un "MIN" menor o inferior.
• Presione momentáneamente el botón MAX / MIN / AVG nuevamente para ver la lectura 
promedio. El símbolo "AVG" aparecerá en la pantalla LCD. El medidor mostrará el promedio 
continuo y se actualizará cuando cambie el valor promedio.
• Mantenga presionado el botón MAX / MIN / AVG para finalizar con MAX / MIN y volver 
a la operación normal.

NOTA:

 MAX / MIN no funciona en frecuencia, ciclo de trabajo, capacitancia o 

temperatura.

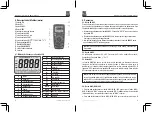
5-5. BotónBacklight/ H0LD 

Para congelar la lectura en la pantalla LCD, presione momentáneamente el botón HOLD. 
El indicador "HOLD" se mostrará mientras se está llevando a cabo la lectura. Presione 
momentáneamente el botón HOLD nuevamente para salir de HOLD y regresar a la 
operación normal.
Para encender la luz de fondo, mantenga presionado el botón HOLD hasta que la luz de 
fondo se encienda. Para apagar la Retroiluminación, mantenga presionado el botón HOLD 
hasta que la luz de fondo se apague.

Retroiluminación Automática

Cuando el medidor está en la oscuridad, la luz de fondo se puede abrir automáticamente, 
no controlada por el botón.

Backlight = 

Retroiluminación o luz de fondo

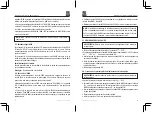
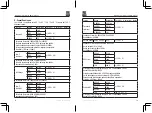
5-6. Botón Flash / PEAK

Presione momentáneamente y el botón PEAK para encender y apagar la linterna. La 
función PEAK es accesible cuando se mide voltaje AC o corriente. Captura y muestra el 
pico positivo más alto y el negativo más alto de la onda AC.
• Mantenga presionado el botón PEAK hasta que aparezca "Peak MAX" en la pantalla 
LCD. El medidor mostrará la lectura máxima y la actualizarácuando un pico positivo sea 
muy alto.
• Para ver el pico negativo más alto, presione el botón PEAKduranteaproximadamente 
un segundo. "Peak MIN" aparecerá en la pantalla LCD y el medidor indicará y retendrá la 
lectura más alta.El medidor actualizará la lectura cuando se detecte o se produzca un pico 
negativo mayor.

• Presione el botón PEAK durante aproximadamente un segundo para cambiar entre las 
lecturas Peak MAX y Peak MIN.
• Mantenga presionado el botón PEAK para salir de PEAK y volver a la operación normal.

NOTA:

 El medidor no desempena la  funciónde Autorange cuando el modo Peak está 

activo. La pantalla se mostrará OL si se excede el rango. Cuando esto suceda, salga 
de Peak y use el botón RANGE para seleccionar un rango de gama superior. El pico no 
funciona en DCV, DCA, frecuencia, ciclo de trabajo, capacitancia o Low Z.

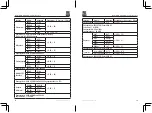
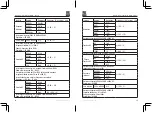
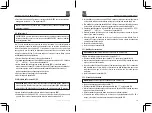
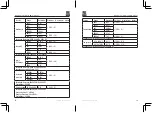
5-7. MEDIDAS DE VOLTAJE AC/ DC

ADVERTENCIA:

 Observe todas las precauciones de seguridad cuando trabajecon 

voltajes altivos.

• Ajuste el interruptor de función rotario en la posición V  ~ HZ%.
• Presione momentáneamente el botón MODE para seleccionar voltaje AC o DC. El símbolo 
   AC "~" o DC"   ~  "aparecerá en la pantalla LCD.
• Inserte lasonda de prueba negra en la toma de entrada COM y la sonda de prueba roja 
    en la toma de entrada V.
• Toque las puntas de prueba del circuito bajo prueba. Si se mide el voltaje de DC, toque 
   la sonda de prueba rojadel lado positivo del circuito y el sonda de prueba negra en el lado 
   negativo del circuito.
• Lea el voltaje en la pantalla LCD.

5-8. Frecuencia y el porcentaje(%) de Mediciones de ciclo de trabajo

ADVERTENCIA:

 observe todas las precauciones de seguridad cuando trabaje con 

voltajes activos.

•Ajuste el interruptor de función rotario en la posición V  ~ HZ%.
• Para seleccionar Frecuencia, mantenga presionado el botón MODE hasta que el símbolo 
   "Hz" aparezca en la pantalla LCD. Para seleccionar% Duty Cycle, presione y sostenga 
    MODE una segunda vez hasta que aparezca "%" en la pantalla LCD.
• Inserte lasonda de prueba negra en la toma de entrada COM y lasonda de prueba roja en 
    la toma de entrada V.
• Toque las puntas de prueba del circuito bajo prueba.
• Lea la frecuencia o el % de ciclo de trabajo en la pantalla LCD.

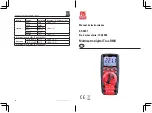
Multímetro digital True RMS / España

Multímetro digital True RMS / España

13/12/2017  Versión No. 001

13/12/2017  Versión No. 001

Summary of Contents for RS-965T

Page 1: ...i 200001 China www rs components com Europe RS Components Ltd PO Box 99 Corby Northants NN17 9RS United Kingdom www rs components com Japan RS Components Ltd West Tower 12th Floor Yokohama Business Pa...

Page 2: ...input jacks and keep fingers away from the metal probe tips when taking measurements Before changing functions using the selector switch always disconnect the test leads from the circuit under test U...

Page 3: ...dible signal if the resistance is approx 50 5 or less Low Battery Indication is displayed Battery life 150 hours light off Display 6000 count LCD display Over Range Indication OL is displayed Polarity...

Page 4: ...LOWEST of any individual component WARNING Operation is limited to CAT II applications when the insulated tips are removed from one or both test probes Refer to Input Limits section in this manual for...

Page 5: ...voltages Set the rotatory function switch to the V HZ position True RMS Digital Multimeter English 13 12 2017 Version No 001 To exit the Manual Ranging mode press and hold the RANGE button until the...

Page 6: ...rue RMS Digital Multimeter English 13 12 2017 Version No 001 Momentarily press the MODE button to select AC or DC voltage The AC or DC symbol will appear on the LCD display Insert the black test lead...

Page 7: ...l Multimeter English 13 12 2017 Version No 001 5 15 Temperature Measurements 5 16 Battery Replacement 5 17 Fuse Replacement Insert the black test lead into the COM input jack and the red test lead int...

Page 8: ...er Always use a UL recognized fuse of the proper size and value 800mA 1000V 6 3 x 32mm fast blow for the A mA ranges and 10A 1000V 10 x 38mm fast blow for the 10A range Install the back cover and tigh...

Page 9: ...Accuracy of reading digits DC Current 600 A 0 1 A 3 0 40 6000 A 1 A 60mA 10 A 600mA 0 1mA 10A 10mA 10A 1 5 5 Overload Protection A mA ranges 800mA 1000V Fuse 10A range 10A 1000V Fuse Resistance 600 0...

Page 10: ...les doigts loign s des pointes de la sonde m tallique lors de la prise de mesures Avant de changer de fonction l aide du s lecteur d connectez toujours les cordons du circuit test N utilisez que des c...

Page 11: ...ce d entr e de 3k R ponse du courant alternative True RMS Bande passante du courant alternatif 2kHz Limites d entr e 3 General Specifications Bande passante du courant alternatif Quatre piles alcaline...

Page 12: ...es de service fiable si les instructions d entretien suivantes sont effectu es GARDEZ LE COMPTEUR SEC S il est mouill essuyez le UTILISER ET STOCKER LE COMPTEUR DANS DES TEMP RATURES NORMALES Les temp...

Page 13: ...esure r elle et la valeur de r f rence enregistr e Pour l activer appuyez sur le bouton REL L indicateur REL appara tra sur l cran LCD avec la lecture Appuyez nouveau sur le bouton REL pour revenir au...

Page 14: ...nt lorsque le mode Peak est actif L affichage lira OL si la gamme est d pass e Lorsque cela se produit quittez Peak et utilisez le bouton gamme pour s lectionner une gamme plus lev e Le pic ne fonctio...

Page 15: ...atif sur la position A et ins rez le cordon rouge dans la prise d entr e A MA Appuyez momentan ment sur le bouton MODE pour s lectionner le courant alternatif ou continu Le symbole AC ou DC appara t s...

Page 16: ...Enlever le couvercle de batterie fusible Remplacez par quatre piles AAA Respectez la polarit indiqu e dans le compartiment des piles Installez le couvercle de batterie fusible et serrez la vis AVERTI...

Page 17: ...mS Gamme de fr quence 5hz 10 kHz Sensibilit 8V RMS Fonction Gamme R solution Pr cision de la lecture chiffres Courant alternatif 600 A 0 1 A 1 5 3 6000 A 1 A 60mA 10 A 600mA 0 1mA 10A 10mA 2 0 5 Prot...

Page 18: ...0 80 0 0 1 1 2 2 Protection d entr e 600V AC RMS or 600V DC Largeur d impulsion 0 1 100 ms Gamme de fr quence 5 Hz 10kHz Sensibilit 8V RMS Capacitance 60nF 10pF 5 0 35 600nF 100pF 3 0 5 6 F 0 001 F 60...

Page 19: ...stleitungen besch digt erscheinen berpr fen Sie den Betrieb vor der Verwendung des Z hlers durch Messung einer bekannten Spannungs Spannung Verwenden Sie das Messger t nicht in nassen oder feuchten Um...

Page 20: ...Serviceeingang von Dienstprogram Outdoor Pumpen 3 2 Sicherheitskategorie Bewertungen Die Bewertung der Messkategorie CAT und der Nennspannung wird durch eine Kombination des Z hlers der Pr fsonden un...

Page 21: ...dus zu beenden halten Sie die Range Taste gedr ckt bis die Auto Anzeige wieder erscheint Beachten Die Range Taste funktioniert nicht auf Frequenz Einschaltdauer Kapazit t oder Temperatur 5 2 M0DE Scha...

Page 22: ...sswert an und aktualisiert den Messwert wenn ein h herer positiver H hepunkt auftritt Um den h chsten negativen Peak zu sehen dr cken Sie die Peak Taste ca eine Sekunde lang Peak min erscheint auf dem...

Page 23: ...Beachten Sie bei der Arbeit an Stromkreisen alle Sicherheitsvorkehrungen Messen Sie nicht Strom auf Stromkreisen die 1000V berschreiten Die Messungen im 10A Bereich sollten alle 15 Minuten auf maxima...

Page 24: ...einer Minute dauern bis ein stabiles lesen auf gro en Kondensatoren zu erhalten 5 15 Temperaturmessungen Stellen Sie den Dreh Funktionsschalter auf die Position F C Dr cken Sie die Mode Taste um die W...

Page 25: ...3 0 40 60V 10mV 600V 0 1V Eingangsschutz 600V AC RMS oder 600V DC Genauigkeit von 5 bis 100 der Mess Klingeln angegeben Eingangsimpedanz ca 3T Gleichspannung 600mV 0 1mV 0 5 8 6V 1mV 0 5 5 60V 10mV 6...

Page 26: ...V DC Eingangsimpedanz ca 3T Frequenz elektrisch 9 999Hz 0 001Hz 1 0 5 99 99Hz 0 01Hz 999 9Hz 0 1Hz 9 999kHz 1Hz Eingangsschutz 600V AC RMS oder 600V DC Empfindlichkeit 8V RMS Funktion Bereich Aufl sun...

Page 27: ...dita lontane delle punte metalliche durante le misurazioni Prima di modificare le funzioni utilizzando il selettore scollegare sempre i puntali dal circuito in prova Utilizzare solo puntali da test UL...

Page 28: ...i al massimo Dimensioni Peso 170 x 75 x 48mm 386g Sicurezza Conforme con UL 61010 1 v 3 per la misurazione Categoria IV 600V e Categoria III 1000V Grado di inquinamento 2 Potenziale pericolo Indica ch...

Page 29: ...con un panno umido NON usare prodotti chimici solventi o detergenti USARE SOLO BATTERIE NUOVE DEL FORMATO E DEL TIPO CONSIGLIATI Rimuovere le batterie vecchie o deboli in modo che non perdano e danneg...

Page 30: ...AX MIN AVG per visualizzare la lettura pi bassa L indicatore MIN apparir sul display LCD Lo strumento visualizzer e manterr la lettura minima e si aggiorner quando si verifica un MIN inferiore Premere...

Page 31: ...ando il simbolo appare sul display LCD NOTA possibile accedere alla funzione di frequenza solo quando lo strumento impostato sulla tensione AC AVVERTENZA osservare tutte le precauzioni di sicurezza qu...

Page 32: ...sul display LCD AVVERTENZA non testare mai i diodi in un circuito attivo Impostare il selettore rotativo sulla posizione Premere il pulsante MODE fino a quando il simbolo appare sul display LCD Inseri...

Page 33: ...x 38 mm per la gamma 10A Installare il coperchio posteriore e serrare la vite AVVERTENZA per evitare scosse elettriche non utilizzare lo strumento finch il coperchio della batteria del fusibile non f...

Page 34: ...A 0 1mA 10A 10mA 10A 1 5 5 Protezione da sovraccarico A range mA fusibile 800mA 1000V Gamma 10A fusibile da 10 A 1000 V Funzione Gamma Risoluzione Precisione di lettura cifre Resistenza 600 0 1 1 0 5...

Page 35: ...1 F 6000 F 1 F 5 0 5 Protezione di ingresso 600V AC RMS o 600V DC Temperatura 4 F to 1400 F 0 1 F 2 0 9 F 20 C to 760 C 0 1 C 2 0 5 C Protezione di ingresso 600V AC RMS o 600V DC Multimetro digitaleT...

Page 36: ...ectrocucion No haga uso si el metro o los cables de prueba est n da ados Verifique la operaci n antes de usar el metro midiendo la tensi n del voltaje conocido No use el metro en ambientes h medos o m...

Page 37: ...bterr neas a edificios separados La entrada de servicio entrante de la utilidad Bombas para exterior 3 2 Clasificacion de Categor as deSeguridad La clasificaci n de categor a de medici n CAT y la clas...

Page 38: ...rango deseado Para salir del modo de Rango Manual mantenga presionado el bot n de RANGO hasta que el indicador AUTO vuelva a aparecer NOTA El bot n de rango no funciona en Frecuencia Ciclo de trabajo...

Page 39: ...El medidor actualizar la lectura cuando se detecte o se produzca un pico negativo mayor Presione el bot n PEAK durante aproximadamente un segundo para cambiar entre las lecturas Peak MAX y Peak MIN M...

Page 40: ...la toma de entrada de 10 A Para medidas de corriente de hasta 600 mA coloque el interruptor de funci n giratoria en la posici n mA e inserte el cable de prueba rojo en la toma de entrada de A mA Para...

Page 41: ...ado enla toma de entrada C F Toque la punta de la sonda de temperatura en el objeto medido Mantenga la sonda en contacto con el objeto hasta que se estabilice la lectura aproximadamente 30 segundos Le...

Page 42: ...MS o 600V DC Impedancia de entrada Aprox 3k Funci n Rango Resoluci n Precisi n de lectura d gitos Frecuencia el ctrica 9 999Hz 0 001Hz 1 0 5 99 99Hz 0 01Hz 999 9Hz 0 1Hz 9 999kHz 1Hz Entrada de Protec...

Page 43: ...Hz 999 9Hz 0 1Hz 9 999kHz 1Hz Entrada de Protecci n 600V AC RMS o 600V DC Sensibilidad 8V RMS Ciclo de trabajo 20 0 a 80 0 0 1 1 2 2 Entrada de Protecci n 600V AC RMS o 600V DC Ancho del pulso 0 1 a 1...

Page 44: ...17...

Reviews: