10
11
• Touch the test lead probes to the component under test. If the component is installed
in a circuit, it is best to disconnect one side before testing to eliminate interference with
other devices.
• Read the resistance in on the LCD display.
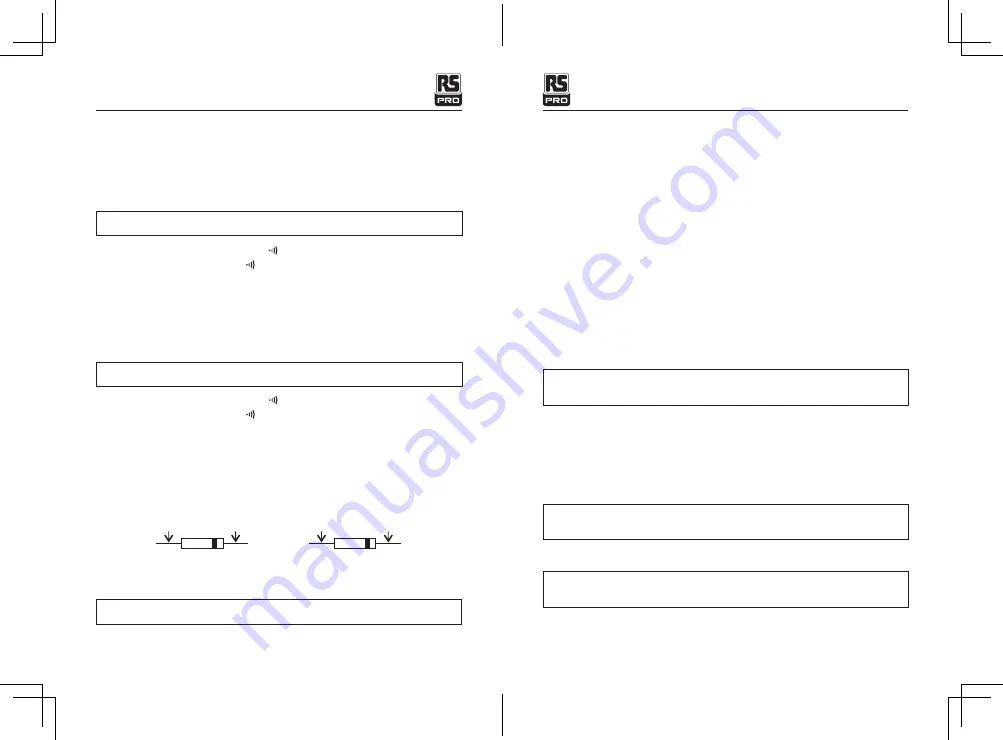
5.12 Continuity Test
5.13 Diode Test
5.14 Capacitance Measurements
WARNING:
Never test continuity on a live circuit.
WARNING:
Never test diodes in a live circuit.
WARNING:
Safely discharge capacitors before taking capacitance measurements.
• Set the rotary function switch to the Ω
position.
• Press the MODE button until the " ” symbol appears on the LCD display.
• Insert the black test lead into the COM input jack and the red test lead into the Ω input jack.
• Touch the test lead probes to the device or wire under test.
• A beeper will sound if the resistance is approximately 50 ±5 or less and the resistance
value will be shown on the LCD display.
• Set the rotary function switch to the Ω
position.
• Press the MODE button until the " ” symbol appears on the LCD display.
• Insert the black test lead into the COM input jack and the red test lead into the Ω input jack.
• Touch the test lead probes to the diode under test.
• Forward voltage will indicate 0.4 to 0.7 on the display. Reverse voltage will indicate
“OL”. Shorted devices will indicate near 0 and an open device will indicate “OL” in both
polarities.
Red
Probe
Red
Probe
Black
Probe
Black
Probe
Forward test
Reverse test
• Set the rotary function switch to the CAP position.
True RMS Digital Multimeter/ English
13/12/2017 Version No. 001
5.15 Temperature Measurements
5.16 Battery Replacement
5.17 Fuse Replacement
• Insert the black test lead into the COM input jack and the red test lead into the CAP
input jack.
• Touch the test lead probes to the capacitor under test.
• Read the capacitance value on the LCD display. It may take up to a minute to get a
stable reading on large capacitors.
• Set the rotary function switch to the °F °C position.
• Press the MODE button to select readings in °F or °C.
• Connect the Temperature Probe to the Banana Plug Adapter. Note the – and + markings
on the adapter. Connect the adapter to the meter, making sure the – side goes into the
COM input jack and the + side goes into the °C °F input jack.
• Touch the tip of the Temperature Probe to the object being measured. Keeps the probe
touching the object until the reading stabilizes(about 30 sec).
• Read the temperature on the LCD display.
WARNING:
To avoid electric shock, remove the test leads from the meter before
removing the battery/fuse cover.
WARNING:
To avoid electric shock, do not operate meter until the battery/fuse
cover is securely fastened to the meter.
WATRNING:
To avoid electric shock, remove the test leads from the meter before
removing the battery/fuse cover.
• Lift up the tilt stand.
• Loosen the one Phillips screw on the battery/fuse cover.
• Remove the battery/fuse cover.
• Replace the batteries with four AAA batteries.
• Observe polarity as shown inside battery compartment.
• Install the battery/fuse cover and tighten the screw.
• Loosen the one Phillips screw on the batter/fuse cover.
• Remove the battery/fuse cover.
True RMS Digital Multimeter/ English
13/12/2017 Version No. 001
Summary of Contents for RS-965T
Page 44: ...17...


