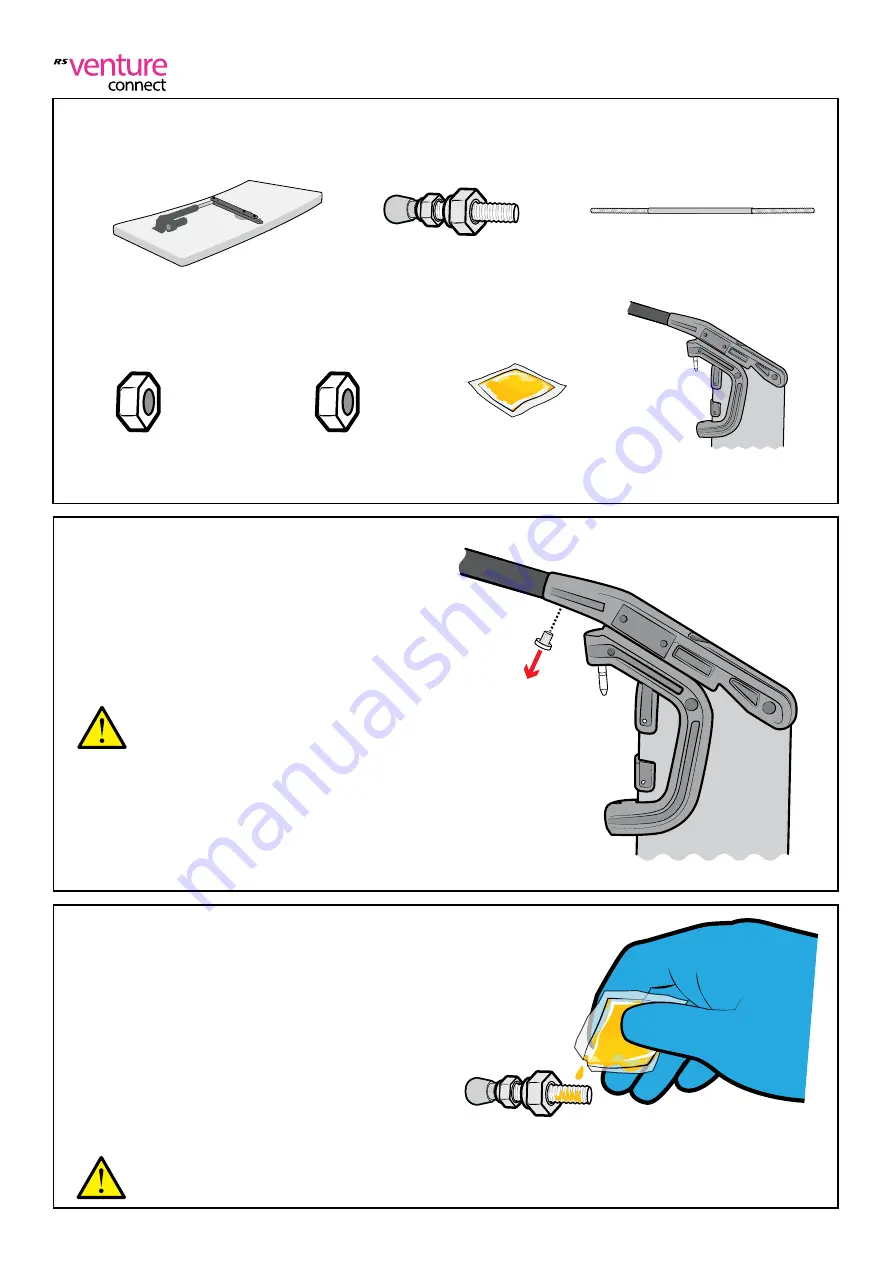
18.3 - Control arms
a)
b)
Unscrew the white plastic lugs from the
underside of the rudders.
You may need to use pliers to unscrew
the plugs as they are difficuly to grip.
Apply jointing compound to the threads of the ball joint.
Be very careful with the jointing compound - It gets everywhere and stains clothing.
Wearing gloves is recommended.
Rear cockpit hatch
cover with ram
For this section you will need:
2 x locking nuts
2 x locking nuts
(opposite thread)
2 x ball joint / quick
release assembly
2 x control arms
2 x rudder stocks
jointing
compound
Summary of Contents for Venture Connect
Page 1: ...Rigging Guide V3...
Page 8: ...Rigging Guide PLEASE FOLLOW RIGGING GUIDE IN CORRECT ORDER...
Page 23: ...Rigging Guide 5 Sails PLEASE FOLLOW RIGGING GUIDE IN CORRECT ORDER...
Page 36: ...Rigging Guide 7 Keel PLEASE FOLLOW RIGGING GUIDE IN CORRECT ORDER...
Page 42: ...Rigging Guide 9 Reefing PLEASE FOLLOW RIGGING GUIDE IN CORRECT ORDER...
Page 96: ...Power Assisted Steering and Mainsheet V2 PLEASE FOLLOW RIGGING GUIDE IN CORRECT ORDER...
Page 113: ...19 3 Afloat a b c...
Page 125: ...PLEASE FOLLOW RIGGING GUIDE IN CORRECT ORDER Seated Control System 22 Problem Solving...
Page 128: ...SCS Modifications...
Page 132: ...Appendix 1 Steering System...
Page 133: ...Rigging Guide 10 Completion PLEASE FOLLOW RIGGING GUIDE IN CORRECT ORDER...
Page 135: ...Rigging Guide 11 Sailing Hints PLEASE FOLLOW RIGGING GUIDE IN CORRECT ORDER...
Page 139: ...Rigging Guide 12 Maintenance PLEASE FOLLOW RIGGING GUIDE IN CORRECT ORDER...
Page 142: ...Rigging Guide 13 Warranty PLEASE FOLLOW RIGGING GUIDE IN CORRECT ORDER...
Page 146: ...Rigging Guide 15 Glossary...


