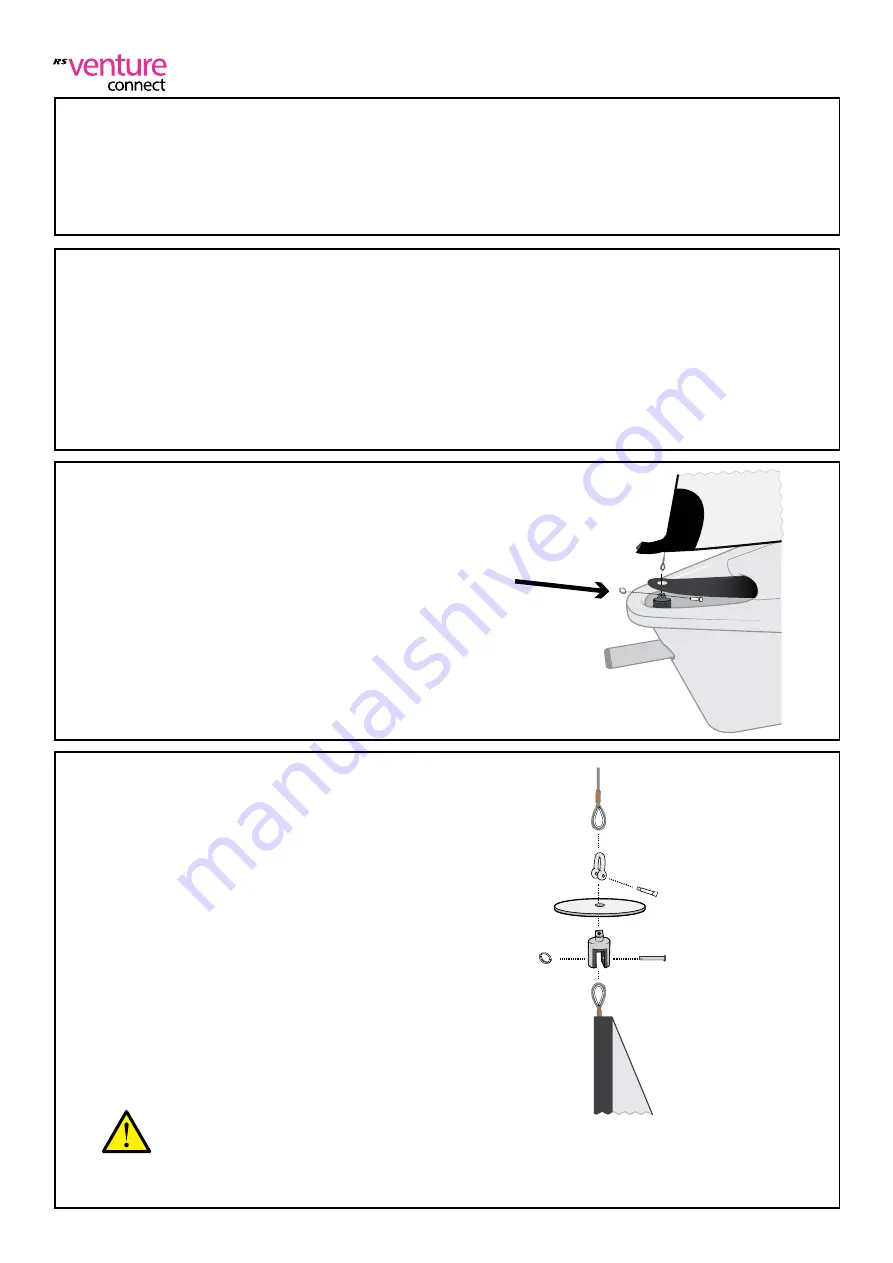
To complete this section, you will require:
•
The jib
• The jib sheets
•
The top furling unit as attached to the jib halliard
Unroll the jib and connect the tack of the sail direct to
the lower furling unit via the pin and split ring.
a)
b)
Make sure the furling line is uncleated and that the furling unit is fully charged – i.e. all
the furling line is wound round the unit and very little left at the cleat.
5.1 - Hoisting the Jib
c)
Attach the head of the jib to
the top furling unit.
Use tape to cover all clevis rings
Summary of Contents for Venture Connect
Page 1: ...Rigging Guide V3...
Page 8: ...Rigging Guide PLEASE FOLLOW RIGGING GUIDE IN CORRECT ORDER...
Page 23: ...Rigging Guide 5 Sails PLEASE FOLLOW RIGGING GUIDE IN CORRECT ORDER...
Page 36: ...Rigging Guide 7 Keel PLEASE FOLLOW RIGGING GUIDE IN CORRECT ORDER...
Page 42: ...Rigging Guide 9 Reefing PLEASE FOLLOW RIGGING GUIDE IN CORRECT ORDER...
Page 96: ...Power Assisted Steering and Mainsheet V2 PLEASE FOLLOW RIGGING GUIDE IN CORRECT ORDER...
Page 113: ...19 3 Afloat a b c...
Page 125: ...PLEASE FOLLOW RIGGING GUIDE IN CORRECT ORDER Seated Control System 22 Problem Solving...
Page 128: ...SCS Modifications...
Page 132: ...Appendix 1 Steering System...
Page 133: ...Rigging Guide 10 Completion PLEASE FOLLOW RIGGING GUIDE IN CORRECT ORDER...
Page 135: ...Rigging Guide 11 Sailing Hints PLEASE FOLLOW RIGGING GUIDE IN CORRECT ORDER...
Page 139: ...Rigging Guide 12 Maintenance PLEASE FOLLOW RIGGING GUIDE IN CORRECT ORDER...
Page 142: ...Rigging Guide 13 Warranty PLEASE FOLLOW RIGGING GUIDE IN CORRECT ORDER...
Page 146: ...Rigging Guide 15 Glossary...


