USER MANUAL ODM-300
USER MANUAL ODM-300
7
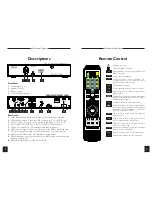
CONNECT UP
Before connecting up the ODM300 it is essential that your satellite dish is installed
as per the manufacturers recommendations. The ODM300 is connected as per the
diagram on page 6 and as follows.
DISH
Your satellite dish should be connected to the
LNB
"f" type connector on the rear
of the ODM300.
UHF AERIAL
Connect your UHF aerial to
ANT IN
on the back of the ODM300. Connect the
TV OUT
on the back of the ODM300 to your VCR or TV
ANT IN/RF IN
with
the enclosed UHF coaxial cable.
The
TEST
switch on the rear of the ODM300 can be used to aid UHF tuning. Put
this to the ON position (upper) and a test signal will be transmitted by the ODM300.
Select an unused programme on your TV and tune the TV until black and white
bars are visible. The same can be done to tune the ODM300 to your VCR. The
UHF channel from the ODM300 can be tuned between 30-45 using a small
screwdriver in the
CH
adjustment on the back panel.
SCART
If your TV or VCR is equipped with SCART connectors then we would recommend
that you connect up using these to improve picture and audio quality.
HI-FI
Hi-fi or home cinema equipment can be connected to the AUDIO OUT left and
right RCA connector on the back of the ODM300.
P.C.
A PC can be connected to the RS232 connector on the back of the ODM300. This
is used for upgrading the ODM300 with the latest software allowing enhanced
features etc. Please consult your dealer for the latest details.
Installation
8
K 9
LNB Setup
The local oscillator settings (LO) for the LNB's connected to the ODM300 must be
set before channel search can be carried out. Many LNB's have 2 LO which are
switched between by a 22Khz tone signal from the ODM300. For frequencies over
11.699 the ODM300 will generate a 22Khz signal and select the
HIGH LO.
LNB SETUP
From the
MAIN MENU
select
4 (Installation)
using the numeric keys (direct) or
arrow keys up/down (navigation) then
OK
to pick highlighted selection.
From the
INSTALLATION
menu select
1 (Install LNB)
. Then select
1 (LNB
Settings)
. In the
LNB SETTINGS
menu you can change between
LNB 1-32
using the arrow keys right/left when option
1
is highlighted. Pick the LNB number
you would like to edit. This would normally be
LNB 1
for a single LNB setup.
Select option
2 (LOW Band)
and key in the
LOW LO
using the numeric keys and
OK
to confirm. Select option
3
(HIGH Band)
if appropriate and key in the
HIGH
LO
and
OK
to confirm. Press
STORE
to save LNB changes. Press
SAT/CANCEL
to move back out of the MENU's
In the
INSTALL LNB
menu option
2
(LNB Power)
allows the LNB power to be
switched
Off
for connection with an analogue receiver.
UNIVERSAL LNB
Settings for Universal type LNB with 2 x LO connected to
ODM300 with no DiSEqC switch.
LNB SETTINGS
1
LNB
2
Help Text
TIME
LOW Band
1
9.750
3
4
5
HIGH Band
DiSEqC
22Khz
10.600
--
STANDARD LNB
Settings for LNB with single LO of 10.750 connected to
ODM300 with DiSEqC switch on D1
C-BAND LNB
Settings for C-Band LNB with LO of 5.150 connected to
ODM300 with DiSEqC switch on D2
NOTE IF NO D
I
SE
Q
C SWITCH IS CONNECTED TO THE ODM300
THE SETTINGS OF OPTION 4 & 5 WILL HAVE NO EFFECT.
LNB SETTINGS
1
LNB
2
Help Text
TIME
LOW Band
2
3
4
5
HIGH Band
DiSEqC
22Khz
10.750
-
-
D1
LNB SETTINGS
1
LNB
2
Help Text
TIME
LOW Band
3
3
4
5
HIGH Band
DiSEqC
22Khz
5.150
-
-
D2


