FOCUS 320 Owner's Manual
21
RSF Woodburning Fireplaces
should be at least 2½" x 2½" and must be covered with non-combustible material. Any custom made spark guard
must have the minimum width specified in Table 1 (I), and be installed centered on the door opening.
NOTE
: Custom-made spark guards are site built.
MANTEL
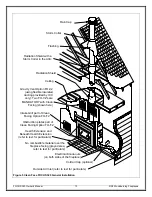
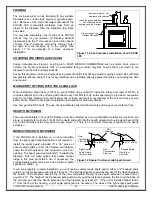
For combustible mantels shelves, please see Table 1 (J-K) for the maximum depth of the mantel shelf and their
clearance requirements. See Figure 1 for an example.
Combustible mantel posts, of any depth, can be installed on either side of the fireplace as long as they respect
the same minimum distance as the side wall (see Table 1 (B)).
Masonry and other non-combustible mantels (shelf and posts) can be placed anywhere around the fireplace
opening. If the non-combustible mantel is located between the top of the fireplace facing and the specified height
for a combustible mantel, then the wall portion between the top of the fireplace facing and the mantel must be
covered in non-combustible material. If the non-combustible mantel is located at the same height allowed for a
combustible mantel, or higher, then no special wall covering is required below the mantel.
REFRACTORY BRICK INSTALLATION
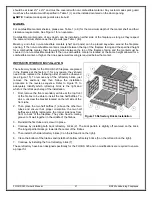
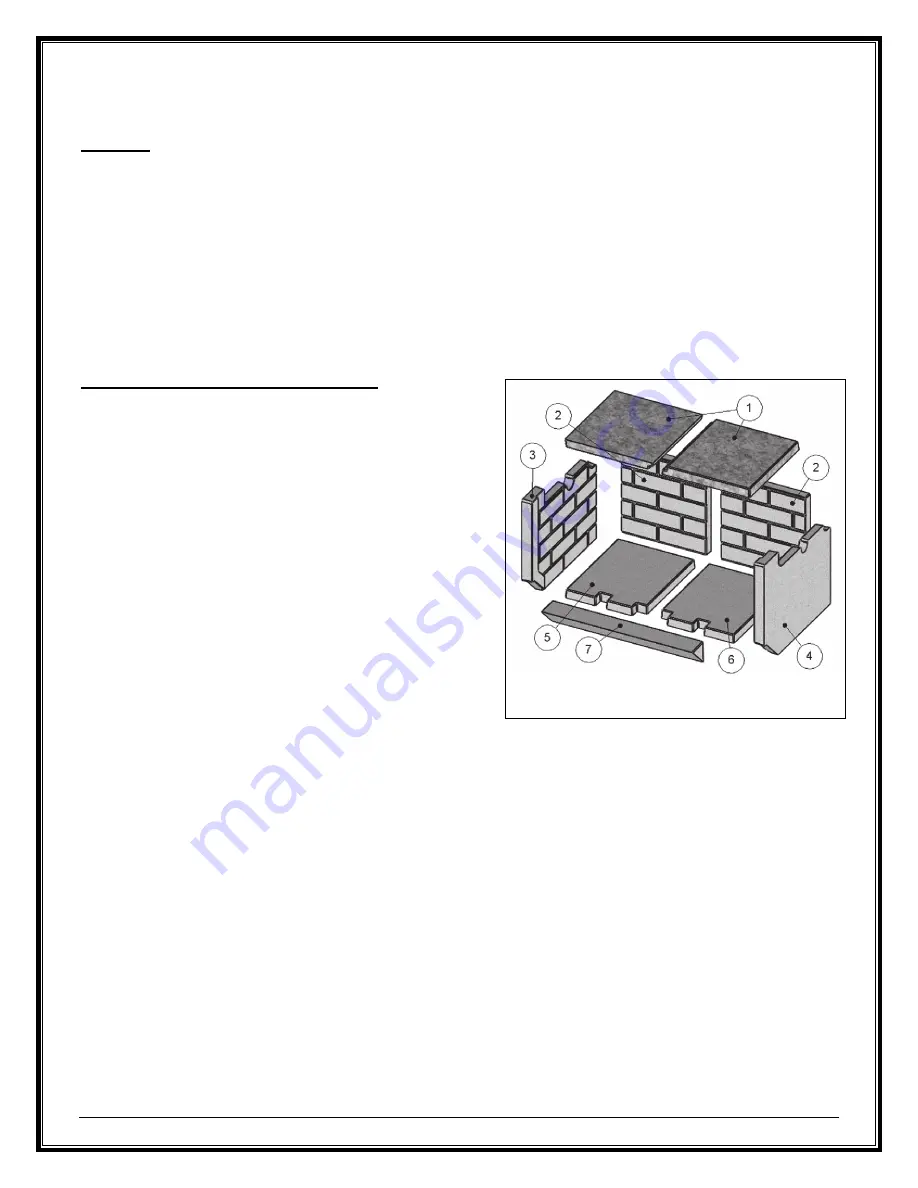
The refractory bricks for the FOCUS 320 fireplace are placed
in the fireplace at the factory. If, for any reason, they should
need to be replaced the following order should be observed
(see Figure 15). To remove any of the refractory bricks, just
remove the andirons and then follow the installation
procedure in the reverse sequence. Refer to Figure 15 to
adequately identify which refractory brick is the right and
which is the left at each step of the installation.
1. First, remove the front secondary air tube at the top front
of the firebox to be able to install the two half baffles. To
do so, unscrew the bracket located on the left side of the
front tube.
2. Then place the two half baffles (1) above the other two
tubes and ensure their proper orientation: the two half
baffles are slightly rectangular, the longer side goes from
front to back of the fireplace. They also have a mating
groove to fit well together in the middle of the firebox.
3. Reinstall the first tube and screw it in place.
4. Continue by installing both back refractory bricks (2). The brick pattern is slightly off centered on the brick.
The longer partial bricks go towards the center of the firebox.
5. Then install both side refractory bricks (3 on the left and 4 on the right).
6. Clean the bottom of the firebox and install both bottom refractory bricks (5 on the left and 6 on the right).
7. Continue by installing the front refractory brick (7).
These refractory have been designed specifically for the FOCUS 320 and no modifications are required to ensure
a proper fit.
Figure 15 Refractory Bricks Installation


