ORACLE2 Owner's Manual
16
RSF Woodburning Fireplaces
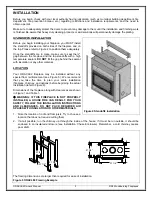
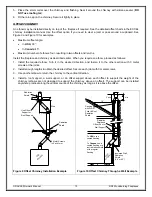
4. Install the liner elbow and masonry adaptor on the lower end of the liner.
5. Move the fireplace forward enough to install the EXCEL chimney on the fireplace (elbow and length) then
move the fireplace back into position as you connect the masonry adaptor to the EXCEL chimney.
Using a New Masonry chimney
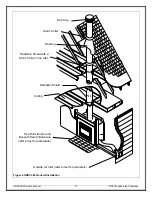
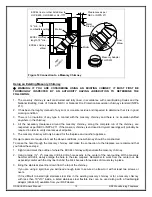
Since the masonry chimney is not build yet, we recommend that you position your fireplace, install the EXCEL
chimney on it and connect to the first length of liner before building the chimney as explained above and shown in
Figure 12. The liner sections can easily be installed as the layers of brick are being placed. Since this is a new
chimney, we recommend that you build it to the right size so you do not have to ovalize the liner but if you choose
to use a 6"x10" clay liner you will need to ovalize the stainless steel liner to fit into the clay liner.
REMEMBER:
The stainless steel liner should be fitted
inside the clay liner all the way to the top of the masonry
chimney. It is not meant to replace the clay liner.
FRAMING
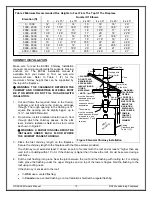
The enclosure walls can be framed with any suitable
materials (2"x4" or 2"x6" studs, plywood, gypsum board,
etc.). Because of the high heat output potential of the
ORACLE2, combustible materials must NOT go closer to
the fireplace than the standoffs, top, back and sides.
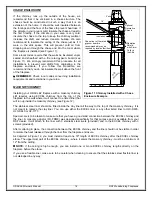
You may also completely cover the top of a ORACLE2 as
long as you maintain all fireplace standoff clearances and
the 2" clearances around the chased chimney. The 2"
clearance around the chimney must be open from the
fireplace up to the ceiling. See Figure 13 for an example
of a close clearance installation.
HEARTH EXTENSION
The area immediately in front of the fireplace must be protected by a non-combustible material such as brick, tile,
stone, or slate. Refer to Table 1 (G-H) for the depth and width the hearth protection should extend beyond the
front and both sides of the door opening (see Figure 1). There is no minimum thickness required for the hearth
extension.
BENEATH HEARTH EXTENSION
If the ORACLE2 is installed on a non-combustible floor,
the spark guard specified below is not required.
Install the spark guard provided (5" x 36" piece of sheet
metal) halfway under the fireplace and halfway under
the hearth extension and centered on the door opening.
The spark guard will extend 2½" beneath the fireplace.
This will make certain that sparks cannot lodge in this
area and start a fire.
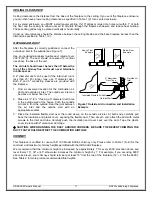
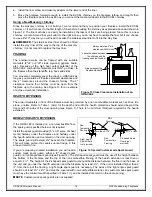
If you are preparing a raised installation, you will need a
custom made spark guard, either a "Z" shaped spark
guard or a right angle spark guard (see Figure 14). The Z-shaped spark guard must be used if the height between
the bottom of the fireplace and the top of the non-combustible flooring of the hearth extension is less than or
equal to 2 ½". The height of the Z-shaped spark guard must equal the distance between the floor and the base of
the unit and go under the hearth extension and the fireplace by at least 2½". If the unit is installed higher than 2
½" from the top of the flooring, a right angle spark guard is necessary. The sides of the right angle spark guard
should be at least 2½" x 2½" and must be covered with non-combustible material. Any custom-made spark guard
must have the minimum width specified in Table 1 (I), and be installed centered on the door opening.
NOTE
: Custom-made spark guards are not supplied.
Always maintain 2" min.
clearance with chimney
Always respect the
fireplace standoffs
Leave the space between
the chimney and the
framing open (no firestop)
Figure 13 Close Clearance Installation of an
ORACLE2
RSF
Fireplace
Non-
Combustible
Flooring
Right Angle
Spark Guard
(not provided)
More than 2 1/2"
Non-
Combustible
Flooring
Z-Shaped Spark
Guard (not
provided)
2 1/2" or less
Figure 14 Special Custom-made Spark Guard

