PEARL Owner's Manual
14
RSF Woodburning Fireplaces
outside air inlet in from the outside. Seal the joint between the air inlet and the outside wall with an
appropriate sealant.
3.
Place the insulated flexible duct over the round sleeve on the outside air inlet. At both ends, carefully pull
back the insulation and plastic cover, exposing the flexible duct. Then at each end, attach the duct with metal
screws to the air inlet and to the fireplace connecting sleeve. Carefully push the insulation and cover back
over the duct. Tape the plastic cover in place with 2" aluminium duct tape.
CAUTION: WHEN RUNNING THE DUCT AROUND CORNERS, BE SURE TO PREVENT CRIMPING THE
DUCT IN A WAY THAT WOULD RESTRICT THE COMBUSTION AIRFLOW.
FINISHING AROUND THE FIREPLACE
The decorative faceplate of the PEARL fireplace is not meant to be covered, it is meant to be admired.
DO NOT
cover the decorative faceplate of the fireplace or any of its louvers.
The decorative faceplate of the PEARL extends ½" beyond the sides of the fireplace to be able to hide the edge
of the finishing material behind it. There is also a 1" indentation in the top of the casing to allow for easy finishing
behind the rounded top of the decorative faceplate.
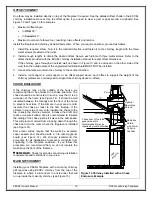
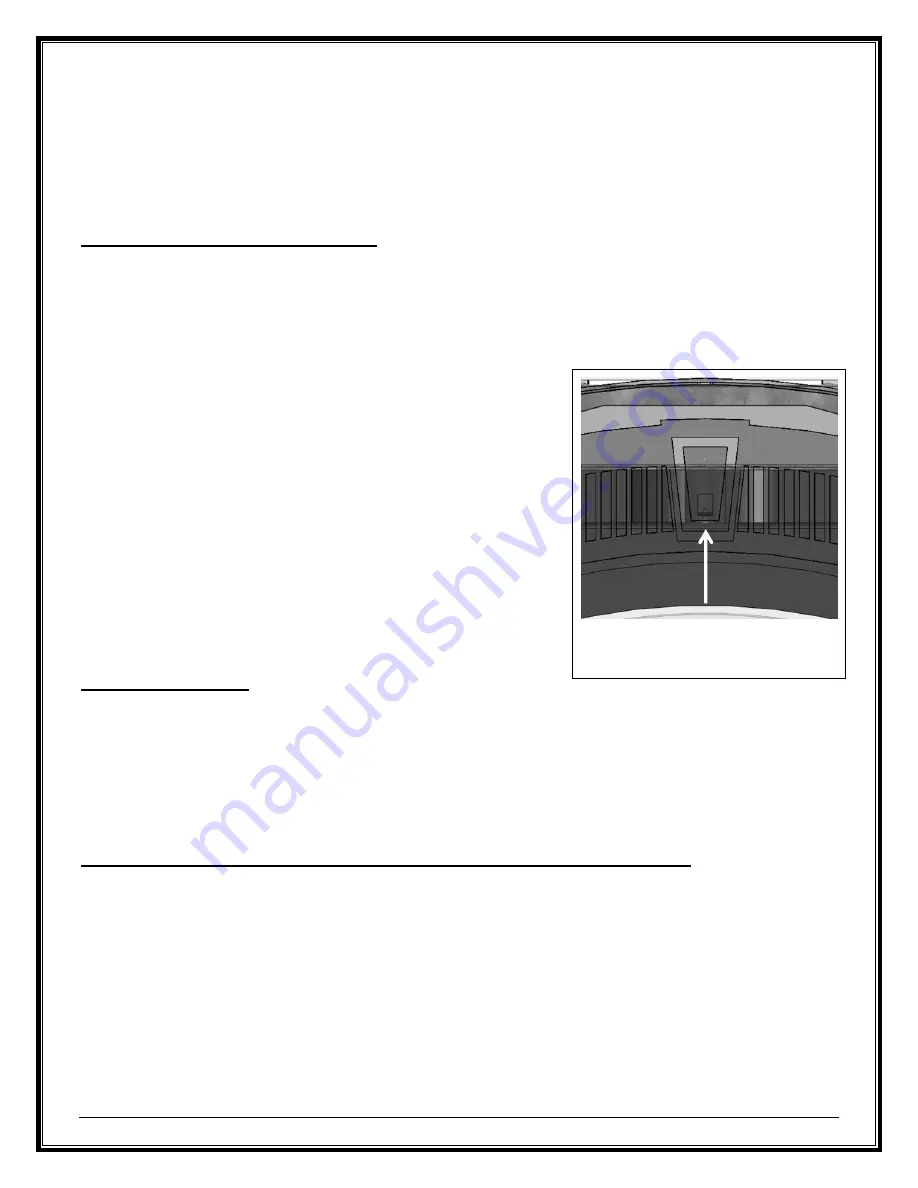
Before you begin, remove the decorative faceplate and bottom louver to
prevent damaging them while installing the finishing materials. To
remove the faceplate, simply open the door and remove the screw that
is centered above the opening of the firebox and is between the
faceplate and the front of the firebox (see Figure 8). Once the screw is
removed, the faceplate will be loose, so with one hand holding the
faceplate in place, close the door. Take a good grip on both side of the
faceplate and lift it up. There are two brackets, one on each lower side,
that need to be disengaged from the base of the fireplace. Do not lose
the hardware that secures the faceplate to the fireplace.
To remove the bottom louver, simply open the door, grab the top of the
louver close to each extremity and pull forward. There are two high
temperature magnets, one on each side, close to the top of the louver
keeping it in place along with two supports close to the bottom of the
louver to support the weight of the louver.
If desired, you can also remove the glass door by lifting it off its hinges
Facing Requirements
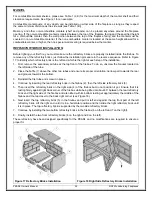
Finishing materials that cover the facing of the fireplace MUST BE NON-COMBUSTIBLE (e.g. brick, slate,
ceramic tile, etc.). Drywall cannot get closer to the fireplace than the side and top standoffs. The front face of the
top standoff is considered part of the fireplace facing (see Figure 5). Framing shown in the Figure 9 and Figure 10
is based on the recommended framing shown in Figure 4.
Plan the finishing of the fireplace in advance and plan for the material thickness including the adhesive
coat. You MUST be able to reinstall the decorative facing properly, or it may become a safety hazard.
Top View - Cross section of Fireplace, Framing and Facing (refer to Figure 10)
The non-combustible finishing materials may be installed so that they fit behind the decorative faceplate. Refer to
Figure 10 and adjust the position of your framing to accommodate the thickness of the finishing material you have
selected.
WARNING GYPSUM BOARDS OR ANY OTHER COMBUSTIBLE MATERIAL CANNOT TOUCH THE
CASING OF THE FIREPLACE. ONLY NON-COMBUSTIBLE MATERIAL SUCH AS CEMENT BOARD CAN
TOUCH THE FIREPLACE CASING.
Framing cannot be recessed more than 1½" from the back of the decorative faceplate or more than ½” back from
the front of the top standoff (see Figure 6). To accommodate thick non-combustible finishing materials (e.g.
materials > 1”), use the decorative faceplate as a template and install them so that they protrude past the
decorative faceplate.
Figure 8 Location of the Screw to
Remove the Decorative Faceplate


