background image

-


In order to set the correct time, press the       button first, then + or - button to carry forward or backward the figure until the exact 
time shows. 

Manual operation setting 

Press the      button to remove the flashing of 

AUTO

If 

AUTO

is flashing (automatic or semi automatic program has been set),press   button to remove

AUTO

and then the manual 

operation process is on. 

Automatic setting (set the time of full automatic starting and ending) 

1.Press    button, set roast time;
2.Press    button, set roast finish time;
3.Set temperatures and roast modes by turning the thermostat knob and selector knob.
After the above setting, 

AUTO

will be glittering, which means the roast process of the oven is set. 

For example:

 if roast time takes 45 minutes and expect it will end at 14:00. 

Press,        the roast time is to be 45 minutes; 
Press,        the roast is set to end at 14:00. 
After the above setting, the screen shows the real time(hour

minute)and flashing

AUTO

,it means the set roast process is memorized 

automatically. 
When the clock turns to be 13:15(or between 13:14-13:15), the oven will start automatically. 
In the roast time,     and

AUTO

will be always flashing. 

When the clock turns to be 14, the roast has been finished automatically. The alarm will ring and

AUTO

  will flash, press the        button 

and the ringing will stop. 

Semi-automatic setting (set the time of automatic starting and ending) 

A.


Set the time limit of roast (10 hours maximum): 

Press the        button to set the time of roast; 
The oven starts immediately,        and

AUTO

will flash. After the roast is finished, the roast operation process will be shut automatically. 

Then

AUTO

flashes, the alarm rings. The ringing will stop after the        button is pressed. 

B.    Set the time of ending (23 hours 59 minutes maximum): 
Press the          button to set the time of ending; 
The oven starts immediately,        and

AUTO

will flash. When the set time of ending is reached, the roast process will shut automatically. 

Then

AUTO

flashes, the alarm rings. The ringing will stop after the        button is pressed. 

When the related button is pressed, the set roast process will be displayed. Whenever the         button is pressed, and set backward the 
time to 

0

,the set roast process will be cancelled. When     button is pressed again, the oven will revert to the manual operation 

process. 

Timer  

23 hours 59 minutes can be set as maximum. 
To set the time, press the        button, and then + or - button, until the required time is shown on the screen. After the setting, the correct 
time (hour, minute) and the      button will show on the screen. When the        button is pressed the time displaced will be seen. When the 
set time is reached,          disappears and the alarm will ring again. To stop the alarm, press the        button. 

Notice:

 After pressing the related button, setting is supposed to be done in 5 seconds. In case of blackout, the set process as well as the 

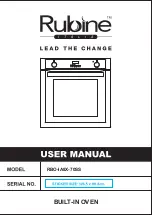
Summary of Contents for RBO-IA8X-70SS

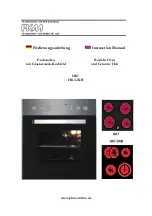
Page 1: ...RBO IA8X 70SS BUILT IN OVEN...

Page 2: ...the mains The omnipolar circuit breaker should be sized according to the load and should comply with current regulations the earth wire should not be interrupted by the circuit breaker The rating plat...

Page 3: ...ce CAUTION Some parts of this product can become very hot and cause burns Particular attention has to be given where children and vulnerable people are present This appliance can be used by children a...

Page 4: ...e backsplash Children climbing on an appliance to reach items could be seriously injured Do not clean the appliance while it is still hot Some cleaners produce noxious fumes when applied to a hot surf...

Page 5: ...icals used in oven sprays will damage catalytic enamel and render it ineffective If using oven sprays on the interior oven surfaces the catalytic cover casing must first be removed from the oven Clean...

Page 6: ...blic refuse disposal sites from your local refuse department or council Meaning of crossed out wheeled dustbin Do not dispose of electrical appliances as unsorted municipal waste use separate collecti...

Page 7: ...80 120 100 60 60 100 120 180 220 MAX 80 10 20 30 40 50 60 70 90 100 110 120 160 160 MAX 220 180 120 100 60 60 100 120 180 220 MAX 160 E C B B D C E 5 FUNCTION MODEL 7 FUNCTION MODEL A U T O A U T O D...

Page 8: ...this initial use is due to the evaporation of substances used to protect the oven during storage and until it is installed Notice Place the dripping pan provided on the bottom shelf of the oven to pre...

Page 9: ...use lower temperatures when cooking roasts This results in less loss of juices meat which is more tender and a decrease in the loss of weight for the roast The Multi cooking mode is especially suited...

Page 10: ...and for the preparation of certain tartlets on 3 shelves at the same time Here are a few examples cream puffs sweet and savory biscuits savoury puffs Swiss rolls and small portions of vegetables au gr...

Page 11: ...automatic setting set the time of automatic starting and ending A Set the time limit of roast 10 hours maximum Press the button to set the time of roast The oven starts immediately and AUTO will flash...

Page 12: ...tes the setting of baking procedure has been remembered automatically When the clock shows at 13 15 between 14 15min the oven will switch on automatically During the baking time frame the square symbo...

Page 13: ...d get stained If these stains are difficult to remove use special products available on the market After cleaning it is advisable to rinse thoroughly and dry the inside of the oven should preferably b...

Page 14: ...of glass fig 4 Clean the glass and other components with an appropriate cleaner Dry thoroughly and place on a soft surface Reassemble the door by following the above procedures backwards Fig 1 Fig 2...

Page 15: ...lected Cooking on More Than One Rack If you have to cook food using several racks use either the baking mode or the Multi Cooking mode as these are the only modes that allow you to do so When cooking...

Page 16: ...for grilling foods rapidly as the distribution of heat makes it possible not only to brown the surface but also to cook the bottom part Moreover it can also be used for browning foods at the end of t...

Page 17: ...inutes Cooking Fish and Meat When cooking white meat fowl and fish use temperature setting from 180 to 200 For red meat that should be well done on the outside while tender and juicy in the inside it...

Page 18: ...mburgers Mackerels Toasted sandwiches 1 1 1 1 1 1 1 1 4 4 4 3 4 4 4 4 4 4 5 5 5 5 5 5 5 5 5 Max Max Max Max Max Max Max Max Max 8 10 6 8 10 10 15 15 20 15 20 7 10 15 20 2 3 With rotisserie where preve...

Page 19: ...5 18 45 10 12 9 Pizza Pizza Roast veal or beef Chicken 0 5 1 1 3 2 2 3 15 10 10 220 220 180 15 20 25 30 60 70 NB cooking times are approximate and may vary according to personal taste When cooking usi...

Page 20: ...an withstand temperatures of up to 100 In compliance with current safety standards contact with the electrical parts of the oven must not be possible once it has been installed All parts which ensure...

Page 21: ...e specifications indicated on the date plate on the appliance and or packaging correspond to those of the electrical mains system of your home Check that the electrical capacity of the system and sock...

Page 22: ...i clockwise to release it and then pull it downwards to take it out Replace it with a new halogen lamp Refit the lamp cover and turn it clockwise to secure it Reconnect the appliance to the mains elec...

Page 23: ......

Reviews: