


Page 3
INSTALLATION PROCEDURES
Before ceiling fan installation, please go through the procedures in
detail with picture diagrams as reference.
DIAGRAM 2
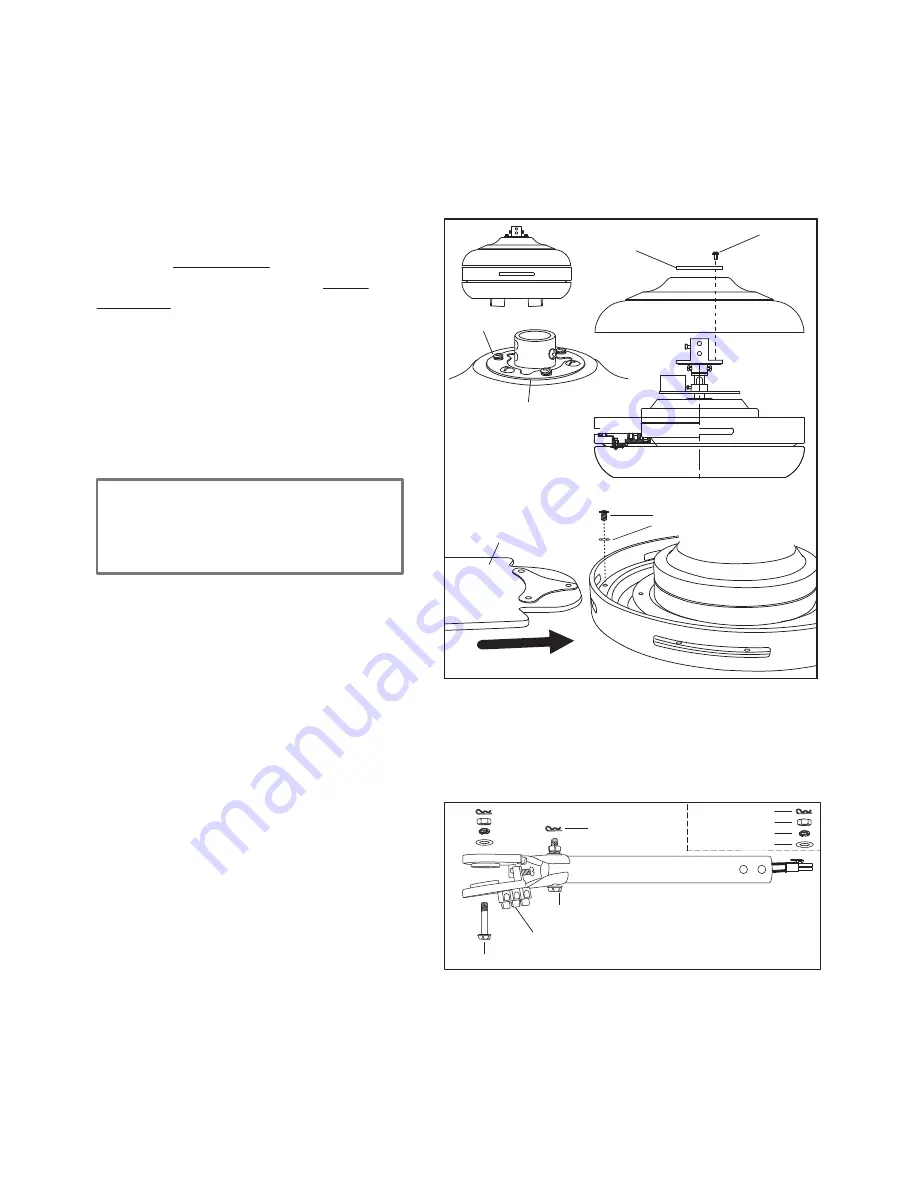
STEP 2 (See Diagram 2)
1 ) Remove 1st hex-head screw along
with the fixings (pin, metal nut, lock
washer and metal washer) from the
downrod.
2 ) Remove the pin on 2nd hex-head
screw and loosen the other fixings.
STEP 1 (See Diagram 1)
1 ) Remove the top housing cover by
removing 6 top screws and mounting ring.
2 ) Attach the fan blade to the motor
assembly by using the blade attachment
screws and paper washers provided in
the screw package. Tighten them
securely.
3 ) Repeat same step with remaining fan
blades.
4 ) After installing all fan blades, re-install
top housing cover and mounting ring
using the 6 screws removed previously.
NOTE:-
Take notice of fan blades marked
“this side up” to avoid installing it
upside down.
DIAGRAM 1
Mounting Ring
Top Screw x 6
Screw
Fan Blade
Top Housing Cover
Paper Washer
Mounting Ring
Top Screw x 6
The 1st Hex-head Screw
Pin
Metal Nut
Lock Washer
Metal Washer
The 2nd Hex-head Screw
Pin
Terminal Block
Fixings


