2
EN
RUCKUS
®
4WD
NOTICE
All instructions, warranties and other collateral documents are subject to change at the sole discretion of Horizon Hobby, LLC. For
up-to-date product literature, visit http://www.horizonhobby.com and click on the support tab for this product.
As the user of this product, you are solely responsible for operat-
ing in a manner that does not endanger yourself and others or
result in damage to the product or property of others.
This model is controlled by a radio signal subject to interference
from many sources outside your control. This interference can
cause momentary loss of control, so it is advisable to always
keep a safe distance in all directions around your model as this
margin will help avoid collisions or injury.
• Never operate your model with low transmitter batteries.
• Always operate your model in open spaces away from
full-size vehicles, traffic and people.
• Never operate the model in the street or in populated areas
for any reason.
• Carefully follow the directions and warnings for this and any
optional support equipment (chargers, rechargeable battery
packs, etc.) you use.
• Keep all chemicals, small parts and anything electrical out of
the reach of children.
• Never lick or place any portion of the model in your mouth as
it could cause serious injury or even death.
• Exercise caution when using tools and sharp instruments.
• Take care during maintenance as some parts may have sharp
edges.
• Immediately after using your model, do NOT touch equipment
such as the motor, electronic speed control and battery,
because they generate high temperatures. You may burn
yourself seriously touching them.
• Do not put fingers or any objects inside rotating and moving
parts, as this may cause damage or serious injury.
• Always turn on your transmitter before you turn on the
receiver in the car. Always turn off the receiver before
turning your transmitter off.
• Keep the wheels of the model off the ground when checking
the operation of the radio equipment.
WARNING:
Read the ENTIRE instruction manual to become familiar with the features of the product before operating.
Failure to operate the product correctly can result in damage to the product, personal property and cause serious injury.
This is a sophisticated hobby product and NOT a toy. It must be operated with caution and common sense and requires some basic
mechanical ability. Failure to operate this Product in a safe and responsible manner could result in injury or damage to the product
or other property. This product is not intended for use by children without direct adult supervision. Do not use with incompatible
components or alter this product in any way outside of the instructions provided by Horizon Hobby, LLC. This manual contains
instructions for safety, operation and maintenance. It is essential to read and follow all the instructions and warnings in the
manual, prior to assembly, setup or use, in order to operate correctly and avoid damage or serious injury.
Meaning of Special Language:
The following terms are used throughout the product literature to indicate various levels of potential harm when operating this product:
NOTICE:
Procedures, which if not properly followed, create a possibility of physical property damage AND little or no possibility of injury.
CAUTION:
Procedures, which if not properly followed, create the probability of physical property damage AND a possibility of serious
injury.
WARNING:
Procedures, which if not properly followed, create the probability of property damage, collateral damage, and serious injury OR
create a high probability of superficial injury.
Age Recommendation: Not for children under 14 years. This is not a toy.
Safety Precautions and Warnings
TABLE OF CONTENTS
Specifications ................................................................................. 3
Components ................................................................................... 4
Charging Warnings ........................................................................ 4
Charging the Vehicle Battery ......................................................... 4
Removing the Vehicle Body ........................................................... 5
Installing Transmitter Batteries ..................................................... 5
Transmitter Controls ....................................................................... 6
Installing the Vehicle Battery ......................................................... 6
Getting Started............................................................................... 7
Installing the Vehicle Body ............................................................ 7
Operation........................................................................................ 8
When You Are Finished.................................................................. 8
Setting the Gear Mesh................................................................... 9
Initial Setup .................................................................................... 9
Binding ........................................................................................... 9
Maintenance ................................................................................ 10
Troubleshooting Guide ................................................................. 10
Limited Warranty ......................................................................... 10
Warranty and Service Contact Information ................................. 11
FCC Information............................................................................ 11
IC Information............................................................................... 11
Compliance Information For The European Union ....................... 12
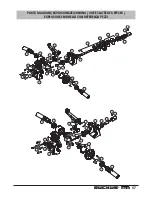
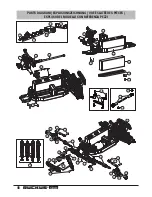
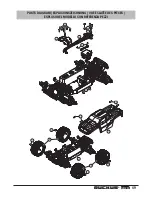
Parts Diagram.......................................................................... 47-49
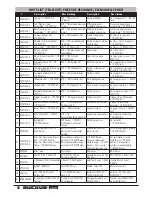
Parts List....................................................................................... 50

