Copyright © 2014 Ruckus Wireless, Inc.
Published April 2014, Part Number 800-70604-001 Rev A
Page 2 of 4
S
TEP
1: C
ONNECTING
AND
S
EALING
THE
RJ-45
C
ABLE
The AP uses one RJ-45 cable for Power over Ethernet (PoE).
Connect and seal the cable using the M25 data cable gland (B in
Figure 1).
1
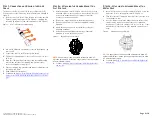
Feed the end of the RJ-45 cable through the sealing nut (D in
Figure 2), rubber sealing insert (C in Figure 2), clamping ring
assembly (B in Figure 2) and cable gland base (A in Figure 2).
Figure 2:
RJ-45 cable and cable gland assembly
2
Use a wide flat-blade screwdriver to remove the blanking cap
from the AP.
3
Connect the cable to the Ethernet port in the AP.
4
Tighten the cable gland base into the AP chassis to 7 N.m or
62 in-lbs.
5
Wrap the clamping ring assembly around the rubber sealing
insert. Make sure that the clamping ring assembly fully
encloses the rubber sealing insert.
6
Seat the clamping ring assembly and rubber sealing insert in
the cable gland base.
7
Hand-tighten the sealing nut.
8
Continue with
Step 2a: Attaching the Hanger Mount to a Flat
Step 2b: Attaching the Hanger Mount to a Metal
.
S
TEP
2
A
: A
TTACHING
THE
H
ANGER
M
OUNT
TO
A
F
LAT
S
URFACE
1
Hold the hanger mount (D in Figure 1) at the location on the
mounting surface where you want to mount the AP. Use the
holes on the hanger mount as a template to mark the
locations of the mounting holes.
2
Remove the hanger mount from the mounting surface.
3
Drill holes required for the customer-supplied mounting
hardware.
4
Attach the hanger mount to the flat surface using the
mounting hardware.
5
Using the mounting hardware instructions, tighten the
hardware to secure the hanger mount.
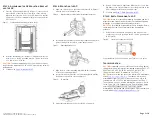
Figure 3:
Hanger mount on a flat surface
NOTE:
Hanger mount shown attached vertically to allow AP
elevation adjustments. Attach the hanger mount vertically to allow
AP azimuth adjustments.
6
Continue with
Step 3: Assembling the AP Mounting Bracket
S
TEP
2
B
: A
TTACHING
THE
H
ANGER
M
OUNT
TO
A
M
ETAL
P
OLE
1
Insert the open end of one steel clamp (H in Figure 1) into the
upper two slots on the hanger mount (D in Figure 1).
2
Take the other steel clamp and insert it into the lower two slots
on the hanger mount.
3
Use the clamps to attach the hanger mount to the pole (the
clamps can be daisy-chained together to accommodate
larger poles). Tighten the clamps to 3 N.m or 27 in-lbs, or per
manufacturer’s specifications if the supplied clamps are not
used.
Figure 4:
Hanger mount on a vertical pole
NOTE:
Hanger mount shown attached horizontally to allow AP
azimuth adjustments. Attach the hanger mount vertically to allow
AP elevation adjustments.
4
Continue with
Step 3: Assembling the AP Mounting Bracket
.
A
B
C
D


