background image


06

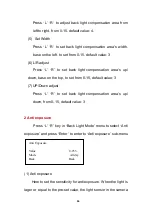
Press 

L


R

 to adjust back light compensation area from 

left to right, from 0-15, default value: 4. 

(5)   Set Width 

Press 

L


R

 to set back light compensation area

s width, 

base on the left, to set from 0-15, default value: 3 

(6) L/R adjust 

      Press 

L


R

 to set back light compensation area

s up/ 

down, base on the top, to set from 0-15, default value: 3 

(7) UP/Down adjust 

Press 

L


R

 to set back light compensation area

s up/ 

down, from 0-15, default value: 3 


2 Anti exposure 

Press 

L


R

 key in 

Back Light Mode

 menu to select 

Anti 

exposure

 and press 

Enter

 to enter to 

Anti exposure

 sub-menu 


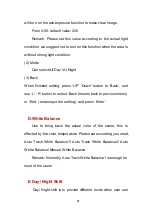
(1) Anti exposure 

Here to set the sensitivity for anti exposure. When the light is 

lager or equal to the pre-set value, the light sensor in the camera 

Anti Exposure 
 
Value                      0-255 
Mode                                            All day 
Back                                            Back 

Summary of Contents for PZ0420-L36

Page 1: ...ly for menu L R Left or Right key is option keys horizontally or revising specification is Return to previous menu for sub menu setting Main menu 1 Lens Manual lens 2 Exposure 3 BLC mode OFF 4 White B...

Page 2: ...Off 4 White Balance Auto white balance 5 Day Night Sift Auto Shift 6 Function 7 Image adjust 8 White dot repair 9 Language Chinese 10 Reset 11 Quit A Lens There are three lens types DC DC drive lens...

Page 3: ...this camera can record 25 pcs pictures in 1 second You can set both low and fast shutter speed on this camera by AUTO 1 50 1 100000 and FLK depends on user s need When the IRIS is on the default shut...

Page 4: ...t this according to your actual need Remark When Day Night shift set to Auto Shift AGC is fixed value and cannot be set 4 D WDR Wide Dynamic Range is to balance the image light when there is different...

Page 5: ...u to select Back Light Compensation and press Enter to enter in Back Light Compensation sub menu 1 Select Area To set back light area 2 options Area 1 Area 2 2 Area display On 3 Back light area gain T...

Page 6: ...down base on the top to set from 0 15 default value 3 7 UP Down adjust Press L R to set back light compensation area s up down from 0 15 default value 3 2 Anti exposure Press L R key in Back Light Mod...

Page 7: ...ess UP Down button to Back and use L R button to select Back means back to previous menu or End means quit the setting and press Enter D White Balance Use to bring back the actual color of the scene t...

Page 8: ...the critical value the camera would probably shift from color to B W constantly to set a time delay value can avoid this to happen the camera will only shift mode when it sense the light brightness i...

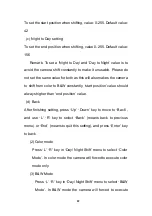
Page 9: ...amera to shift from color to B W constantly start position value should always higher than end position value d Back After finishing setting press Up Down key to move to Back and use L R key to select...

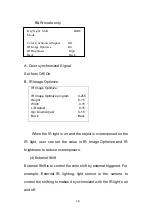
Page 10: ...overexposed on the IR light user can set the value in IR Image Optimize and IR brightness to reduce overexposure 4 External Shift External Shift is to control the color shift by external triggered For...

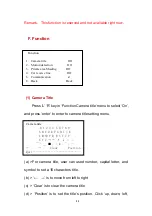
Page 11: ...used number capital letter and symbol to set a 15 characters title b is to move from left to right c Clear is to clear the camera title d Position is to set the title s position Click up down left Fu...

Page 12: ...rea and set in this area all 4 areas in total and can only set one area at a time B Display Area To set to activate the motion detection in the selected area when this is Off motion detection will not...

Page 13: ...ction s sensitivity the larger the value the higher the sensitivity from 0 255 Default value 38 H Motion Detection Tracking When this is ON the camera will track the moving object by drawing red line...

Page 14: ...L R to set the area s height base on the top you can set the bottom s value from 0 255 D Width Press L R to set the area s width base on the left you can set the bottom s value from 0 255 E L R Adjus...

Page 15: ...eans quit the menu and press Enter to back 4 Reverse Car Line Press L R key in Reverse Car Line to select On and this function is On press Enter to enter its setting To adjust the position and range o...

Page 16: ...splay the camera s ID or not when the camera is turned on When this is ON there will be CAM XXX xxx means camera s ID displayed on the upper left side on the screen Default OFF d Communication Protoco...

Page 17: ...and use L R key to select Back means back to previous menu or End means quit the menu and press Enter to back G Image Adjustment 2 DEFFECT a Edge Illumination Compensation This function can increase...

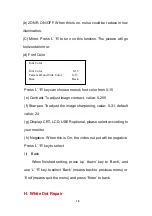
Page 18: ...arpen To adjust the image sharpening value 0 31 default value 24 g Display CRT LCD USER optional please select according to your monitor h Negative When this is On the video out put will be negative P...

Page 19: ...tional Chinese Japanese English Press L R to select It takes a few seconds to change the selected language J Reset Press Enter key to enter to Reset menu after reset all setting will resume to factory...

Page 20: ...key to select Back means back to previous menu or End means quit the menu and press Enter to back K Quit When finished setting press up down key to Back and use L R key to select Back means back to pr...

Reviews: