3-31
OPERATION
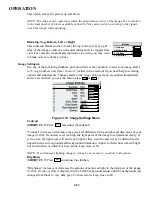
TEST PATTERNS
- Select this option to use a pull-down list of all avail-
able internal test patterns.
NOTE: For quicker access from your presentation, use the key to
cycle through the patterns. At the last pattern, press to return to your
presentation-or press at any time.
FREEZE IMAGE
- Use the “Freeze Image” checkbox to freeze (stop) the
image at a single frame. This diagnostic tool is useful if you need to exam-
ine in detail a still version of the incoming image that may not be “freez-
able” at the source. For example, in moving images it is difficult to observe artifacts such as
external deinterlacing/resizing and signal noise.
COLOR ENABLE
- Select which color or colors you want to see, useful while working with
color temperature white levels or input levels.
Input Levels
NOTES:
1)
It is recommended that only experienced users use the
Input Levels
menu-the pro-
jector automatically optimizes input levels for all but the most unusual of sources.
2)
Always
check that overall contrast and brightness settings are near 50
and
that color temperature is
properly set up on an internal grayscale test pattern before attempting an input level adjust-
ment.
3)
There must be at least one white pixel present in the image for “Auto” to work.
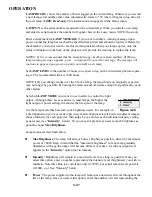
Good RGB or input levels-that is,
the
drives
and
blacklevels
for each
of the three colors, red, green and
blue-ensure that images from analog
sources other than decoded video
have maximum contrast without
crushing black or white. By default
(and in an “Auto Setup” from the
Mai
n menu), the projector automati-
cally determines the best input levels
by monitoring image content and
adjusting the controls appropriately-further adjustment is typically not required to obtain proper
blacks or whites.
NOTE: This automatic adjustment requires at least
1 white pixel
in the image.
Without a white pixel, input levels may produce skewed colors, particularly in non-video
images.
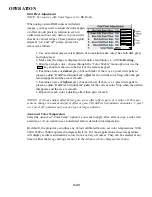
However, for a very unusual source an experienced user may prefer to use the
Input Levels
menu (see Figure 3.19). This adjustment, which is actually a calibration process to compensate
for differences in sources and cabling, enables an experienced user to perfect the source image
input levels.
AUTO INPUT LEVE
L - Keep off for virtually all sources (default). Temporarily enter a
checkmark
only
if you are an experienced user and you have an unusual source that you feel
needs further color temperature and/or input level adjustment. After entering a checkmark, wait
for the six values to stabilize, then delete the checkmark.
Test
Exit
Test
Figure 3.20. Input Levels Submenu
Summary of Contents for Reflection VX-3C
Page 2: ......
Page 119: ...B 1 KEYPAD REFERENCE Figure B 1 Keypad Appendix B ...
Page 120: ...C 1 Menu Tree Appendix C ...
Page 121: ...C 2 MENU TREE ...
Page 123: ...D 2 THROW DISTANCE ...
Page 124: ...D 3 THROW DISTANCE ...
Page 125: ...D 4 THROW DISTANCE ...
Page 126: ...D 5 THROW DISTANCE ...
Page 127: ...D 6 THROW DISTANCE ...
Page 128: ......
Page 129: ...2900 Faber Street Union City CA 94587 510 324 7777 Fax 510 324 9300 RUMA 003300 rev 9 00 ...


