background image

09

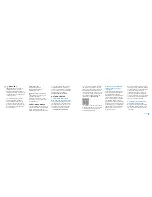
Guide the cable ties through the 

openings in your Runtastic Speed 

& Cadence Sensor. Mount the 

sensor to the chainstay so that 

the Runtastic logo faces outward. 

Close the cable ties, but do not 

tighten them firmly yet.

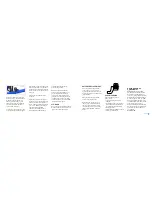
Position the spoke magnet on one 

of the spokes so that the magnet 

is level with the Runtastic Speed & 

Cadence Sensor. Mount the spoke 

magnet on the spoke and close the 

cable ties, but do not tighten them 

firmly yet.

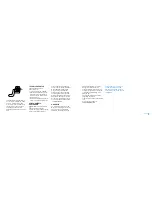
Then mount the pedal onto the 

crank arm.

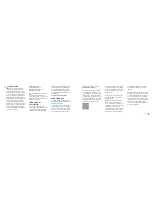
Adjust the position of the spoke 

magnet so the magnet passes very 

close to the sensor but does not 

touch it. Keep a maximum distance   

of 4 – 5 mm between the magnet 

and the Runtastic Speed &  

Cadence Sensor.Align the Run-

tastic Speed & Cadence Sensor 

towards the wheel/spokes as 

precisely as possible.

NOTE: The Speed & Cadence 

Sensor is composed of two parts. 

To ensure optimal assembly on 

your bicycle, slightly loosen the 

screws with an Allen key. Now you 

can adjust the two parts for ideal 

positioning. When you are finished, 

tighten the screws again.

STORAGE

Do not expose the Runtastic Speed 

& Cadence Sensor to excessve sun-

light over an extended period.

BATTERY REPLACEMENT

Open the battery compartment 

cover with a coin by turning it 

counterclockwise. Remove the old 

battery and insert a new 3V battery 

(type CR2032). 

Always ensure that the positive 

pole (+) is facing upwards.

Refit the battery cover and lock 

it by turning it clockwise. Ensure 

that the cover is securely closed 

to prevent moisture from entering 

the Runtastic Speed & Cadence 

Sensor.

SPECIFICATIONS

Speed & Cadence Sensor  

Power supply:

• 

1 lithium battery (3V 0.5 mA 

CR2032)

• 

Transmission frequency from Run-

tastic Speed & Cadence Sensor 

to smartphone: Bluetooth 4.0

• 

Water tightness

• 

The Runtastic Speed & Cadence

• 

Sensor is splash-proof.

DECLARATION OF 

CONFORMITY


R&TTE Directive 1999/5/

EC, RoHS Directive 2011/65/EU:


Short text of the declaration of 

conformity: Krippl-Watches hereby 

declares that the Runtastic Speed 

& Cadence Sensor (item no. RUN-

SCS1, type: BSCBLE) conforms to 

the fundamental requirements and 

other relevant provisions of  

Directive 1999/5/EC and 2011/65/

EU. The full text of the declaration 

of conformity can be viewed on 

our website: 

Runtastic.com

ENGLISH

Summary of Contents for RUNSCS1

Page 1: ...QUICK INSTRUCTIONS SPEED AND CADENCE SENSOR...

Page 2: ...CADENCE SENSOR Danke dass du dich f r Runtastic entschieden hast Grazie per aver scelto Runtastic Merci d avoir choisi Runtastic Gracias por elegir Runtastic We reheretohelp http help runtastic com E...

Page 3: ...on including battery information Non compliance with these notes may lead to damage and under certain circums tances even explosion of the batteries For information about replacing the battery in the...

Page 4: ...entering your activation code Runtastic com activate You may also scan the QR code be low In order to be able to use this feature you need to have previously downloaded the free app from the appropria...

Page 5: ...ghten the screws again STORAGE Do not expose the Runtastic Speed Cadence Sensor to excessve sun light over an extended period BATTERY REPLACEMENT Open the battery compartment cover with a coin by turn...

Page 6: ...different from that to which the receiver is connected Consult the dealer or an expe rienced radio TV technician for help WARNING changes or modifications to this unit not expressly approved by the p...

Page 7: ...mbatte rie 3V CR2032 betrieben Nach stehend findest du einige Hinweise zum Umgang mit Batterien Ersetze eine Batterie nur durch einen gleichwertigen Batterietyp Batterien d rfen nicht gela den oder mi...

Page 8: ...t du auf Runtastic com de products INBETRIEBNAHME 1 Installation Runtastic Bike App Aktivierungscode F ge den unten angef hrten Link in die Adressleiste deines Browsers ein um zum Runtastic Fitnesspor...

Page 9: ...t ndig fest Um den Pedalmagnet an der richtigen Stelle befestigen zu k nnen musst du zuerst das Pedal demontieren Positioniere dann den Pedalmagnet auf gleicher H he mit dem Runtastic Speed Cadence Se...

Page 10: ...sor Art Nr RUNSCS1 Model BSCBLE in bereinstim mung mit den grundlegenden Anforderungen und den brigen einschl gigen Bestimmungen der Richtlinie 1999 5 EG und 2011 65 EU befindet Den kompletten Text de...

Page 11: ...eur de vitesse caden ce Runtastic utilise une batterie au lithium 3V CR2032 Quelques informations utiles concernant l usage de la batterie Ne remplacez la batterie que par une batterie de m me puissan...

Page 12: ...iez le lien ci dessous et collez le dans la barre de votre navigateur pour arriver directement sur Runta stic com Vous pouvez ensuite suiv re les instructions pas pas pour utiliser votre code d activa...

Page 13: ...teur et l aimant Al ignez le capteur et l aimant le plus possible NOTE Le capteur est compos de 2 parties Pour avoir une fixation optimale vous pouvez desserrer les visses avec une cl Allen Vous pourr...

Page 14: ...u vez DECLARATION DE CON FORMIT R TTE Directive 1999 5 EC RoHS Directive 2011 65 UE Version abr g e de la d claration de conformit Krippl Watches par la pr sente d clare que le capteur de vitesse cade...

Page 15: ...Runtastic com POXXXX_EU_V1_21_12...

Reviews: