4
WARNING
–
Before operating the winch under load you should check proper
function of the winch by engaging and disengaging the clutch, by operating the
directional controls, and operating the speed controls. This will ensure that the winch
is working properly and will help prevent unintended damage and injury. Cycling the
winch prior to loading will also ensure the gears are properly aligned.
UNPACKING
When unpacking, check to make sure all parts are included. Refer to Assembly
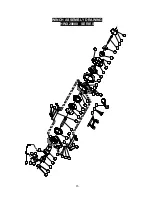
Drawings and Parts List (both with the like item numbers) at the end of this manual.
INSTALLATION
1.
Your 20000lb winch is designed with a bolt pattern that is standard in this class of
winch. Many winch mounting kits are available that utilize this bolt pattern for the
most popular vehicle and mounting channels. If you cannot find a kit locally, contact
us and we will provide you with the name of a dealer near you. If you will utilize the
mounting channel you must ensure that it is mounted on a flat surface so that the
three major sections (motor, drum and gear housing) are properly aligned. Proper
alignment of the winch will allow even distribution of the full rated load.
2.
Start by connecting the roller fairlead to the mounting channel using 2 each of the
cap screw, flat washer, lock washer and securing with nut. (Make sure the screw is
placed through the mounting channel and roller fairlead from inside the channel.
This will allow enough clearance for the winch to be placed in the channel without
obstruction.)
3.
Mount winch to the vehicle using high strength cap screw. It should be aligned and
secured to a solid part of the vehicle (front or rear) where the the full rated load will
be evenly distributed.
4.
Connect the two-color (positive) battery cable from the directional valve to screw-
down positive (+) terminal to the 12/24 volt battery.
5.
Please refer to installation illustration.
Mounting The Balance Valve:


