Before Switching On
•
Before using your appliance, add a teaspoon of bicarbonate of soda to warm
water and with a damp cloth wipe down all parts of the new appliance, then
repeat the process with a clean damp cloth and dry.
(ensure the appliance is not
connected to the power when performing this task).
•
Remove all transport tapes and foam protection pieces. Clean the interior with a
cloth dampened in lukewarm soap and water. Wipe with clean water and wipe
dry.
•
There may be an odour when you first switch on the appliance, it will disappear
when the appliance starts to cool.
•
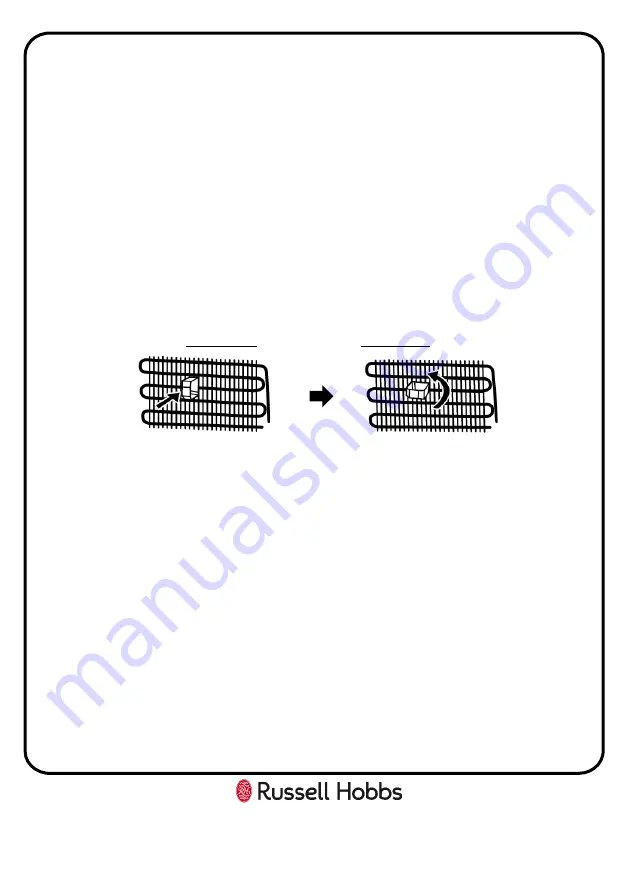
Install the plastic distance guide, this is on the condenser pipes (the black pipes)
on the rear of the appliance, by turning it 90° (as shown below) to prevent the
condenser pipes from touching the wall. The distance between the appliance and
back wall must be a
minimum
of 25mm and a
maximum
of 75mm.
•
When the appliance has been positioned, adjust the feet to ensure the unit is
stable. This is essential to ensure quiet running and proper door opening/ closing.
•
Connect to the electrical socket but do not switch the power to the refrigerator
on for at least 3 hours. The coolant within the product needs time to settle after
it has been transported and put in to position, failure to do this will affect the
cooling performance of your appliance.
•
Once the appliance has settled, locate the thermostat dial (this inside the fridge
compartment, at the top of the cavity) on the product and set between setting ‘3’
and ‘4’. Close the door and switch on the power, the compressor will begin to
work. Close the door.
•
You may hear faint gurgling or bubbling sounds when the refrigerant is pumped
to the cooling system and through the coils or tubing at the rear of the appliance.
When the compressor is in operation you may hear a slight whirring sound or
pulsating noise. The thermostat controls the operation of the compressor, and
you may hear a slight click as it cycles in and out (this is normal).
•
To save energy, you should minimize the frequency and duration of door opening.
8
Summary of Contents for RH180FFFF55
Page 27: ...27 Notes...


