background image

 Upon pressing the “I/II” button the unit will be in the

 LOW

 heat mode, it’s 1200W rating 

power. 

Pressing the “I/II” button second time will put the heater into 

HIGH


heat mode, it’s 2400W 

rating power, low and high indicator light together, 

6.


To turn the heater OFF, press the ON/OFF button “

”.  

        
NOTE: To assist in maintaining the internal components, after pressing the “ON/OFF” button “ ” the fan 

will continue to blow room air for a period of 30-60 seconds before shutting down to standby.  
 
OSCILLATING BUTTON 

This heater has an oscillating function. To switch the function on, press the SWING button. To stop it, press 
the oscillating button again. 
 
TIMER FUNCTION 

 
This function will work in any mode. The timer function allows you to set the length of operation from 1 to 8 
hours.  

To set the timer, press the TIMER button. The display screen will show 1h, indicating the heater will 
operate for 1 hour before shutting down to standby. To increase the operation time, continue to press the  

 button until the desired operation time is displayed. To cancel the timer feature press the  

 button 

until all time indicator light off. This returns the heater to continuous running. Each press increase 1 hour. 

  
 TEMPERATURE SETTING: 
                                                                          

1) 

Operate the Heating Mode as per above instructions. 

2) 

The LED screen will display the room temperature, to adjust the temperature, press “+”  

             to increase the desired temperature and “-“ to decrease the desired temperature. 

3)          When the air temperature reaches 1 degree above the set temperature, the heater will cut off. The 

heater stops working but the fan continues working to allow the product to cool down and maintain the 
temperature. 

4)          When the air temperature drops 3 degrees below the set temperature, the unit will come back on. 

5)          Temperature can be set from 10 degrees to 49 degrees, by pressing the “+” and “-“. 
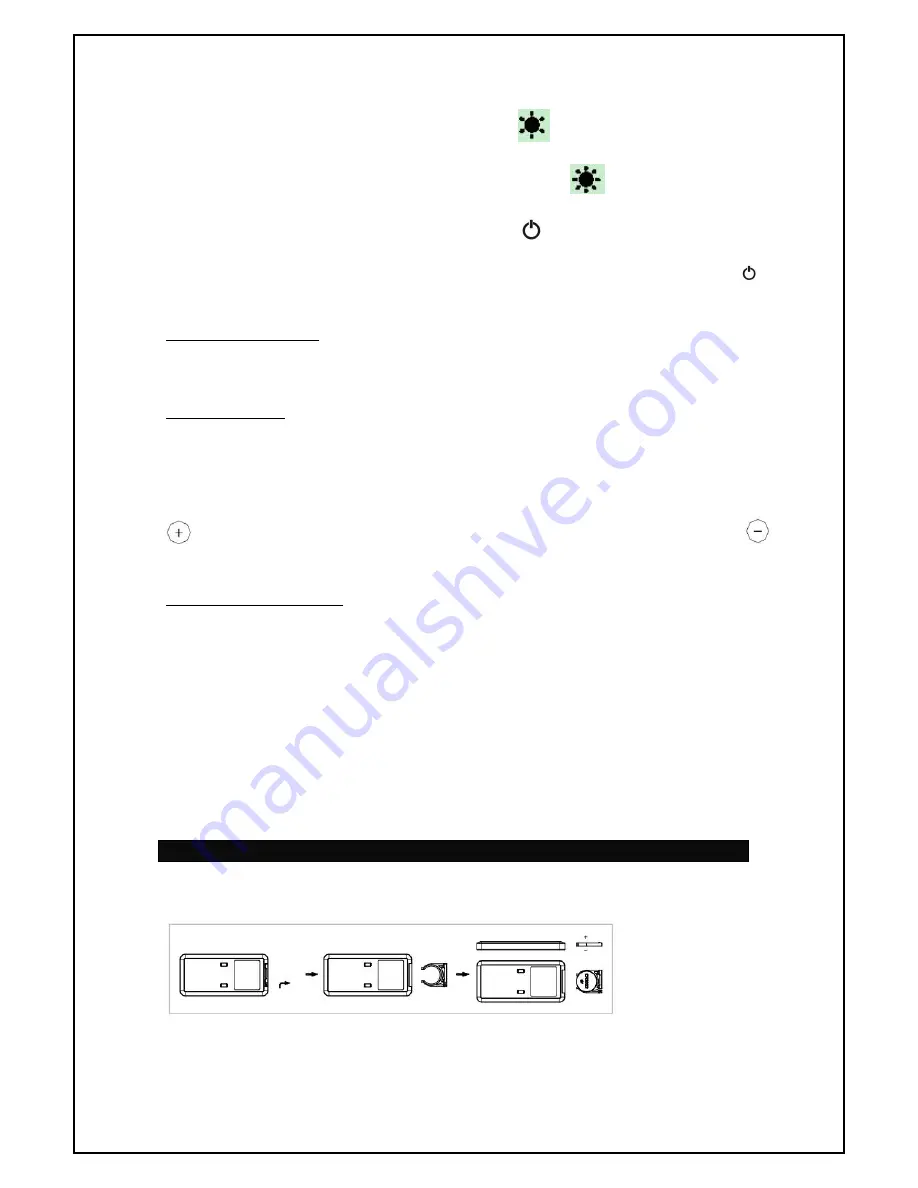


Battery  


The remote control use one button cells, model No. CR2025 (3V). We recommend the 

use of Lithium type battery for longer use. 


Note: Please follow battery disposal instruction on battery packaging, or contact your 
local councils for safely disposal of batteries. 


Summary of Contents for RHCTH1

Page 1: ...CERAMIC HEATER INSTRUCTION MANUAL Model RHCTH1 READ AND SAVE THESE INSTRUCTIONS FOR DOMESTIC USE ONLY ...

Page 2: ...he packing such as plastic bags 4 Close supervision is necessary when the product is used by or near children or infirm persons Do not allow children to use it as a toy 5 Do not operate any product with a damaged cord or plug or after the product malfunctions or is dropped or appears damaged in any way Return the complete product to the place of purchase for inspection repair or replacement 6 Befo...

Page 3: ... of attachments or accessories not recommended or sold by the product distributor may cause personal or property hazards or injuries 26 This product is intended for normal domestic household use only 27 Use this heater as described in this manual Any other uses not recommended by the manufacturer may cause fire electric shock or injury to persons and may void the warranty LOCATION 1 The appliance ...

Page 4: ...isplay room temperature centigrade light Please wait 3 seconds then start to operate any function after 30 seconds if no operation light and LED switch off 5 Turn the heater ON by pressing the ON OFF button The unit is now in fan mode This will conduct recirculation of the room air Indicator panel Right frame Trim strip Wind outlet Ornament panel Base Back frame Back net Left frame Master switch O...

Page 5: ... operation time continue to press the button until the desired operation time is displayed To cancel the timer feature press the button until all time indicator light off This returns the heater to continuous running Each press increase 1 hour TEMPERATURE SETTING 1 Operate the Heating Mode as per above instructions 2 The LED screen will display the room temperature to adjust the temperature press ...

Page 6: ...as the heater may not work due the tip over switch not been activated MAINTENANCE Your appliance must be switch OFF via the main power supply and unplugged before proceeding with any cleaning work Clean the housing with a lightly damp cloth a vacuum cleaner or a dusting brush Never use flammable or abrasive cleaning agents such as benzene or spirit to clean the appliance Never immerse the applianc...

Page 7: ... the product in terms of this warranty subject to legislative requirements This warranty shall be valid only where the customer has not broken the product himself or used the product for something that it is not supposed to be used for The warranty does not include and will not be construed to cover products damaged as a result of disaster misuse tamper abuse or any unauthorised modification or re...

Reviews: