5
AT THE AMPLIFIER END
1. Cut off excess wire, leaving enough to comfortably reach from the
hole in the wall to your stereo system. If there’s a possibility that
you’re going to move the amplifier to another part of the room, con-
sider leaving some excess wire coiled up. If you’ve used sufficiently
thick wire, this extra length will not affect speaker performance and
could make re-routing easier if the room is rearranged later.
2. Pull the conductors on both speaker wires apart so they’re separated
for the last two inches.
3. Using wire strippers, diagonal pliers or a knife, remove 1/2 inch of
insulation from each conductor.
4. Twist the tiny strands in each conductor into tight spirals.
5. Attach the speaker wires to the red and black speaker terminals on
the amplifier or receiver.
* Connect the POSITIVE (+) conductor to the RED terminal and the
NEGATIVE (-) conductor to the BLACK speaker terminal of the receiv-
er/amplifier. Make sure that no stray strands of wire have gotten
detached and are touching the other main wire.
Repeat Steps 1 through 5 for the other speaker.
FINAL ASSEMBLY
1. If you haven’t done so already during painting, remove the perforat-
ed grilles from both Russound speakers. Use the clamp (dog-ear) to
push the grille out from the back side.
2. Center the speaker in the cut-out hole and tighten the screws until
the clamps are drawn up snugly from behind, clamping the speaker
in place. Try to tighten each screw equally but do not over tighten.
3. Insert the Russound speaker grille by gently pressing it into place.
In most installations, the grilles will fit tightly without causing vibration.
If any audible vibration does occur, or if your Russound speakers are
ceiling mounted, use the pre-cut lengths of special damping/adhesive
material.
LISTENING TEST
It’s a good idea to test everything at this point.
1. Turn on your stereo system. Make sure that the VOLUME control is
turned down and that the BALANCE control is set to center.
2. Activate a musical source such as FM or CD player.
3. Gently turn up the volume. You should hear music coming out of
your new Russound Speakers! (If you don’t, refer to the troubleshoot-
ing guide below.)
4. Now rotate the stereo’s BALANCE control all the way to the LEFT.
Sound should only come out of your left speaker. If it comes out of
the RIGHT speaker, skip to Step 6.
5. Rotate the BALANCE control all the way to the RIGHT. Sound should
only come out of the right speaker.
6. If sound comes from the right speaker when the stereo’s balance
control is turned to the LEFT, you’ll need to change the connections
on the back of the amplifier/receiver.
6a. FIRST TURN OFF THE AMPLIFIER!
Swap the wires attached to the left and right speaker terminals.
A QUICK TROUBLESHOOTING GUIDE
Before returning your Russound speakers for service, it is a good idea to
check out these simple remedies first.
No sound from either speaker:
1. Incorrect source selected on receiver or preamplifier.
2. Mute button pressed on receiver.
3. Wrong speaker output selected; many receivers have an “A” and “B”
speaker switch. Make sure it’s in the correct position.
4. In-Wall Volume control not turned up or wired incorrectly.
5. If using a “speaker selector,” room/station not turned on or improper-
ly connected.
No sound from one speaker:
1. Unsecured connection at either the speaker or amplifier -
double-check them.
2. Balance control turned all the way left or right-return it to center.
3. Bad connecting cable between sound source and amplifier - try a
new cable.
4. Defective speaker - contact your Russound dealer or call Russound
Tech Support at 603.659.5170.
Any other problems not listed, discuss with your dealer or call
Russound.
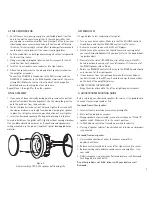
Figure 8
Final assembly of SP-C503 speaker baffle and grille


