ENG
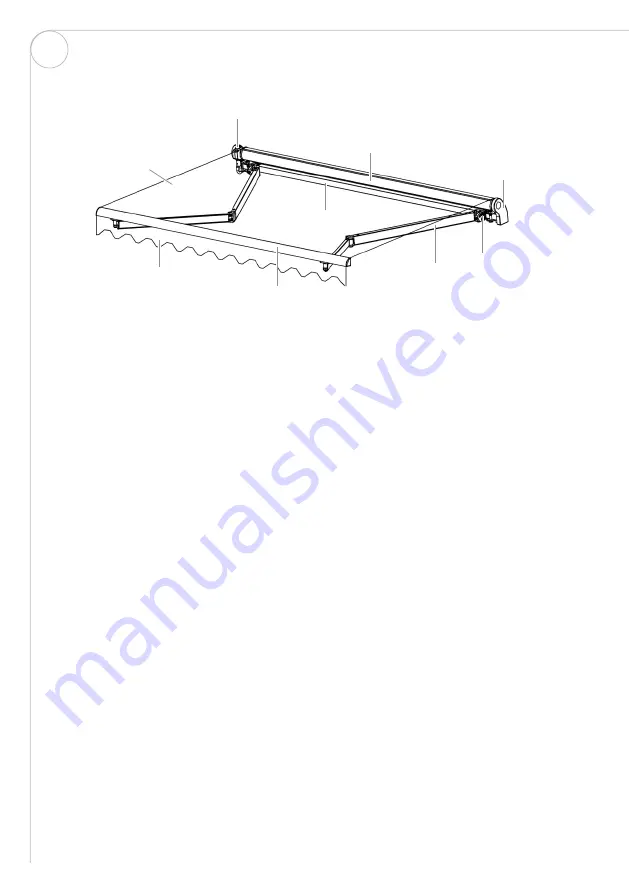
DESCRIPTION
Cassette
Balk
Cassette holder
Worm gear
Canopy
Valance
Awning front
Arm
Arm mount
ASSEMBLY
• If you are uncertain as to how to install the terrace awning, consult with a professional
installer.
• At least 3 people should install the awning.
• Unpack all the parts and place them near the intended awning installation location.
Make sure all the parts are included.
• Factor in the tilt angle of the awning when you determine the awning’s height. We
recommend a tilt angle of 14°.
• The awning can be mounted on the roof, but this requires installation by a professional
installer. (Ceiling attachment is sold separately).
• Once the height has been determined, use a spirit level and mark the height with a
line. The line should mark the top edge of the wall brackets. It is essential the line is
straight.
• The holes for the wall mounts must align both vertically and horizontally.
• All the wall brackets must be used. The wall brackets shall be positioned near the arm
attachment points and centred for 4.5x3m and 3.6x2.5m terrace awnings.
• Mark the locations for the drilled holes in the wall.
• Use a drill and bit suitable for your wall when you drill the holes. If you are uncertain
which bit is suitable for your wall, consult with a professional installer.
• Fasten the wall brackets with bolts that are suitable for your wall. If you are uncertain
which bolts are suitable for your wall, consult with a professional installer.
MOUNTING THE AWNING ON THE WALL BRACKETS
1. Unscrew the nuts and bolts in the wall brackets.
2. Fasten the screw square beam in the wall brackets.
3. Fasten the awning by tightening the bolts and nuts on the wall brackets.
4. Tighten the nuts to ensure that the awning is securely fastened on the wall mounts
4
Summary of Contents for 62561123
Page 27: ...NOTES...


