Assembly Instructions
4.
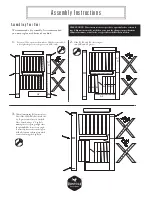
Slide all C Slats into A1 R and A3 grooves. Once all of
the slats have been positioned, place the A4 Top Rail onto
the C slats and in the A1 R grooves. Fasten A4 into place
with a Lag Bolt, first with your hand, then tighten with a
ratchet. Be sure the Lag Bolt is going straight in and not at
an angle. Fasten by hand, then with a ratchet.
Slide Side Stile A1 L into place, attaching with 6” Lag
Bolts, tightening by hand. Once you have determined all
are in place straight, tighten Lag Bolts with a ratchet.
5.
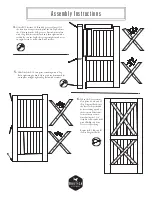
When the Door is assem-
bled, place A5, A6 and A7
(Top Diagonal Rails) onto
the door so the predrilled
holes are facing up and so
they form an X that runs
from corner to corner.
Attach using the 1-1/4”
Grabber Screws and a drill
with a Phillips bit. Your
Door is ready to hang.
Repeat for B5, B6, and B7
(Lower Diagonal Rails).
6.
Ass embl y I ns truc t ion s


